Installing WordPress – Method #2 (Advanced)
This method requires to manually download the WordPress platform from the official website, upload it to your root folder, create database and user, and run the installation. Here are the steps…
Upload WordPress Using File Manager
- Get the latest version of the WordPress installation from their official website.
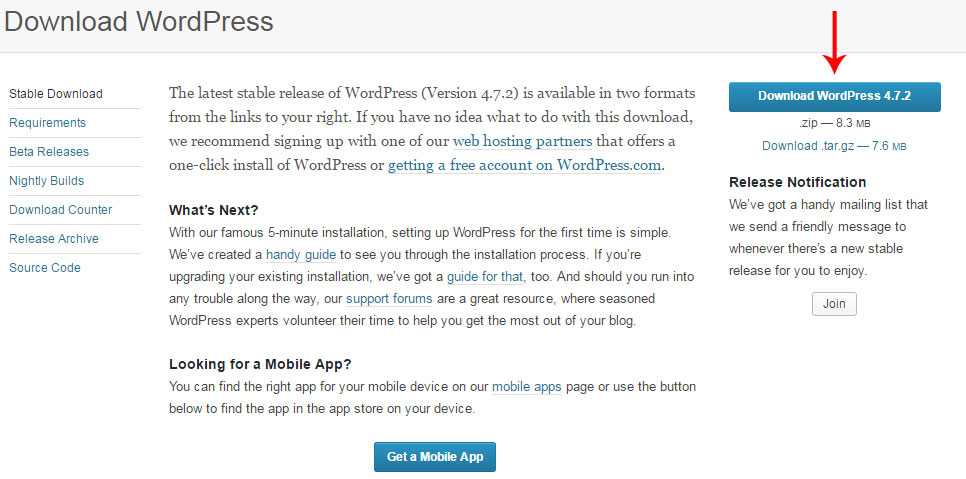
Figure 3. Download WordPress from the official website
- Go to your cPanel and open the File Manager.
- Navigate to public_html -> your root folder (ex. webmaxformance.com)
- Click on the Upload button

Figure 4. Uploading WordPress
- Select Choose File and browse for your WordPress zip file that you’ve downloaded it previously.

- Wait a few minutes (depending on your connection) and click on Back to /default_path
- Now you need to extract the zip file. Open your root folder where you’ve uploaded the zip file and use right click -> Extract -> Extract File (s)
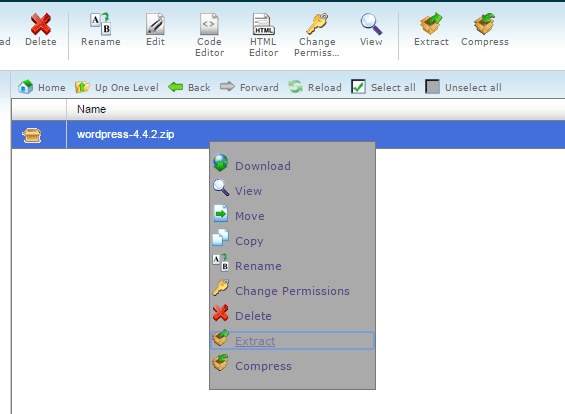
Figure 5. Extract the zip file
This will create another folder within the root folder where the WordPress installation is stored. But this is NOT what we want for the path of our WP installation. We need to move those files to the root folder of our website.

Figure 6. WordPress folder
- Open the wordpress folder, click on Select all -> Move File. Delete the wordpress at the end and click Move File(s).

Figure 7. Move files to root folder
- Now everything is in the right place. You can move to the database creation.
Upload WordPress Using FTP (FileZilla) – An OLD Alternative Way
Before the database creation, we will tell you how to achieve the same from above, using FTP protocol and client.
- Download FileZilla Client and install it.
- Open your notepad document with the FTP details about your hosting and put them into FileZilla client. Click on QickConnect.
- From the right panel locate the folder where you want your WordPress installation to be stored (ex. webmaxformance.com)
- Extract the WordPress zip folder on your Desktop.
- Locate the content of the WordPress folder from the left panel.
- Select it all (Ctrl + A) -> right click -> Upload
- Wait few minutes (depending on your internet connection, this process may be slower than uploading through the File Manager)

Figure 8. Upload the WordPress files through FileZIlla
Creating Database And User
In your cPanel find the MySQL® Databases. From here you need first to create your database name.
You can put something descriptive such as webmaxfo_academy and click on Create Database.

Figure 9. Create new database
Now you need to add a user for your database and put a strong password.
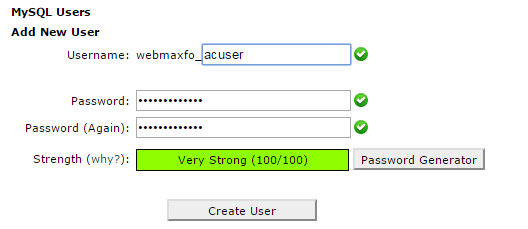
Figure 10. Adding new user to the database
Next, you need to connect the user with the database. Locate the user from the dropdown with your corresponding database and click on Add.

Figure 11. Connect user with database
Click on ALL PRIVILEGES.
From here copy the user and the database in the same notepad file from before. Write there down the password of the user also. We will need these credentials later.
Click Make Changes.
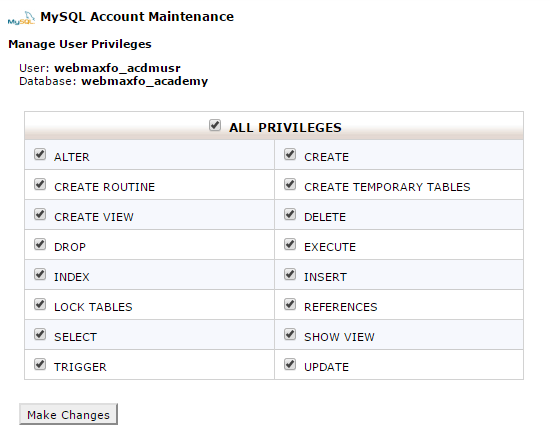
Figure 12. Assigning privileges to the user
Great job, now you can finally run your WordPress installation.
- Enter the URL of your website in the address bar. If you followed our steps, the WP installation will automatically call the wizard for installation (Note: If there is an error “Oops! Website currently not available” – add index.php at the end of the URL – www.webmaxformance.com/index.php)
- Choose your language and press Continue.

Figure 13. Choose language
- On the next screen click Let’s go!
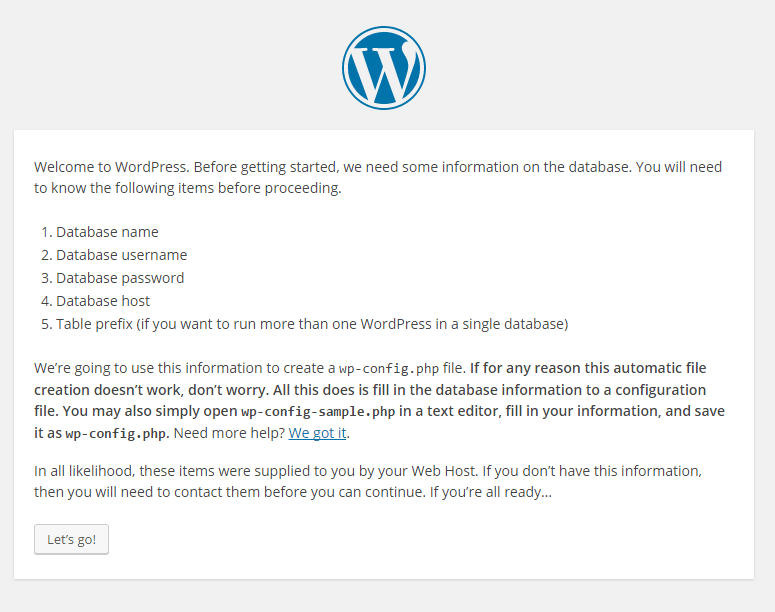
Figure 14. Click on Let’s go!
- Now you need to put the information that you’ve stored previously in the notepad document.
- Database host usually is localhost. If you can’t make the connection using localhost, contact your hosting provider.
- Make sure at the end to change the standard wp_ prefix for security purposes (put something like wmf278_, make sure it ends with underscore).
- When you are done, click on Submit.

Figure 15. Connecting the WP installation with the database
- On the next screen, you need to click Run the install.
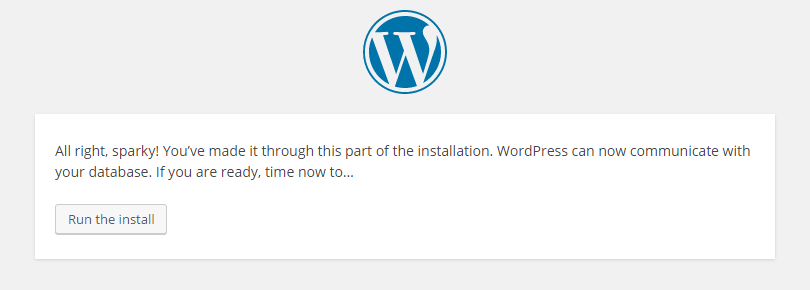
Figure 16. Click on run the install
Now, you need to put the information about your website. Make sure your username is NOT admin and make sure you have a strong password.

Figure 17. Put the essential information about your website and click on Install WordPress
When you click on Install WordPress you are done with your WordPress installation. Now you can log in to your WordPress Dashboard.

Figure 18. Log in to your new WordPress Dashboard
Congratulation! Now you have fresh WordPress installation up and running.
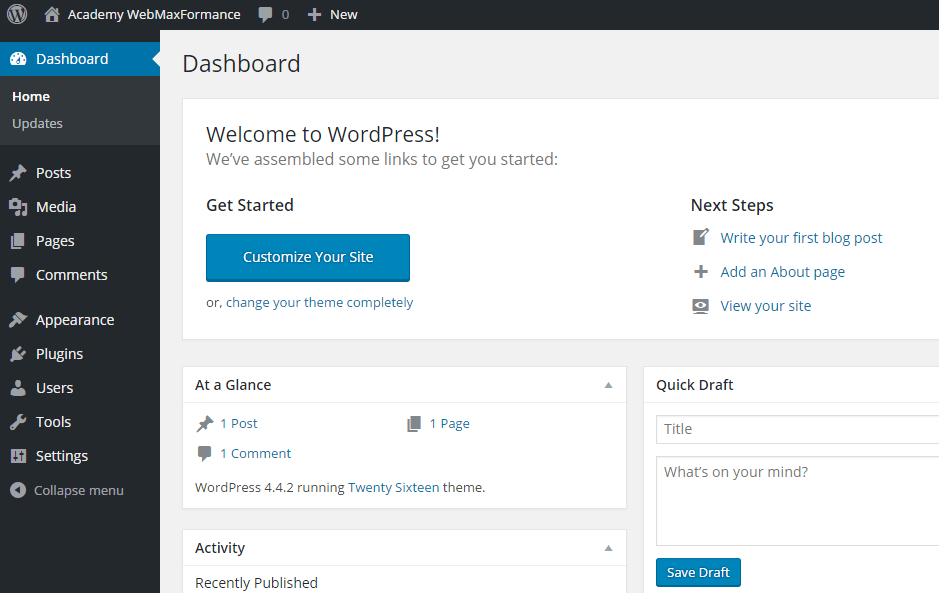
Figure 19. Fresh WordPress Dashboard
You can change the theme now, you can install the required plugins, and start creating your membership site.