WooCommerce is the most recent platform in the e-commerce stage space on WordPress. It’s characterized as an Enterprise e-commerce platform on the web offering tailor made answers for every diverse kind of e-commerce organizations. The achievement of an e-commerce business exclusively relies on upon the main usefulness of the site and it is important for traders to build up an easy to use shopping entryway, coordinating solid installment doors alongside an appropriate stock administration framework in the backend.
WooCommerce is definitely one step in front of its real rivals. There are no real players on the WordPress plugins stage offering e-commerce mix with high usefulness. In the interim, WordPress is considered as the most adaptable and simple to utilize CMS on the web yet it generally did not have the setup of a very practical complete e-commerce entryway like greater players like Magento, Drupal Commerce.
This open source e-commerce plugin platform for WordPress is custom made for the businesses online. By using WooCommerce you can offer a variety of functionality to your clients. WooCommerce is a free, effective WordPress e-commerce plugin. With the extensibility of a colossal index of business subjects and expansions, we have every one of the instruments you may need to get your shop running on the go. And in this lesson, we will tell how to do so, step-by-step.
WooCommerce Installation And Basic Configuration
As we mentioned, WooCommerce is a free plugin, created by WooThemes. The plugin works with ANY theme! Visit their official website and download the latest version of the plugin. Also, you can install the plugin from the WordPress plugin repository, but this way is more effective as you can see later in our lesson.
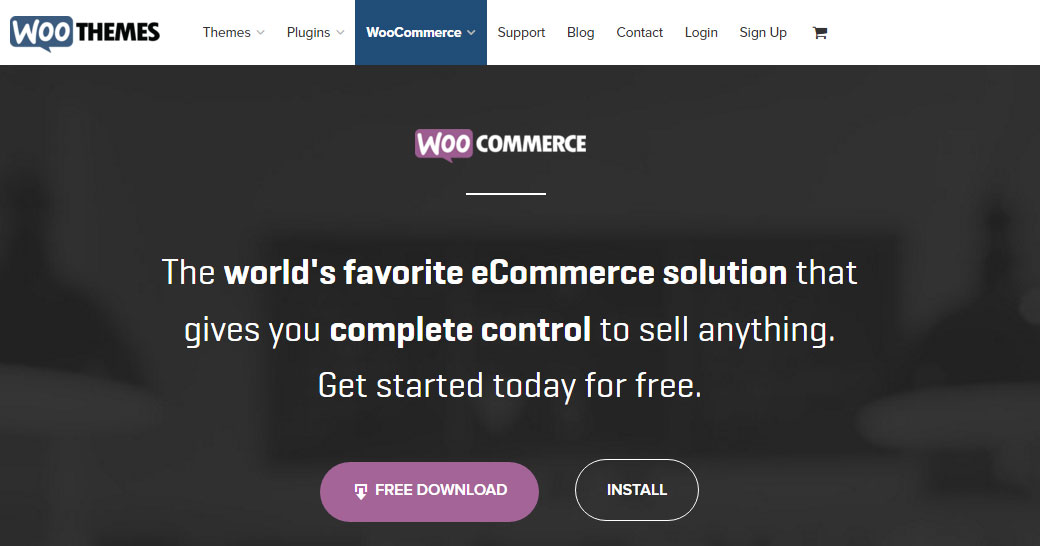
Figure 1. WooCommerce Installation – Download the plugin from their official website
Now go to your WordPress Dashboard and install the plugin (Plugins -> Add New -> Upload).
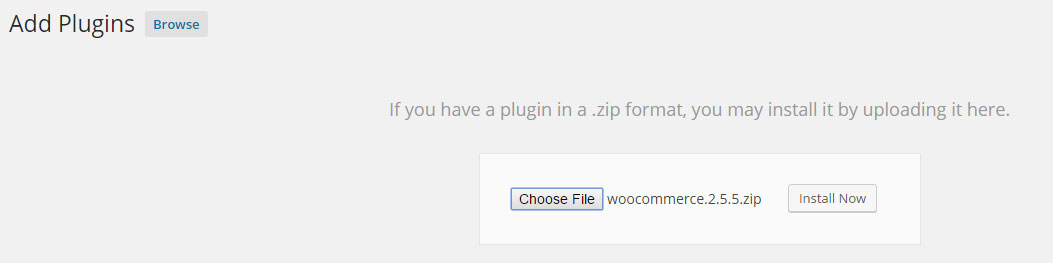
Figure 2. Upload the WooCommerce plugin
Once you’ve installed and activated the WooCommerce plugin, next you need to go through the wizard that will appear.
- On the welcome screen, click on Let’s Go!
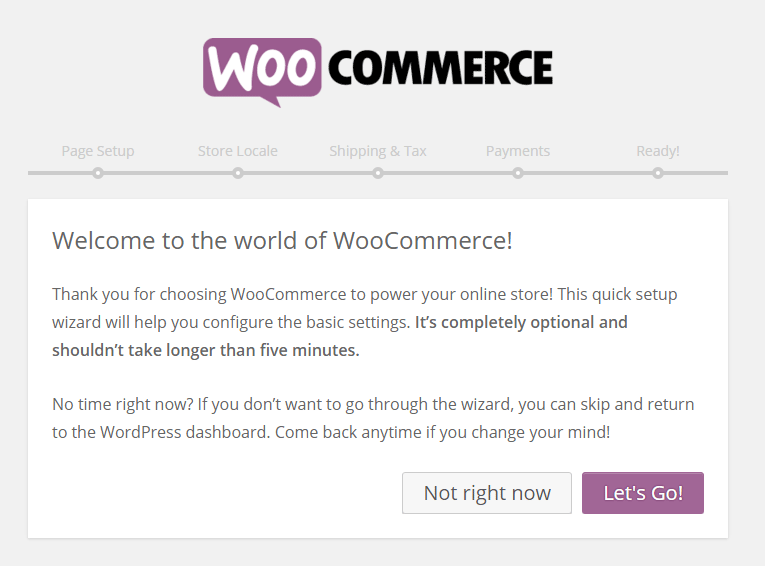
Figure 3. WooCommerce Wizard Step 1
- The first step is Page Setup. This will allow you to create the necessary CORE pages for running your e-commerce site. Later we will put these pages in the navigation bar, but for now, click on Continue.
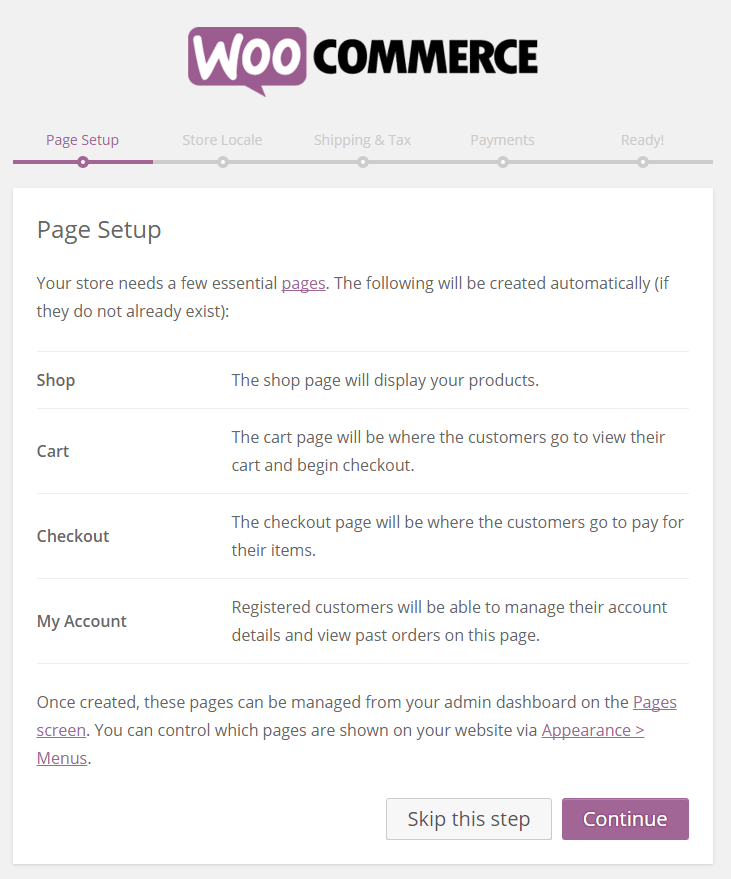
Figure 4. Creating the CORE pages for your e-commerce site
- On the next step, it’s important to select where your store is located. Also, decide on which currency will your store use. Next, select what units you will be using for the weight and dimension of your products (if you have physical products). When you are done click Continue.
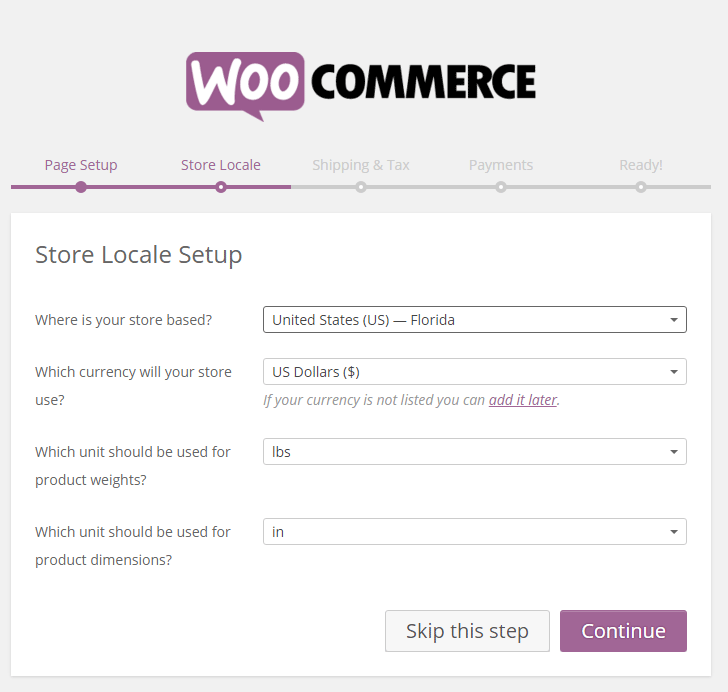
Figure 5. Putting the info about the store and the products
There are cases where business owners need to include a shipping and tax for their products. If you are one of them, WooCommerce allows you in this step to set the shipping and tax settings for your products. The settings here are pretty self-explanatory and you can always change them later.
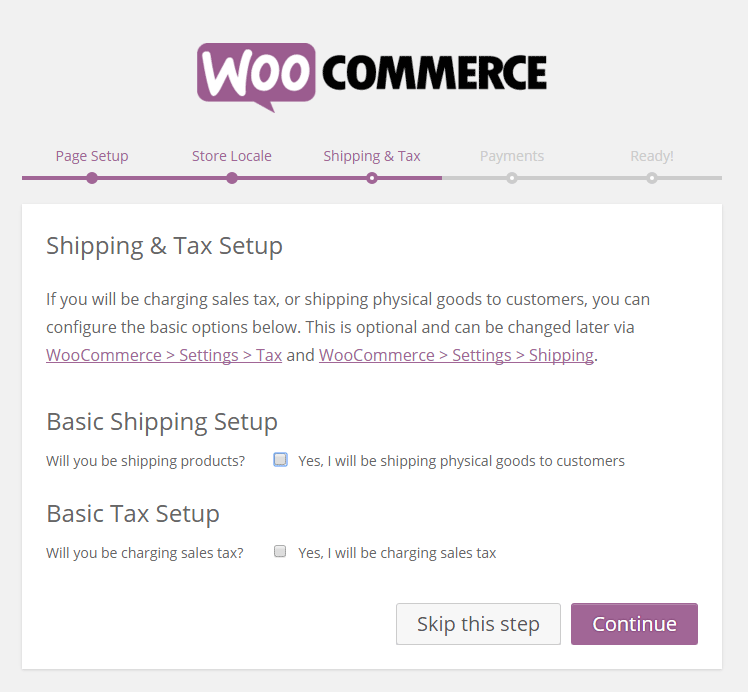
Figure 6. Setting up the shipping and the tax
- In the Payments step, you can set your PayPal email address if you plan on using PayPal Standard payment method. If you plan to use something else, we will show you how to configure it later. We don’t recommend using offline payments!
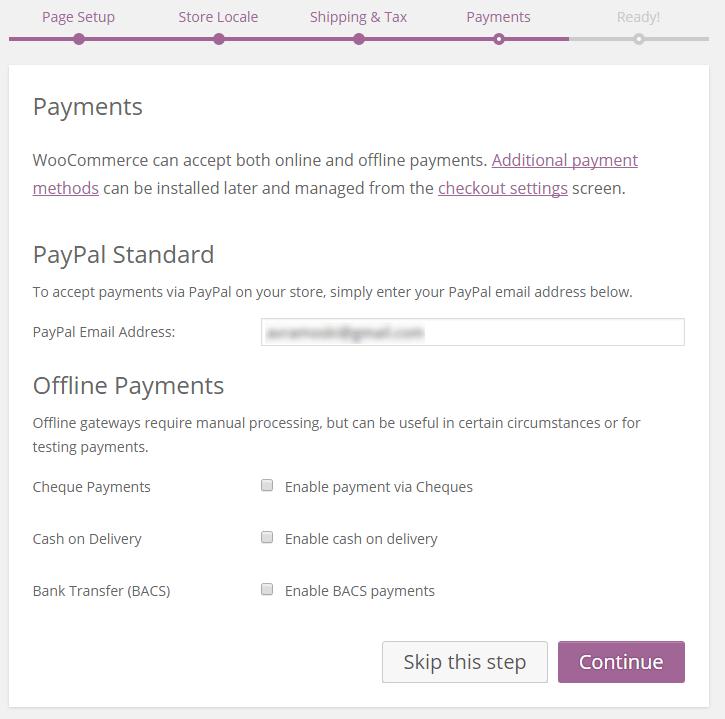
Figure 7. Configuring the payments through PayPal or offline payments.
- On the last step, the wizard will tell you that your store is ready, but DON’T click on Create your first product. We are not quite ready yet! Click on Return to the WordPress Dashboard.
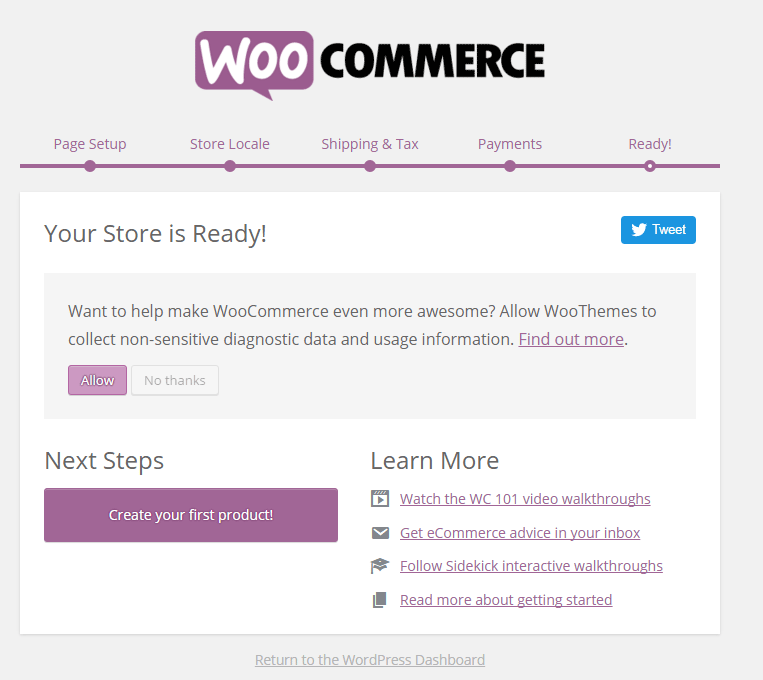
Figure 8. Your store is ALMOST ready. Click on Return to the WordPress Dashboard
Basic Configuration Of Your Online Store
You’ve created the necessary pages of WooCommerce, but there are few REQUIRED pages that need to be present on your website before putting your e-commerce website in use.
Now we will show you how to easily create the other ESSENTIAL pages:
- Privacy Policy
- Terms And Conditions
- About
- Contact
Creating “Privacy Policy” Page
Navigate to your WordPress Dashboard -> Pages -> Add New. Put a title Privacy Policy.
Go to Free Privacy Policy generator and click on Start Free Privacy Policy.

Figure 9. Generate your Privacy Policy for free
Spend some time there and properly decide what options apply to your online store.
When you are done, get the HTML version of the generated privacy policy and put it in the Text editor of the Privacy Policy page.
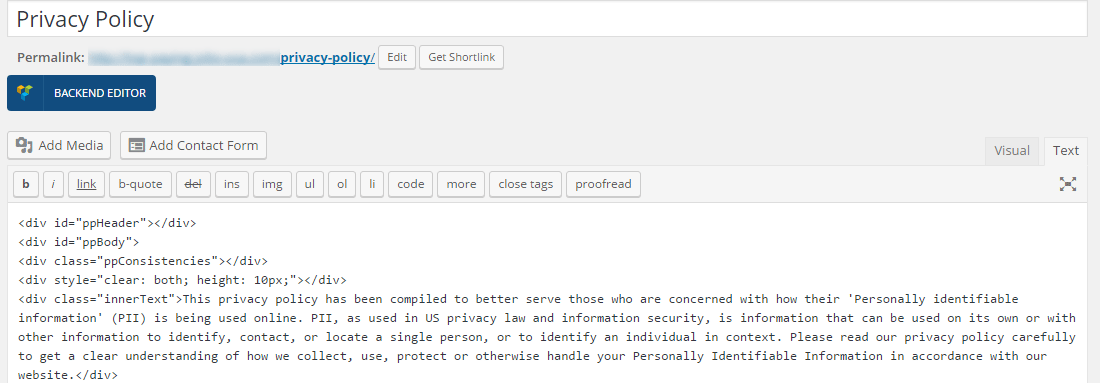
Figure 10. Put the HTML code of the generated Privacy Policy in the Text editor
Publish the page and move to creating Terms And Conditions page.
Creating “Terms And Conditions” Page
- Go to Pages -> Add New and give a title Terms And Conditions.
- Now find some free terms and conditions generator online such as this one.
- Enter the required info and get the HTML code of the generated terms and conditions disclosure.
- Put the code in the Text editor, read it to see if everything looks nice and remove the credit at the end.
- Publish the page.
Creating “Contact” Page
Please follow our lesson on how to properly set-up the contact page for your website.
Creating “About” Page
- Go to Pages -> Add New
- Provide information about your company and include for vision and mission if you like.
- Put the address of your company
- Put a link to your contact page
Disabling The Comments For The Info And Legal Pages
You don’t want a comment section to be included on these pages so we will disable them with one simple step.
- Go Pages -> All Pages.
- Select these pages and choose Edit -> Apply
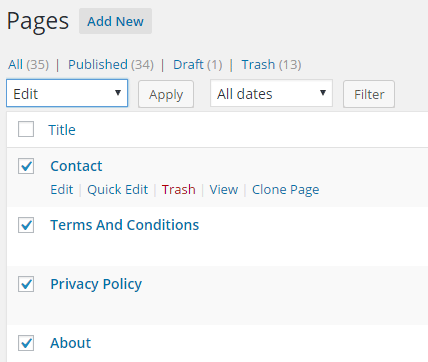
Figure 11. Editing the Info and Legal pages
From the Comments choose Do not allow.
Click on Update.
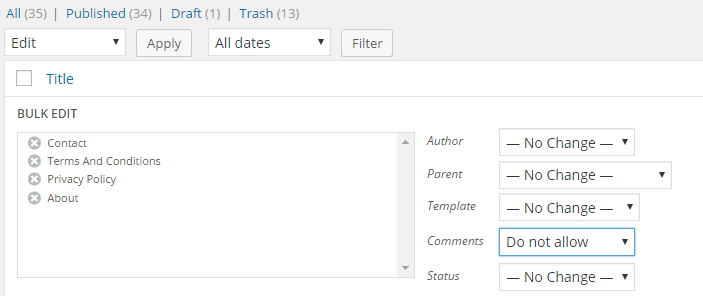
Figure 12. Disallowing comments
Configuring The Navigation Bar (TOP)
- Go to Appearance -> Menus.
- Create a new main menu for your e-commerce store.
- Add to menu the WooCommerce CORE pages in an order like on the figure
- Depending on your theme, check the location on the menu to be at the standard TOP location, above all the body content.
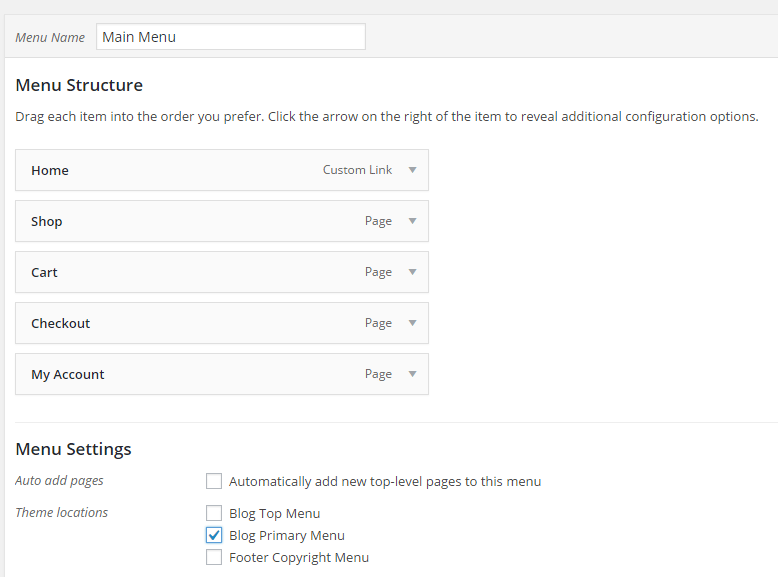
Figure 13. Creating navigation with the main store pages
Configuring The Navigation Bar (BOTTOM)
- While you are still in the Menus, create a new menu.
- Name it Bottom Menu.
- Here put the pages that we’ve created lastly.
- Follow the order from the figure below.
- Check the location of this menu to be in the Footer Copyright Menu
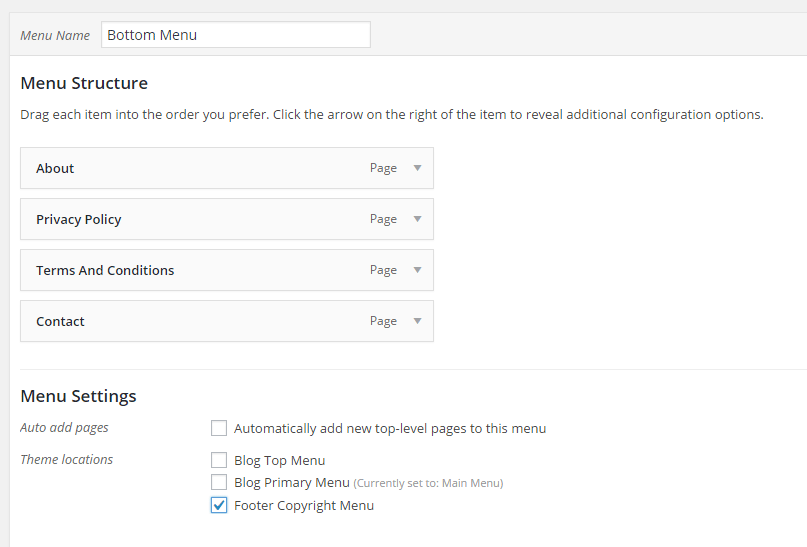
Figure 14. Creating navigation with the “about” and the legal pages
So far you’ve done a great job, but just at the backend. Open your site and you will see that there is nothing in the frontend.
Next, we will show you how to put the dummy data from WooCommerce plugin. Also, you will see why it was important to have your WooCommerce plugin downloaded from their official website to your computer.
Importing The WooCommerce Sample Data
- Unzip the downloaded zip file of WooComerce.
- Go to your WP Admin -> Tools -> Import -> WordPress
- Install the WordPress Importer (Activate plugin and run Importer)
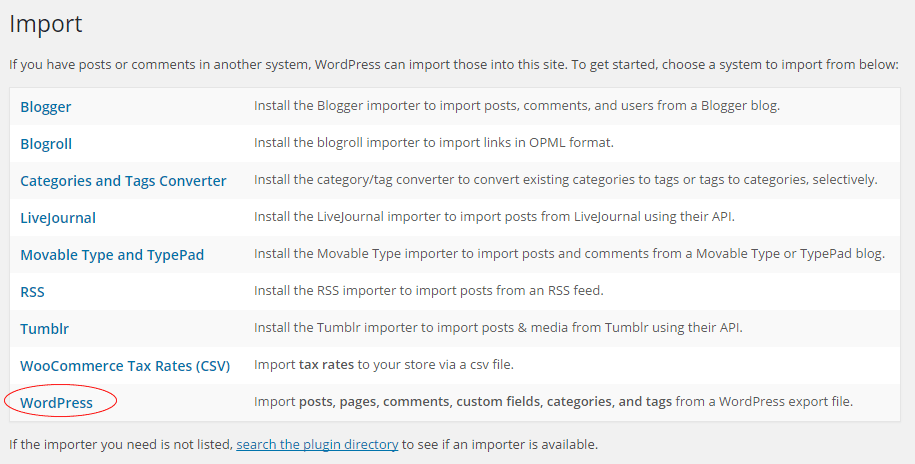
Figure 15. Install the WordPress Importer
- Locate the extracted woocommerce folder -> dummy-data -> open dummy-data.xml
- Click Upload file and import
- Assign posts to an existing user -> select your user
- Check Download and import file attachments
- Submit
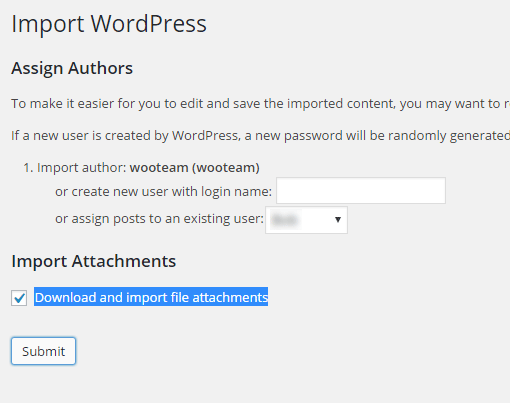
Figure 16. Importing the WooCommerce dummy data
If everything is successful, now let’s have fun 🙂
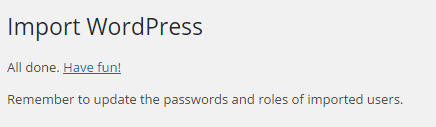
Figure 17. Successfully imported all dummy data
Configuring The WP Settings
Now if you want all products to appear on the front page you need to set the Shop page as Homepage.
Go to Settings -> Reading and at Front page select Shop.
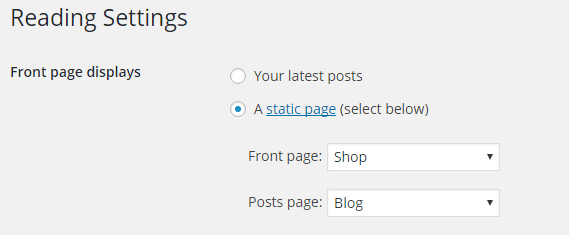
Figure 18. Setting Shop page as Homepage
While you are here, go to Permalinks and make sure your permalinks are set to Post name.
And now you can see how your store looks at the frontend.
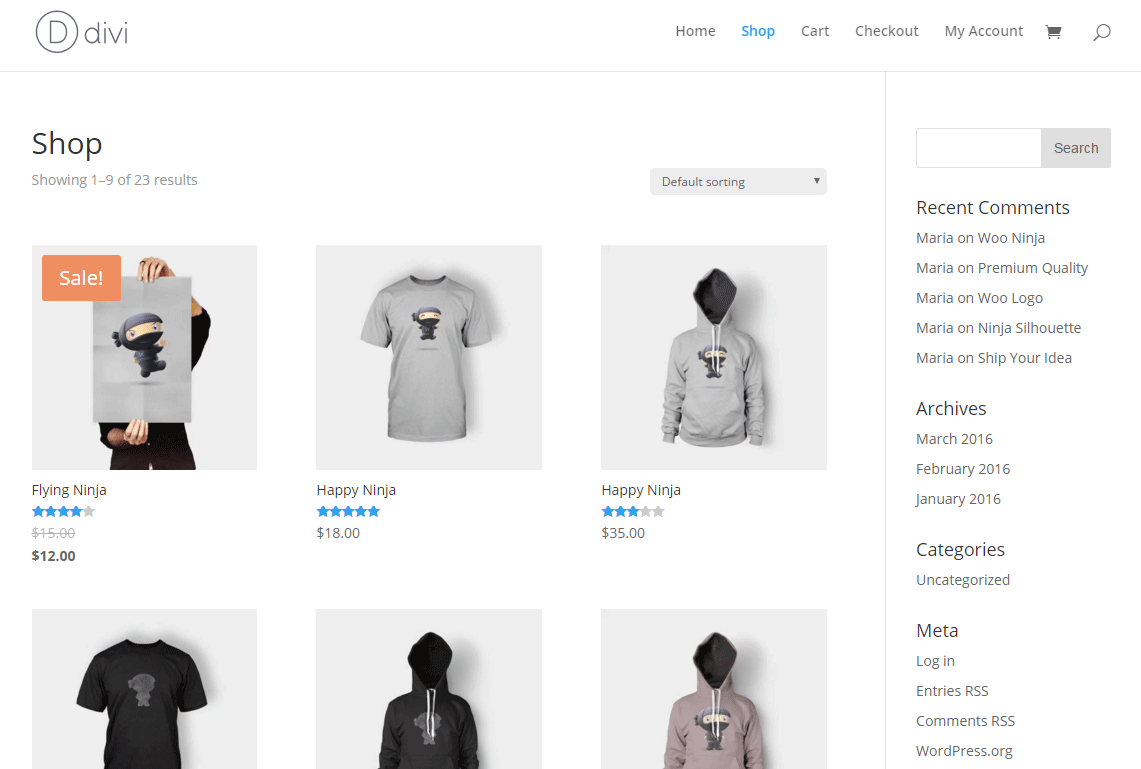
Figure 19. Shop at the frontend
Great! Now it’s time to customize your store settings with your data.
General Settings In WooCommerce
By navigating to your WP Admin -> WooCommerce -> Settings you need to set the advanced features for your store (the features that weren’t covered in the setup wizard)
- Base location – This is a physical location where your store is located
- Selling locations – If you want to sell your products worldwide (in case you have digital products) you can select Sell to all countries. If you have physical products that can be sold only in United States for example, then choose Sell to specific countries only and write United States. If you want to sell in Canada too, write here Canada…
- Default Customer Address – Geolocate
- Store Notice – If you enable this feature, you can write a text that will appear through your e-commerce site as a notification at the bottom (Figure 21). You can use this for promotions, hot deals, you can include links with HTML, etc.
- Currency options – The default options are good enough for us.
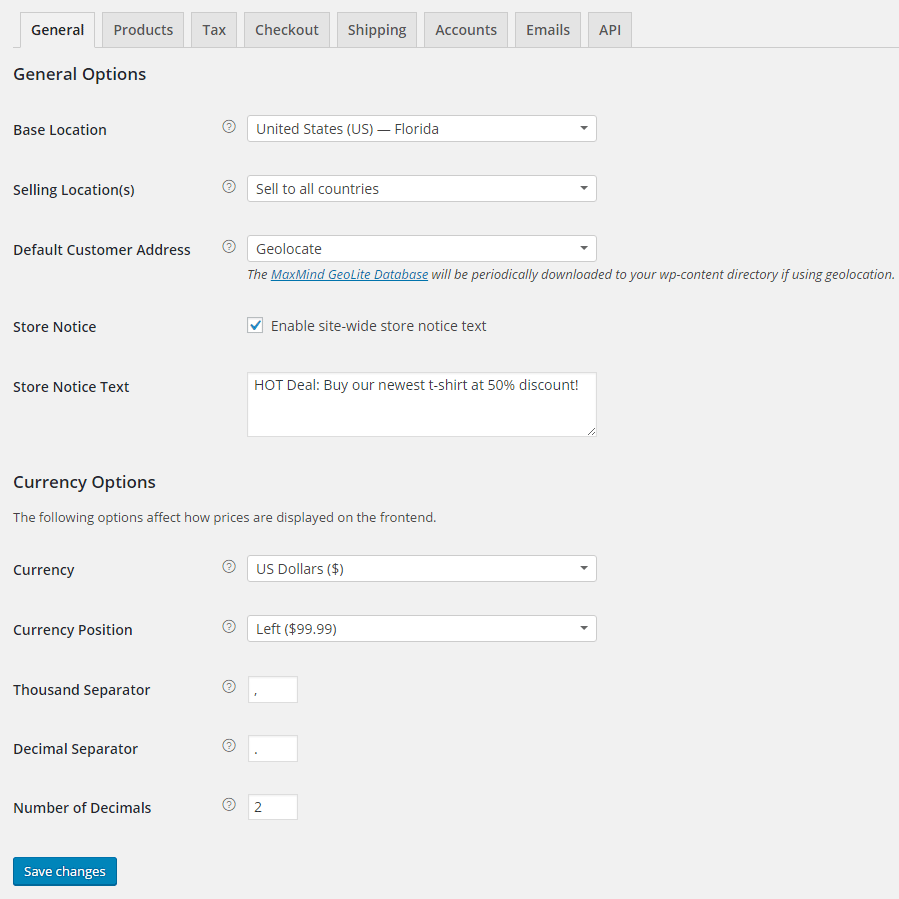
Figure 20. General Settings in WooCommerce
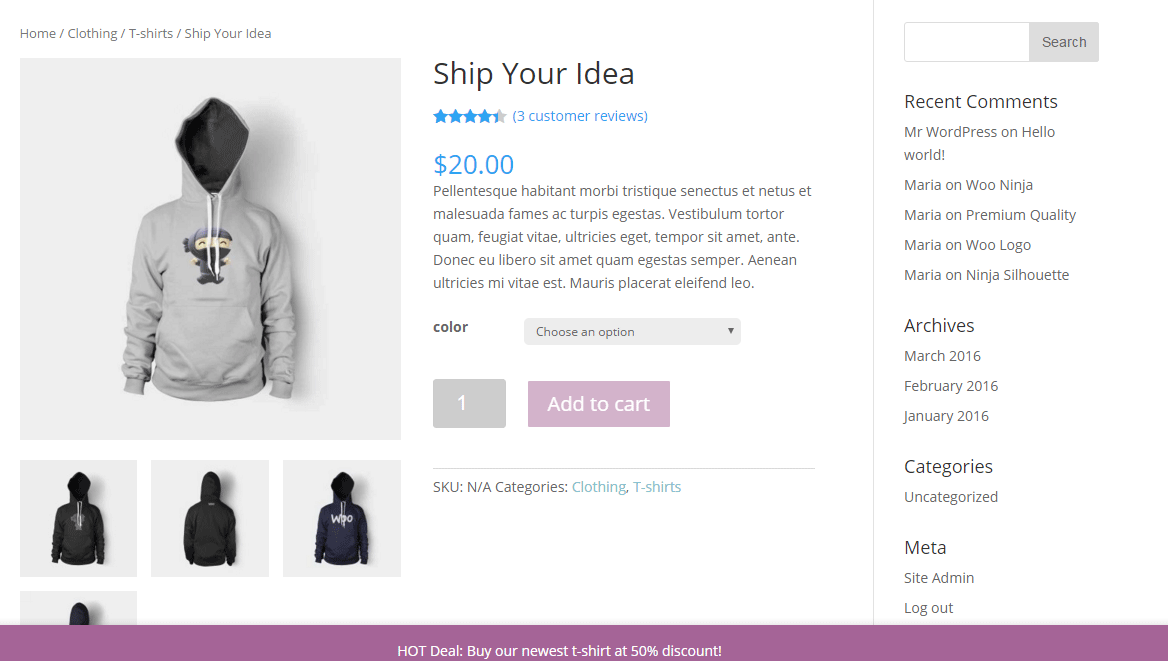
Figure 21. Dummy product on the frontend with store notice at the bottom
Product Settings In WooCommerce
In the Products tab you can set the measurement units, reviews, displays, inventories and downloadable product settings.
General Settings
In WooCommerce -> Settings -> Products -> General you can change the initial measurements for your products that you’ve set up previously in the wizard.
In the Reviews below, you can decide about the settings for the reviews of your product. They are self-explanatory.
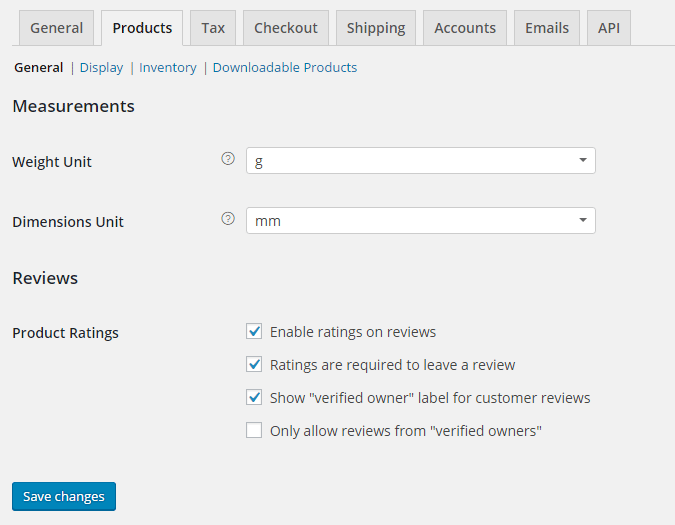
Figure 22. General settings for our products
Display
In WooCommerce -> Settings -> Products -> Display you can set how you want your products to appear at your e-commerce store.
- Store Page is properly set by default. This is the page where your products will be contained.
- Shop Page Display – Here you can choose instead of your ALL products, in the Shop page to appear the categories of your products (or both the categories and products).
- Default Category Display – Also for showing the default category or products.
- Default Product Sorting – Used for showing the default sorting on your products. You can decide to sort your products by: popularity (sales), average rating, most recent, price (ascending), price (descending).
- Add to cart behavior – Here you can choose to Redirect to the cart page after successful addition, which may not be a good idea because your customer may want to continue buying more than 1 product (leave this unchecked). Leave the Enable AJAX add to cart buttons on archives feature on for better user experience.
- Product images: Make sure Hard Crop is ticked in all checkboxes.
- Product Image Gallery – Enable Lightbox for product images (check)
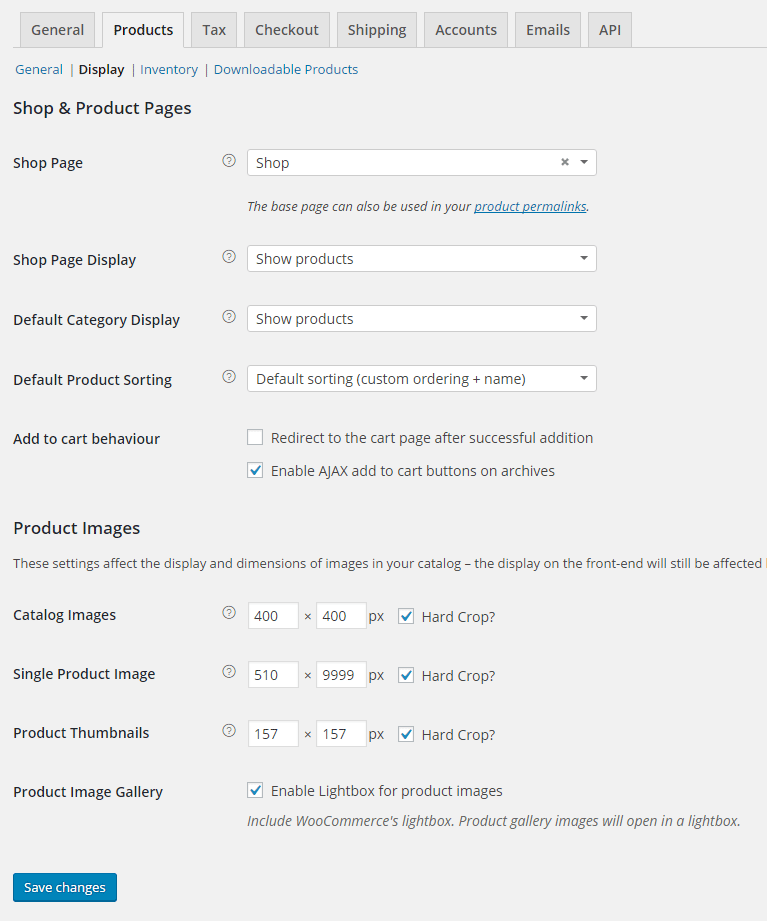
Figure 23. Products display
Inventory
If you have physical products, then it’s always a good idea to have a good stock management. In this tab the settings are self-explanatory, set them according to your needs. Later we will put the number of available products in stock for a specific product.
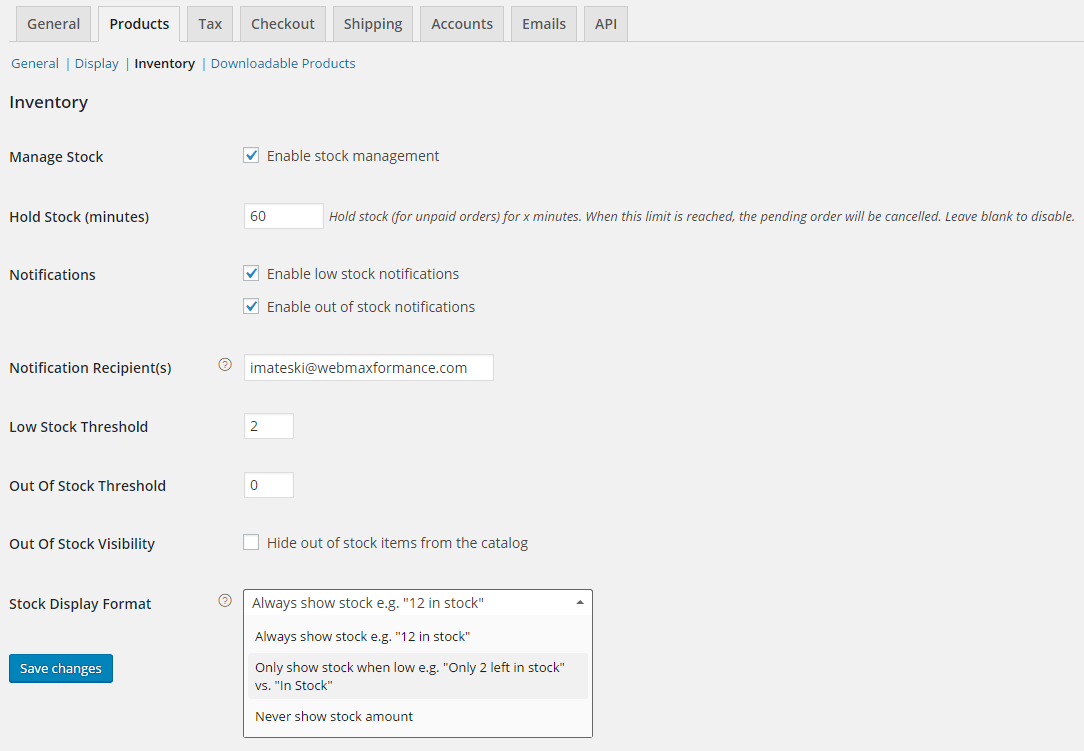
Figure 24. Stock management in WooCommerce
Downloadable Products
If you sell virtual products, in this tab it’s a good idea to set:
- Force Downloads
- Downloads require login (check) – You don’t want the download link to be spread to unauthorized users
- Grant access to downloadable products after payment (uncheck) – Don’t allow granting access to downloadable products when they are “processing”.
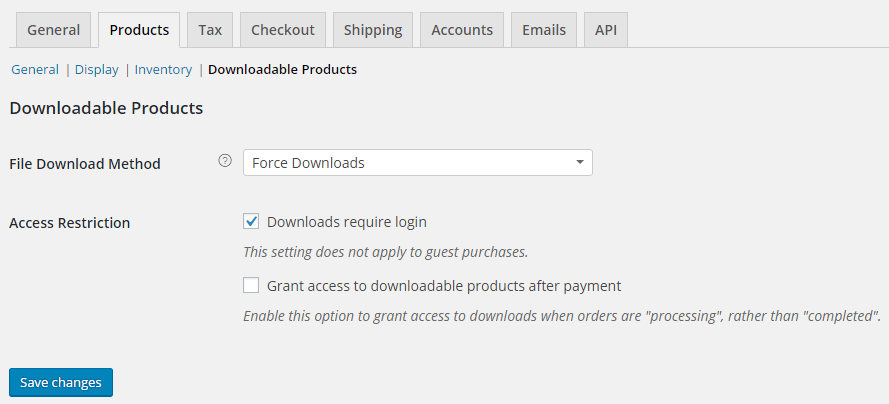
Figure 25. Settings for your downloadable products
Setting The Tax
Setting the taxes about your store products is a tricky matter because it needs making a lot of research and consulting with your accountant or tax professional. WooCommerce allows you to set any kind tax settings (and tax rates) that your store require, but first, make sure to make a thorough research.
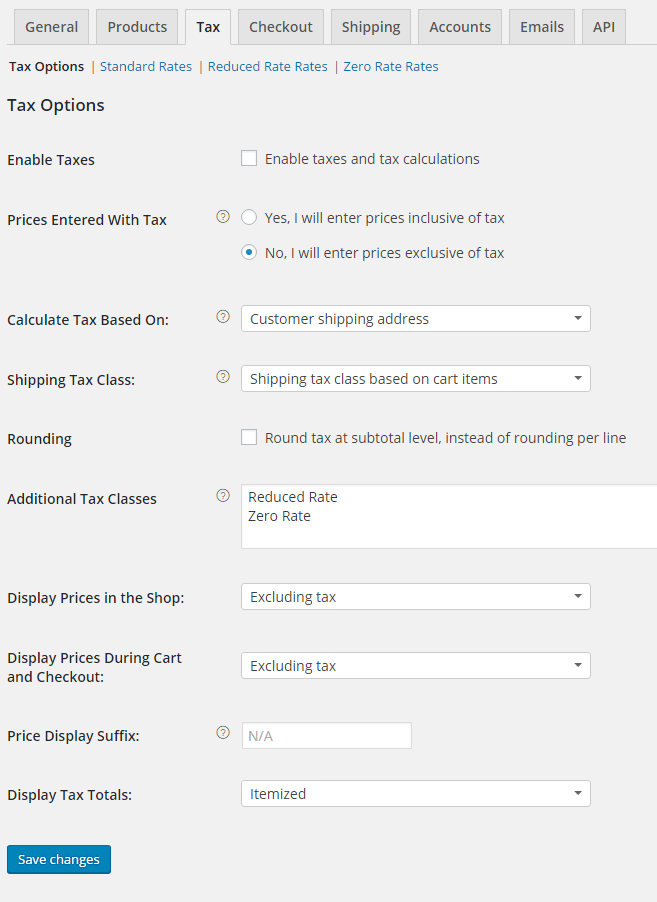
Figure 26. Tax settings in WooCommerce
Checkout Settings
The features in the Checkout tab allow you to make the necessary changes for the checkout settings.
- First you can enable/disable the use of coupons on the checkout page.
- Next you need to decide whether to allow guest checkout (without creating an account) or you will require your customers to create an account (recommended with virtual products)
- When you run an e-commerce store is HIGHLY required to buy a SSL certificate especially for the checkout page. We recommend to check the two boxes: Force secure checkout (that will force the SSL certificate on the checkout page) and Force HTTP when leaving the checkout (that will un-force the SSL on every other page – you need SSL certificate ONLY on the checkout page)
- Cart and Checkout pages are properly selected, but you need to select the page that we’ve created for Terms and Conditions.
- Checkout Endpoints don’t need any touching.
- In Gateway Display Order with dragging move PayPal and Credit Cart at the beginning.
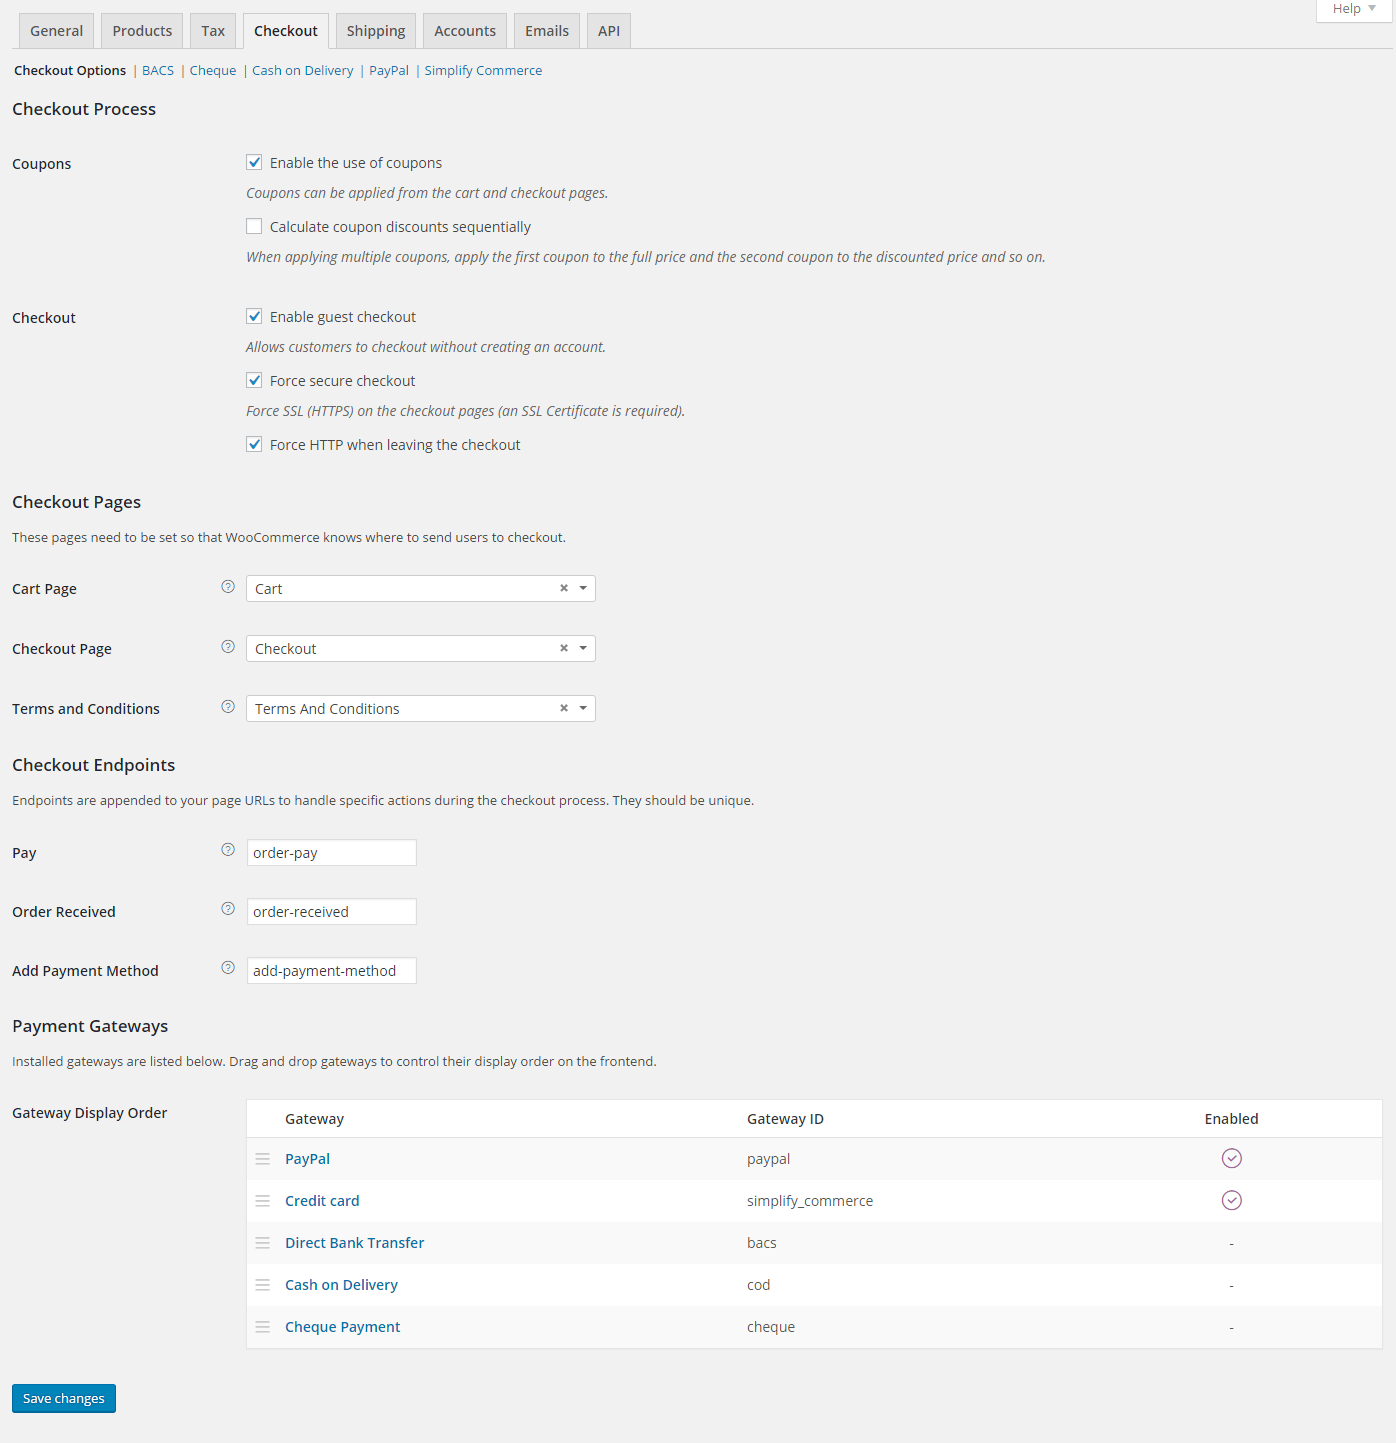
Figure 27. Checkout settings in WooCommerce
- In the BACS tab, you can choose to Enable Bank Transfer
- In Cheque tab, you can Enable Cheque Payment (not recommended!)
- In Cash on Delivery tab, you can allow your customers to pay with cash (or by other means) upon delivery.
Setting the PayPal Payment System
In the PayPal tab, you can select to use the PayPal standard system for processing orders from your website. The PayPal standard mechanism sends customers to PayPal from where they can enter their payment information.
Click to enable the PayPal Standard. Put a custom Title and Description if you want that will appear on the checkout page (Figure 29)
PayPal Sandbox allows you to test the payments for your products. You can set a PayPal developer account and put as much virtual money as you want. With that account later you can buy your products to ensure that the PayPal transaction went smooth.
A good idea is to Enable logging. This would create a text file that will log all PayPal events, allowing you to see how the transitions from your website are processing and where are the possible errors if some problem occurred.
In Receiver Email, we recommend you to put the same email as your PayPal email to have better control of the orders from your website.
PayPal Identity Token allows better user experience because the payments will be verified more easily. Hover on the question mark (?), and it will give you instructions how to enable the PayPal Identity Token. This is an optional setting.
Next, you need to take your PayPal API credentials by clicking on the provided link, and you are done configuring the PayPal Standard method for processing transactions on your e-commerce site.

Figure 28. PayPal settings in WooCommerce

Figure 29. PayPal on the frontend in Checkout page
Simplify Commerce
To allow paying directly through credit cards, WooCommerce is suggesting to sign up at their partner Simplify Commerce.
Simplify Commerce is a merchant account and payment gateway all rolled into one. Choose Simplify Commerce as your WooCommerce payment gateway to get access to your money quickly with a powerful, secure payment engine backed by MasterCard.
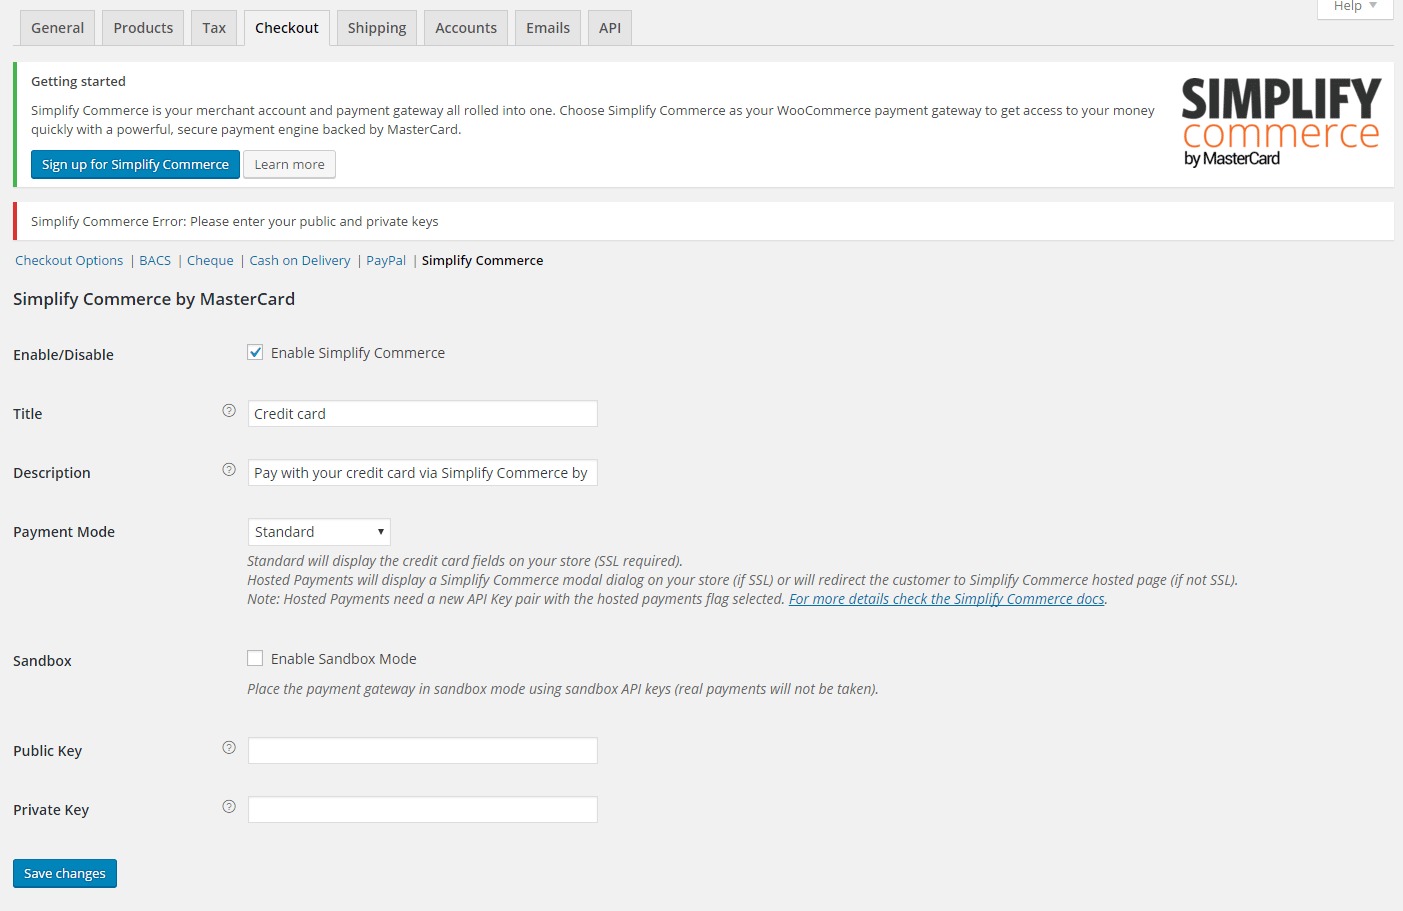
Figure 30. Using Simplify Commerce for credit card transactions
For using more payment options like Stripe or Authorize.Net, you need to install that additional payment gateway from WooThemes Payment Extensions.
Shipping
When you are selling a physical product, you need to think seriously about how the shipping of your products will go. Some matters to think about:
- What kind of products you are selling? How will you package them? How they are going to fit in the shipping boxes?
- Where are you shipping your products? Locally (can be used local mail) or internationally (can be used shipping services like FedEx)?
- How are you going to charge for the shipping? Will you provide free shipping?
When you decide about the shipping, you are ready to configure the settings in WooCommerce.
If you have many different products in your store, you can group them by their common shipping rates. So, for example, you have small and large items in your store, and a different shipping rate apply for each. The solution is to group them with Shipping Classes.
Navigate to your WP Admin -> Products -> Shipping Classes. If you are familiar with Categories in WordPress, you can notice that it’s the same like adding a new category.
Add a class for Small Items and Large Items.

Figure 31. Group the shipping of your products with Shipping Classes
Now let’s move to WooCommerce -> Settings -> Shipping.
WooCommerce comes with several standard shipping methods.
- Flat Rate Shipping
- Free Shipping
- International Flat Rate
- Local Delivery
- Local Pickup
But you can even further extend the WooCommerce shipping methods by using the WooCommerce shipping extensions from WooThemes.
Of the top at the Shipping Options, you can enable or disable shipping calculations.
Note: You need to DISABLE the shipping and shipping calculator if you are selling digital products or services.
Other options in this tab are self-explanatory.
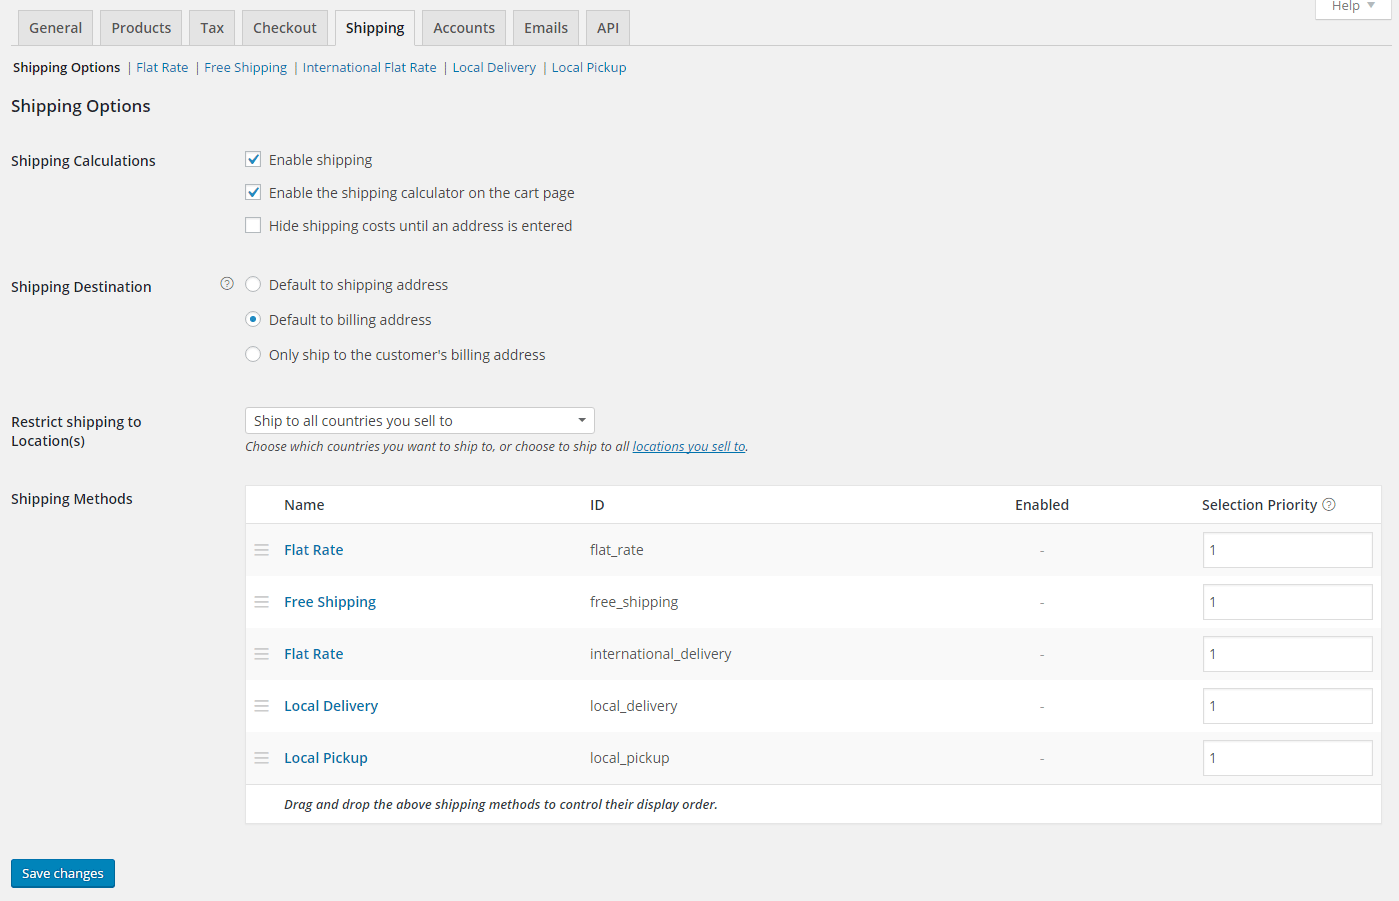
Figure 32. Shipping options in WooCommerce
Flat Rate
Flat Rate Shipping lets you charge a fixed rate for shipping.
For Availability, you can select this rate to apply to all allowed countries or to select specific countries (United States, Canada) where this flat rate will apply.
Below you can see the shipping classes that we’ve created previously. By hovering on the (?), you can see what shortcodes are available for calculating the shipping rate of your products.
Calculation Type can be per class.
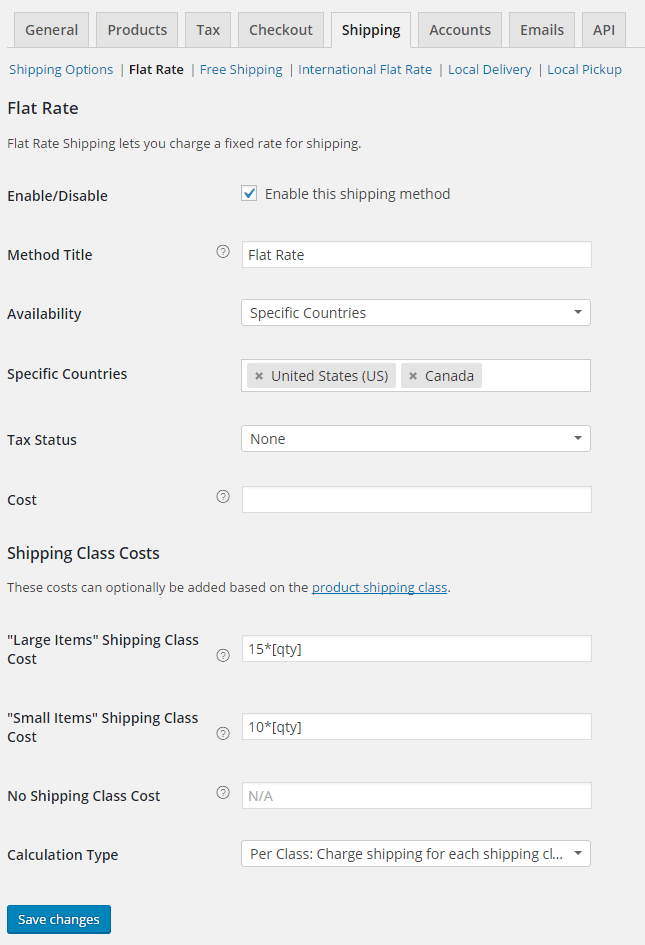
Figure 33. Using flat rate for shipping
Free Shipping
Free shipping is the easiest option for setting up.
- Choose to Enable Free Shipping
- Set the method title
- Method availability – choose to which country the free shipping will apply (all countries or specific countries)
- Decide what the free shipping method requires: nothing, a valid free shipping coupon, a minimum order amount, a minimum order amount OR a coupon, a minimum order amount AND a coupon.
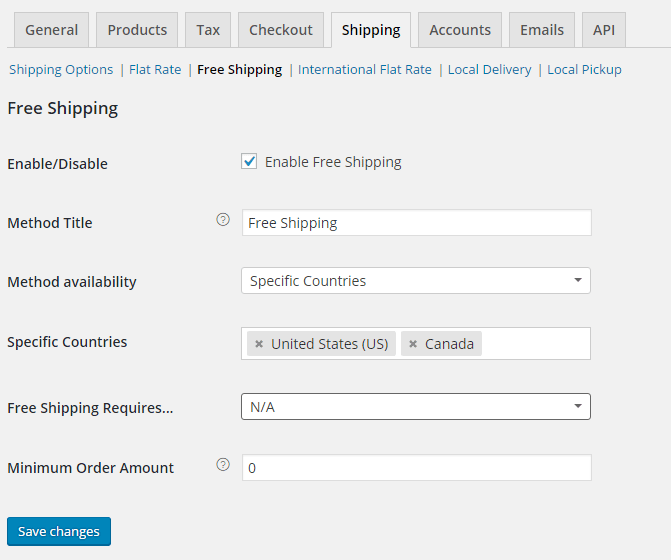
Figure 34. Free shipping configurations
International Delivery
International Delivery is similar to the Flat Rate.
- You can enable it
- You can set a title
- Select the availability (to which countries this shipping method will apply)
- Decide for the Tax Status
- Enter the cost for the shipping classes (use the standard shortcodes for the price)
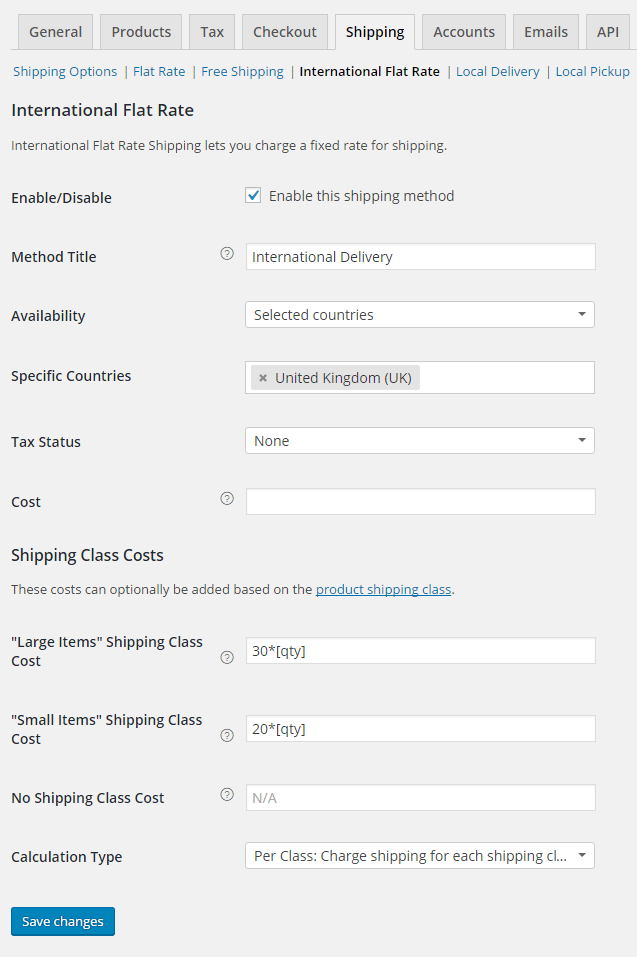
Figure 35. International flat rate
Local Delivery
Local Delivery allows you to deliver your products to your local customers. To configure this shipment method:
- Click to enable it
- Give it a title
- Set a fee type (fixed amount, percentage of cart total, fixed amount per product)
- Put your delivery fee (actual amount or the percentage)
- Enter the Allowed ZIP/Post Codes
- Method availability – Specific country and put your country
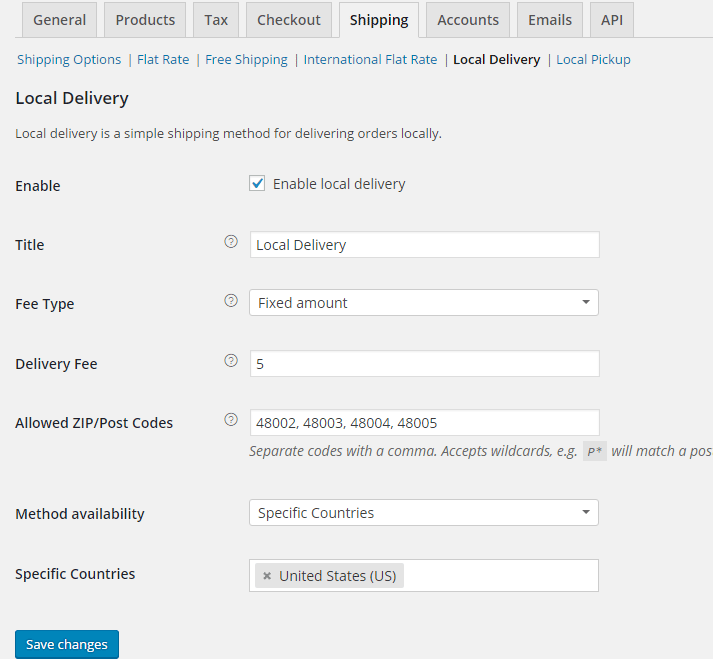
Figure 36. Setting the local delivery shipping method
Local Pickup
The last option allows the customer to come to your location and to pick up your product. You can consider using this option if you have a proper business address. You don’t want your customers to show at your house to pick up their products. Configuration is simple:
- Choose to enable this option
- Give it a title
- Put the Allowed ZIP/Post Codes so the people who are far away from your business location won’t be given this option.
- Set the method availability only to a particular country (your country).
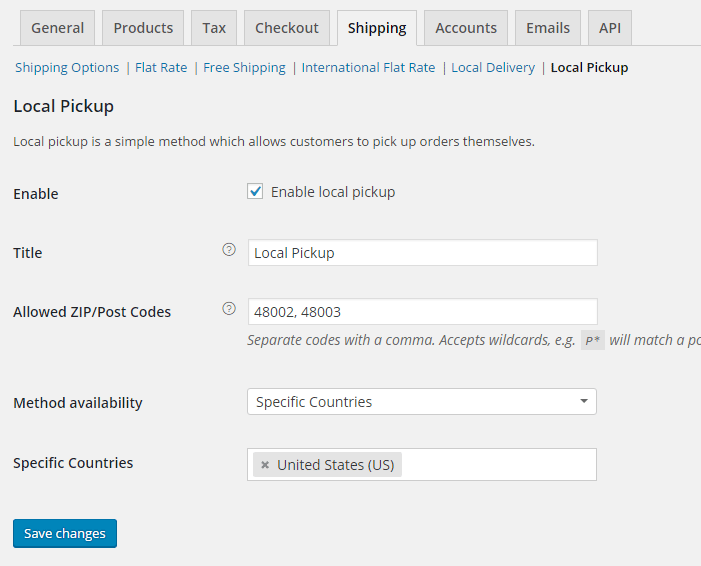
Figure 37. Setting the local pickup method
Account Settings In WooCommerce
The Account page was created in the wizard, but now we can further customize it. The Account page and endpoints are okay, but we recommend checking:
- Enable registration on the “Checkout” page
- Enable registration on the “My Account” page
- Display returning customer login reminder on the “Checkout” page
- Automatically generate username from customer email
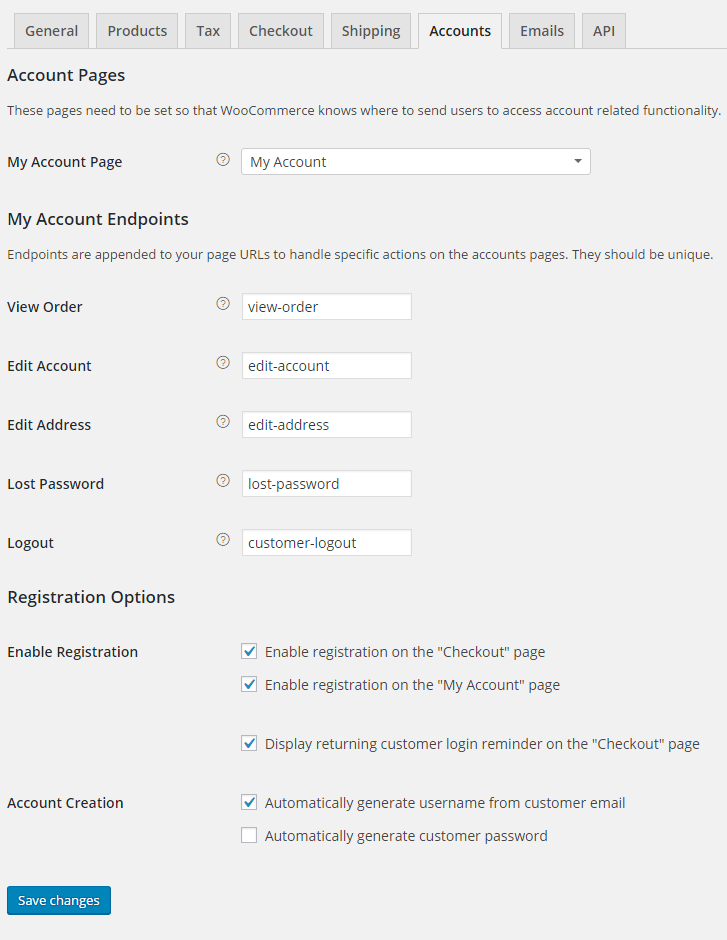
Figure 38. Account settings
If you put My Account page on your top menu, it is a good idea to include registration form here if someone clicks on this page for the first time.
The registration form won’t appear for registered users.
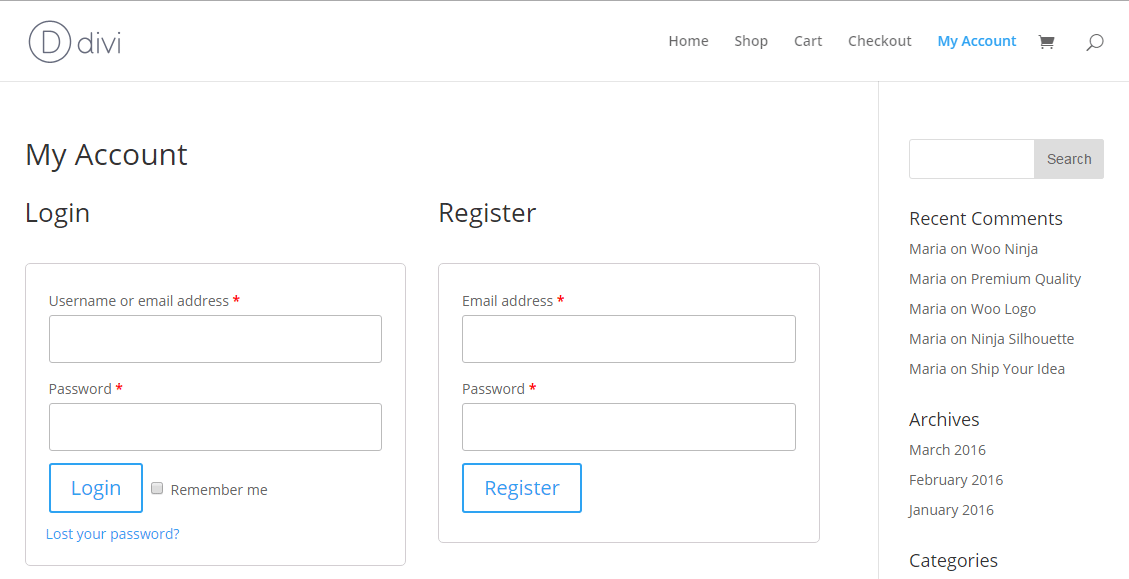
Figure 39. Registration form in My Account page
Here’s how My Account page looks for registered users:

Figure 40. My Account for registered users
Emails Settings In WooCommerce
Under Emails tab, you can find the default options for every email WooCommerce is sending to you and your customers. From here you can customize the settings for each email type.
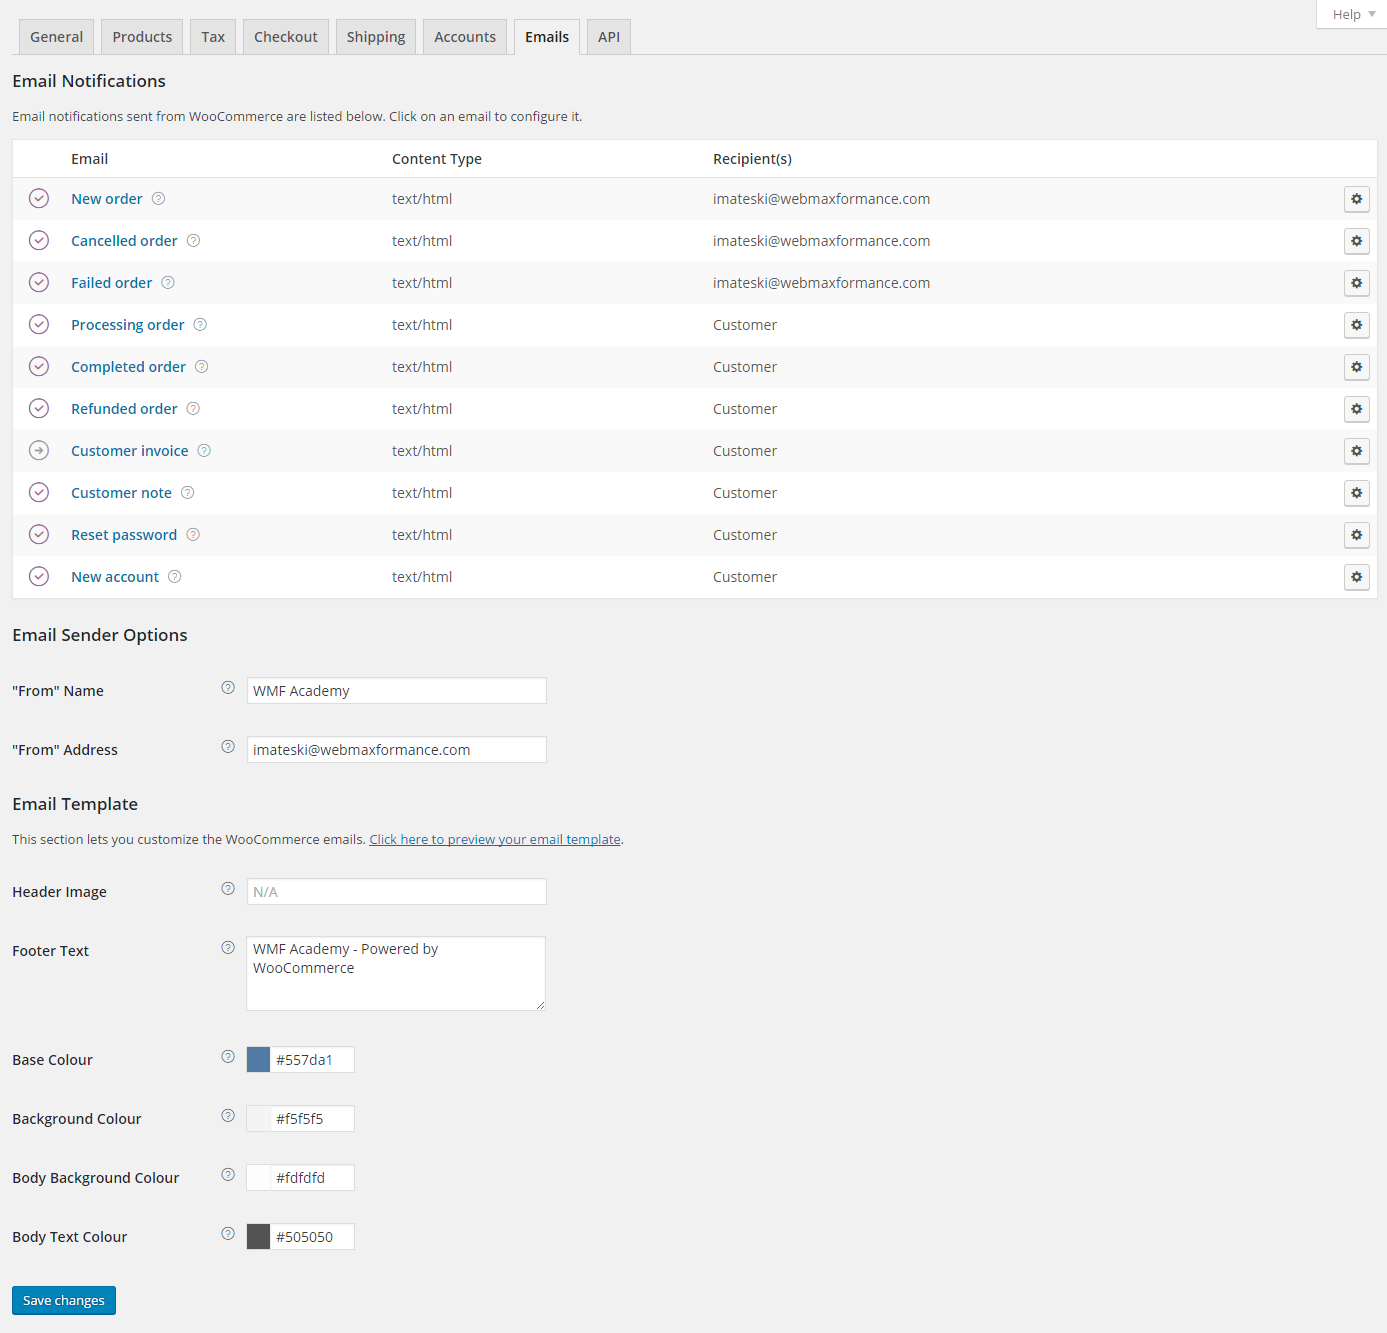
Figure 41. WooCommerce emails customization
Also, you can change the template and colors of your emails. Put colors that correspond to your website colors and click on Click here to preview your email template.
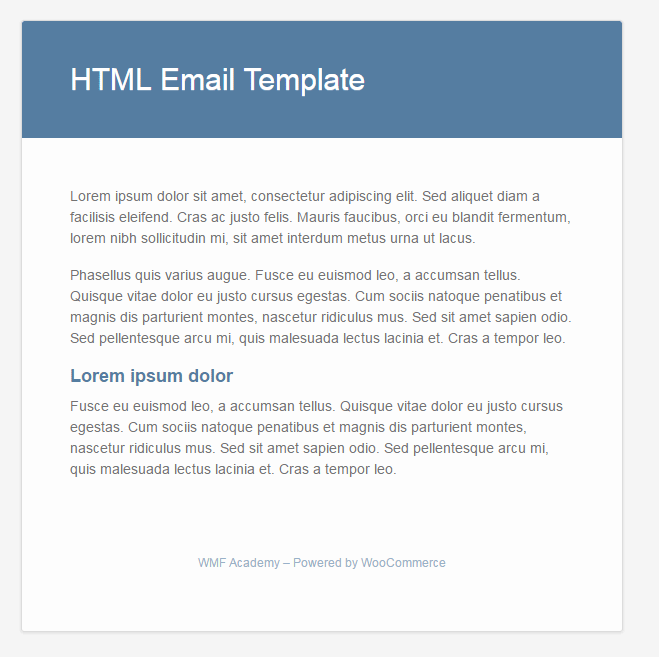
Figure 42. WooCommerce email template
Congratulations! You are done configuring the setting for your e-commerce store. Now it’s time to add your products to the store (and delete the dummy ones)
Creating Your First Product In WooCommerce
Adding a new product is simple as adding a new post in WordPress. In this part of our lesson, we will show you how to add a physical product – Book Hardcover + DVD.
In your WordPress Dashboard find Products -> Add Product.
- First, you need to put a descriptive title for your product
- In the standard editor put the long description of your product (it will appear below at the product frontend).
- On the right choose or create a new category for your product.
- Set the main product image (make sure to put good title and alt tag for the image)
- Below, add product gallery images (also make sure to put good title and alt tag for the image)
- Put a short description of your product that will appear right next to your product image on the frontend.
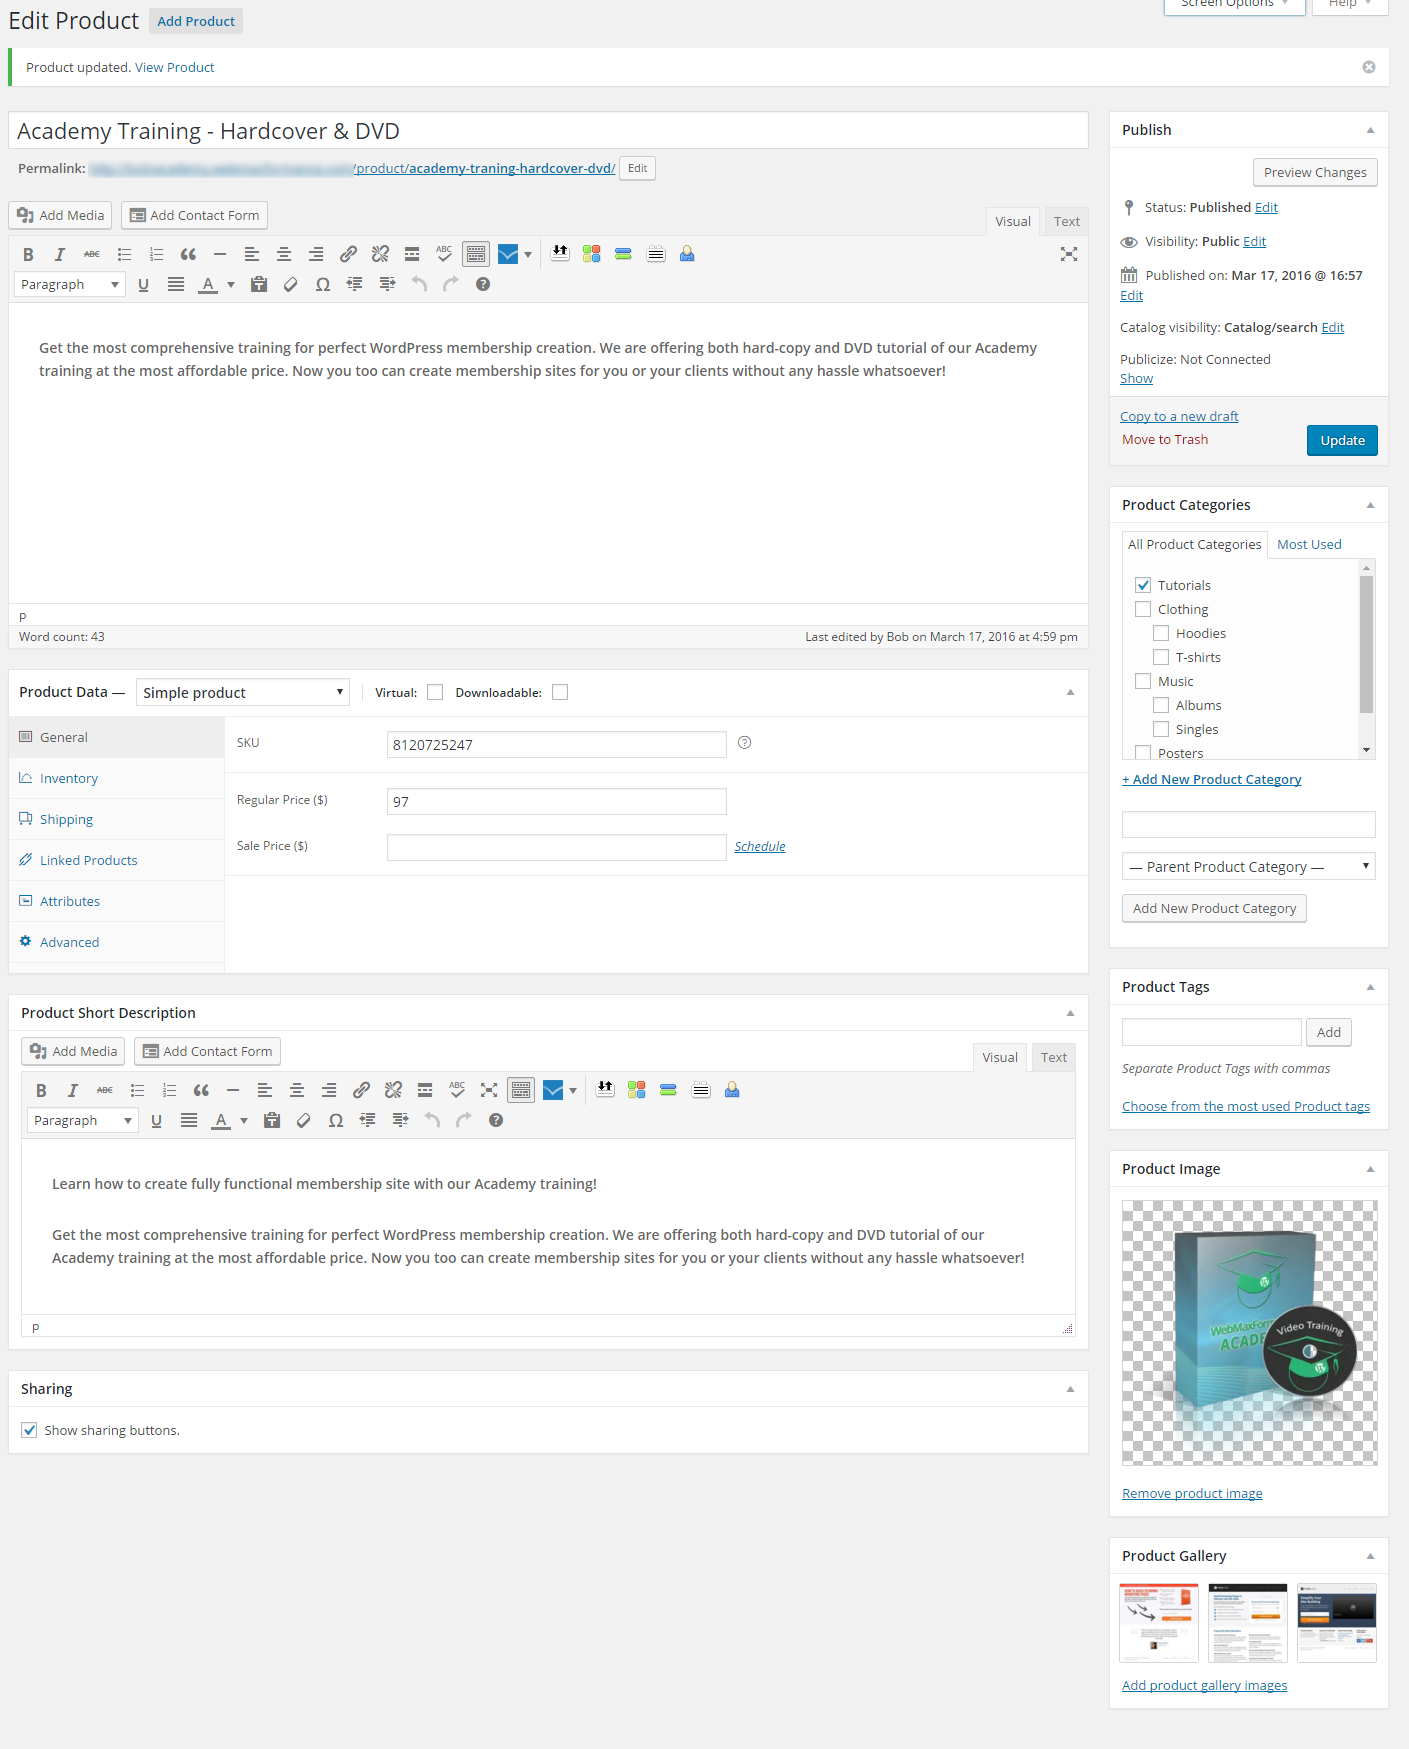
Figure 43. Creating our first product
In Product Data, we can select Simple product (but there are more product types: grouped product, affiliate product, variable product)
- The General section is used to put the SKU (stock-keeping unit) number. Learn how to create good SKU numbers here. Also, put your regular price and you can schedule sale price if you want.
- Since this is a physical product, you need to Enable stock management. In Inventory section you can put how many copies of your product you have in stock.

Figure 44. Inventory settings for your product
- In Shipping section, you need to enter the weight of your product and its dimensions. Also, you can select the shipping class you’ve created previously. Our product belongs to the Small items group so we will select the Small items shipping class.
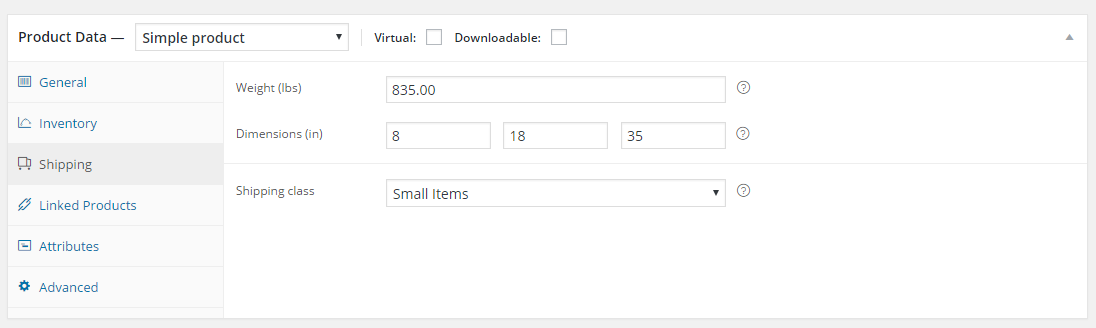
Figure 45. Shipping settings for our product
- In Linked Products area you can add upsells, downsells, and grouping products.
- Attributes are used to create different attributes for your product. For example, if you are selling t-shirts, one attribute can be color and the values can be black, blue, green, etc.
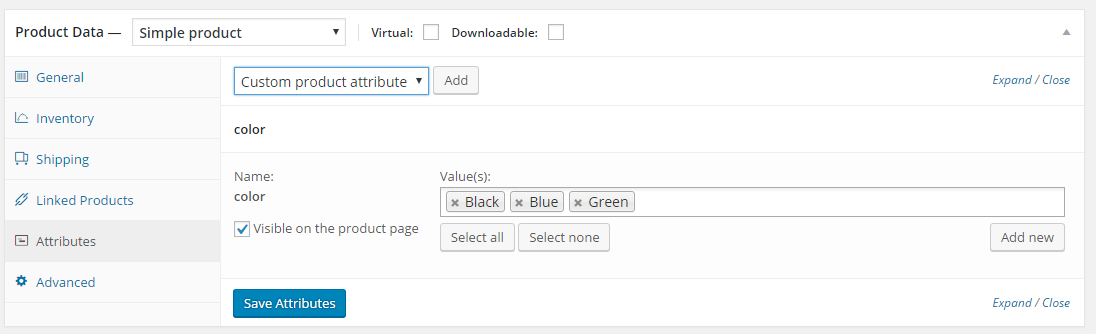
Figure 46. Attributes for your product
- In the Advanced section, you can put an extra Purchase Note for your customers; you can set the custom order position, and you can decide whether you want to enable reviews for this product.
Now let’s see how our product will look on the frontend:

Figure 47. Our product at the front-end
Excellent job! Now go and create the rest of your products. Don’t forget to delete the dummy products that we’ve imported at the beginning!
Customizing The Sidebar Of Our Store
As you notice, the sidebar of our store is filled with the default widgets from WordPress. But before we put our store in use, we need to customize the sidebar with WooCommerce widgets.
Navigate to WP Admin -> Appearance -> Widgets and delete the standard widgets from your main sidebar.
Next, drag the following main widgets (you can always add more if you want):
- WooCommerce Product Search
- WooCommerce Cart
- WooCommerce Products (select featured products)

Figure 48. Customizing the sidebar for our store
You can set a featured product by going to Products and clicking on the star:
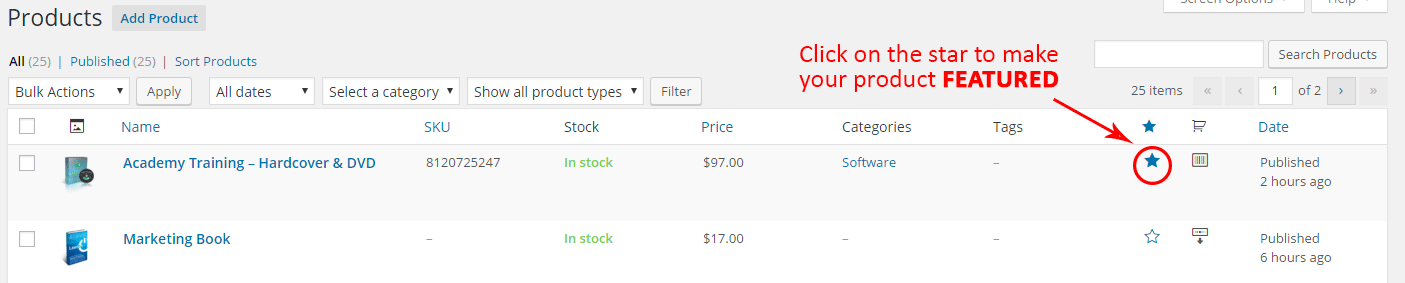
Figure 49. Setting featured products
And here’s how the sidebar looks at the frontend:

Figure 50. Frontend of our store with the new sidebar
Other Related Plugins from WooThemes
- Sensei: Showing coursework has never been less demanding, all inside WordPress. With our uniquely offered Sensei plugin, you can make courses, compose lessons, and include tests. Set lesson and course pre-requirements, permit client enrollment and even charge for your course content utilizing WooCommerce on the off chance that you need.
- Wooslider: Or another plugin named the Wooslider is one of the best you can find. You can add a slider to any subject, any page or post with a definitive slideshow plugin for WordPress. Controlled by its own custom post sort and with a responsive configuration, it is genuinely adaptable.
- Woosidebars: Overriding a widgetized area was never easier for your WordPress website as with our Woosidebars you can create separate widgets for separate screens.
Beside these main WordPress plugins, there are other essential plugins from WooThemes:
- Projects – For projects showcase
- Our Team – Our team display with complete details and info
- Features – Complete list of your company features and functions
- Testimonials – Show the feedback of your happy clients
Final Words
No other e-commerce platform on WordPress stage gives such a profound coordination to every single major functionality required for a little or huge organization hoping to do e-commerce than WooCommerce. If you are dispatching another start-up in the e-commerce business, then we would unequivocally prescribe to go with WooCommerce services on WordPress.
For the end, we can say that you’ve done a FANTASTIC job by arriving this far. Now you know how to set up an e-commerce store properly for your or your clients. WooCommerce is serving on a plate almost everything you need for any kind of e-commerce. The procedure is almost the same if you want to make an online store for selling only virtual products. Also, there are a lot of extensions for WooCommerce that can make your job a lot easier.
As we mentioned, you can sell services for clients about creating online stores. The prices can go for $500 to $1000 for a single e-commerce store.
As for every lesson in our Academy, we are also here to assist you if you stuck somewhere along your way of creating your store.
Good luck!