As your site grows bigger, the comments are starting to flood your site (usually the spamming ones). WordPress has a nice built-in comments system, but with it, you are limited in so many ways for managing your comments. If you installed one of our plugin recommendations for spam prevention, now you can further improve your site by installing a third-party commenting system for your WordPress site – Disqus Comment System.

Why Use Disqus?
- It has a great spam filter. If Akismet or Antispam Bee for some reason stopped functioning, Disqus will take care of the spammers with high accuracy.
- Easy to moderate. The comments on your website are very easy to moderate with Disqus. You can edit the comments through your WordPress Dashboard or Disqus Dashboard.
- Reducing server load. If your post has a lot of comments, it will take longer to load. However, using the Disqus, your server load will be reduced because the comments are handled by the third party commenting system with their own servers.
- Easy sync with your database. Your existing comments can easily be synchronized with the Disqus commenting system, and if you decide to deactivate it, your comments will be reverted to their previous state.
How To Install Disqus Commenting System
Open your WordPress Dashboard -> Plugins -> Add New and search for the Disqus Comment System. Install and activate the plugin.
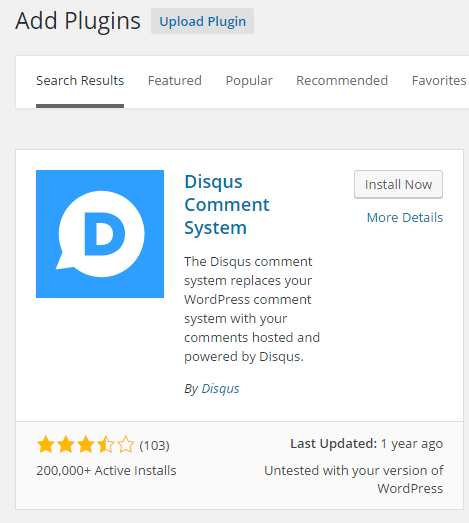
Figure 1. Installing Disqus Comment System
Now from your WP dashboard navigate to Comments -> Disqus. First, you need to upgrade your database for the Disqus Comments System.
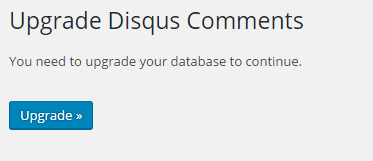
Figure 2. Upgrade database
So now to use this commenting system on your WP site, you must register a free account on Disqus (if you don’t have already). If you have an account just put your login credentials here and go to the official Disqus website to create new site (Figure 5)
We assume that you don’t have an account so click on Don’t have a Disqus Profile yet?
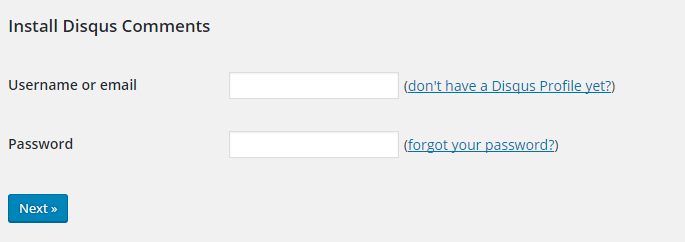
Figure 3. Click on Don’t have Disqus Profile yet
Put your name, email and password and click on Sign Up.
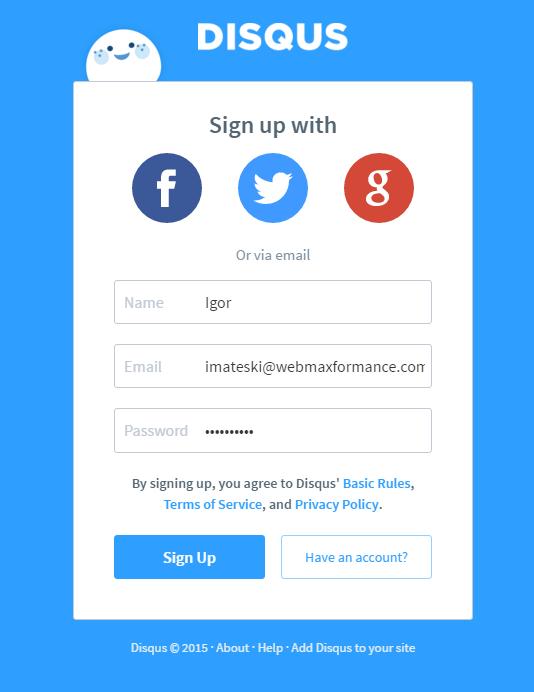
Figure 4. Sign up an account on Discus
Now click on the gear button on the top right corner and choose Add Disqus To Site.

Figure 5. Add Discus to your site
Now click on Install On Your Site.

Figure 6. Install Discus on your site
Now set up Disqus on your site.
- Put the name of your website.
- Choose unique Disqus URL for your Disqus Dashboard.
- At the end select your category from the drop-down
- Click on Next.
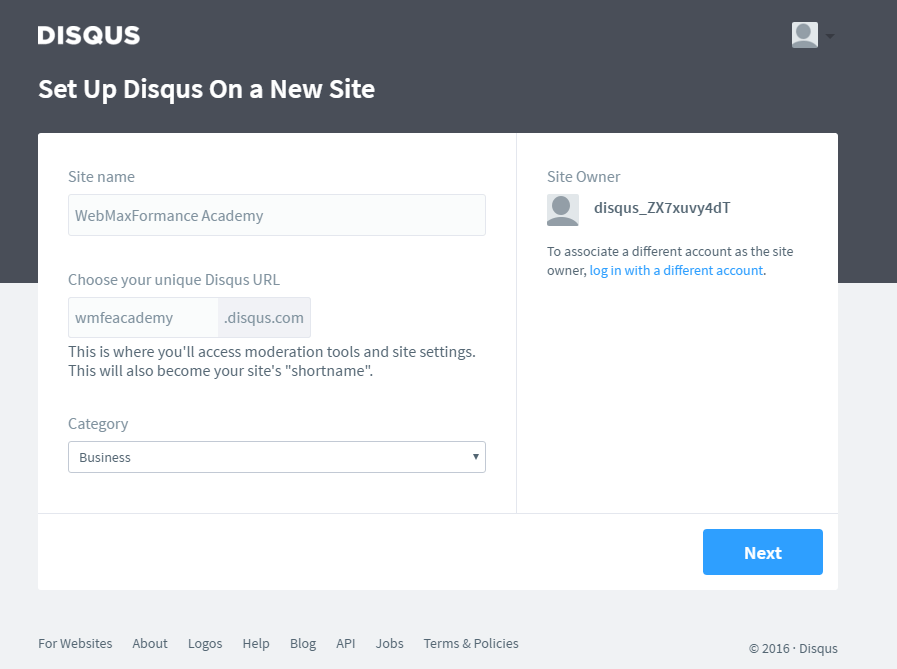
Figure 7. Setting up the Disqus account
On the next screen probably you need to choose My site is just a personal site.

Figure 8. Choose the type of your website
Now put the number of sites you manage and click Next.

Figure 9. How many sites do you manage?
Now from the drop-down menu select how many daily page views do your site have on average and click Finish.
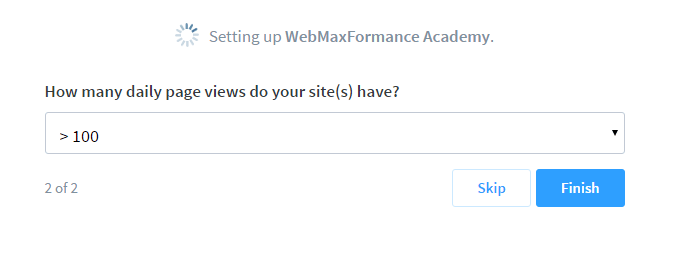
Figure 10. Select how many daily page views do your site have
On the next screen choose the WordPress platform.
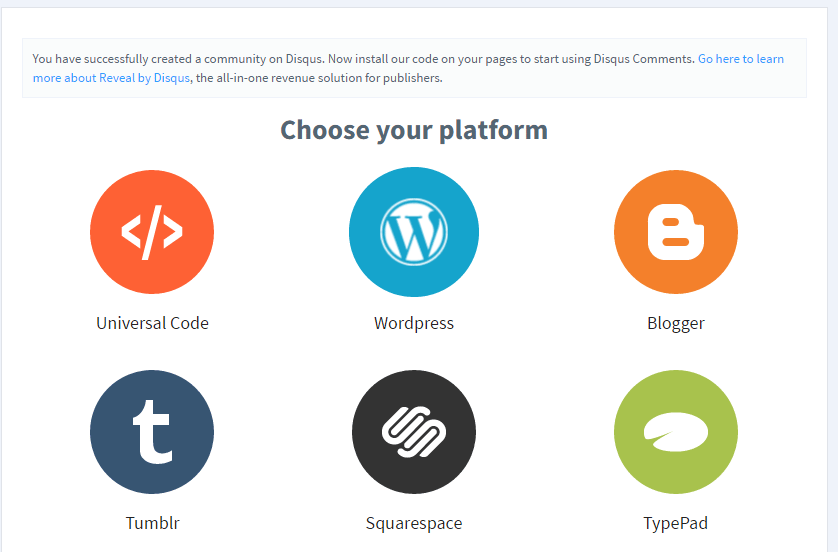
Figure 11. Choose WordPress platform

Figure 12. Setup instructions for installing the Disqus commenting system
Now return to your WP Admin Dashboard -> Comments -> Disqus and log in with your email and password.

Figure 13. Login in with your Disqus credentials
Select your Disqus website and click on Next.
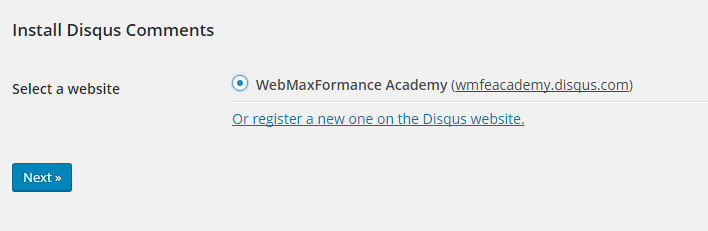
Figure 14. Select your Disqus website
Now Disqus has been installed, and you can continue to the moderation dashboard.

Figure 15. Successful installation of Disqus

Figure 16. Go to Disqus Moderation
Now you will be presented with the Disqus dashboard and from here you can moderate your future comments on your site.
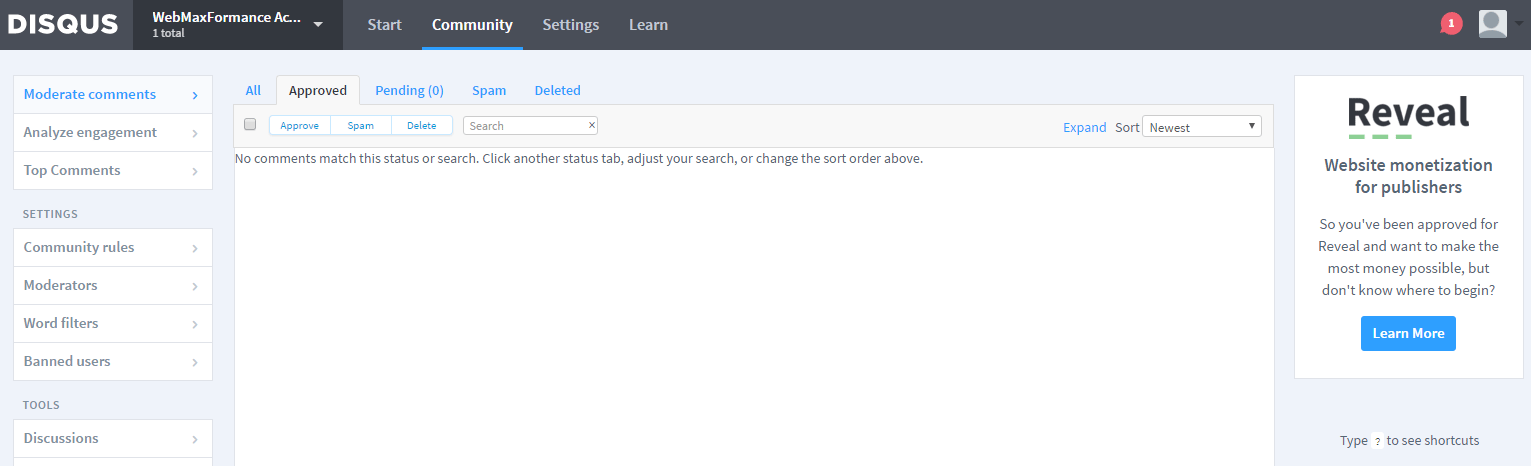
Figure 17. Disqus dashboard
Now open some post and you will notice the Disqus commenting system below. From here you need to send an activation link to you mail.
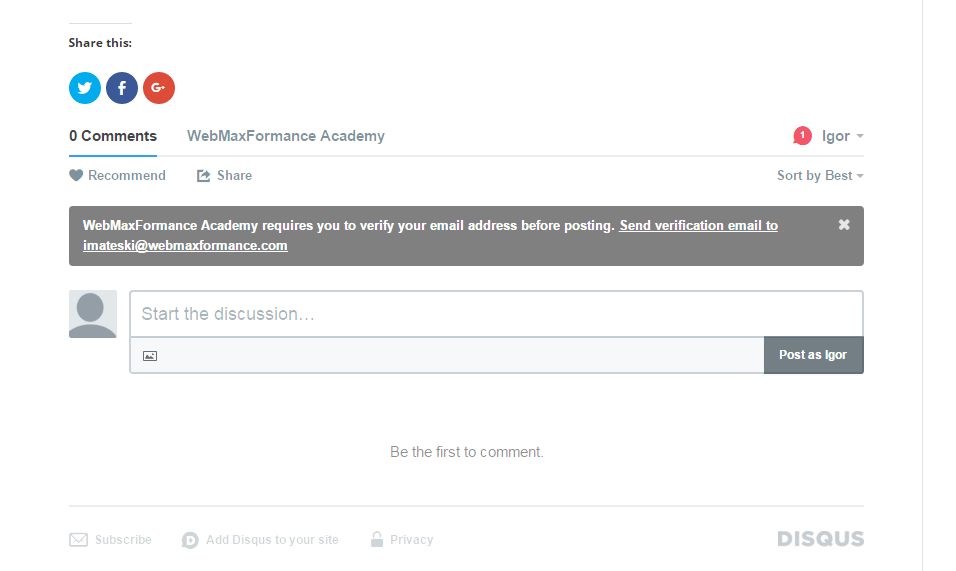
Figure 18. Verification of the Disqus commenting system
From the popup window click on Send verification email.

Figure 19. Send verification email
Now the procedure is finished and on the next figure, you can see how the commenting system looks on your posts and pages.

Figure 20. Commenting system frontend
Now your visitors can use this system to start discussions, put images, vote on the best comment, etc.
If you don’t see the Disqus commenting system below your page, here’s what you need to do:
- Edit your post/page
- From the top right corner click on Screen Options
- Check the Comments feature
- Update your post/page
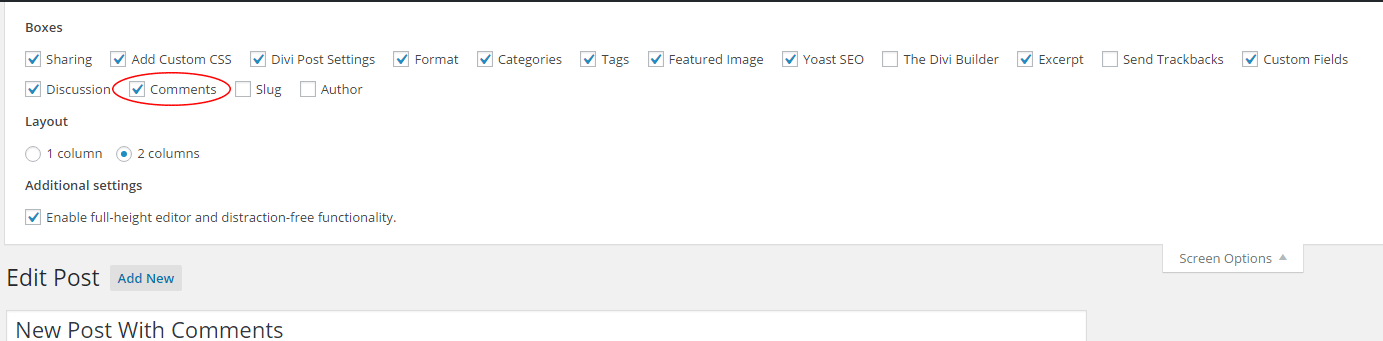
Figure 21. Enable Comments
Now let’s import your existing comments to Disqus Commenting System.
Import Your Existing Comments To Disqus Commenting System
From your WordPress Dashboard go to Comments -> Disqus -> Locate Plugin Settings from the top right corner.

Figure 22. Open plugin settings
From the Settings page, scroll down to Import and Export area and from the Export comments to Disqus click on the Export Comments button.
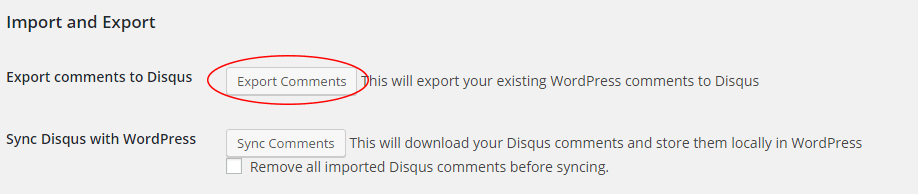
Figure 23. Export comments to Disqus system
Wait for a few moments until the exporting process put your WordPress into the Disqus commenting system.
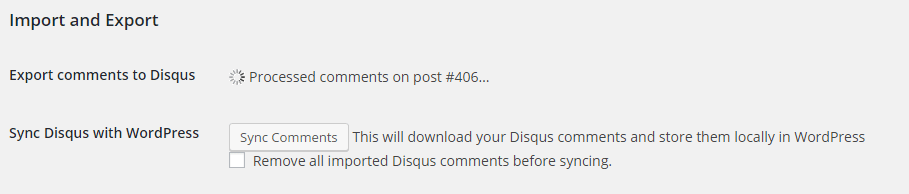
Figure 24. Processing the comments
You can see the status by clicking on the link.
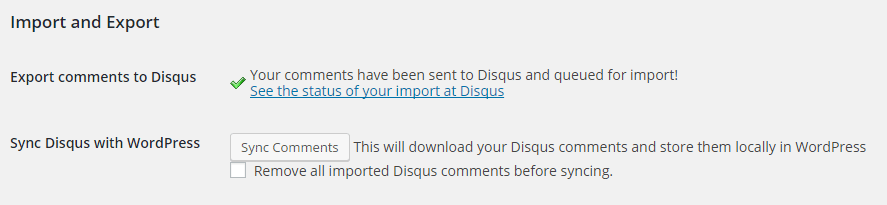
Figure 25. Successfully imported comments
This will open your Disqus Dashboard and from there you can moderate your existing comments, analyze engagement, see top comments and many other settings.
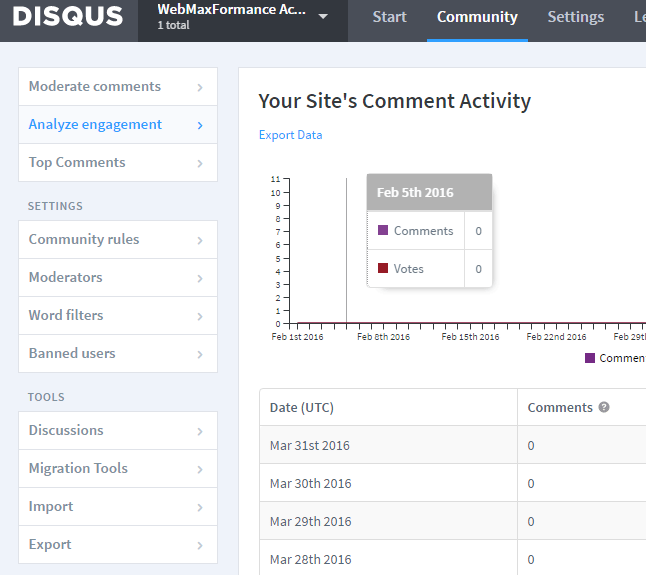
Figure 26. Disqus dashboard – analyze engagement
You still can manage the comments from your WordPress dashboard, but this way will be more efficient.
You are done configuring the Disqus commenting system. Excellent work for today.