WPBakery Page Builder (formerly Visual Composer) is a premium page builder that can be found on CodeCanyon. Its regular price is $46, but it’s totally worth the price. After the successful purchase, navigate to your CodeCanyon Download page and locate the plugin there. Download Installable WordPress file only.

Figure 1. Download the Visual Composer from CodeCanyon Download page
Now navigate to your WP Admin and install the plugin just like any other third party plugins by going to Plugins -> Add New -> Upload. Upload the downloaded file.

Figure 2. Upload the zip file of the Visual Composer
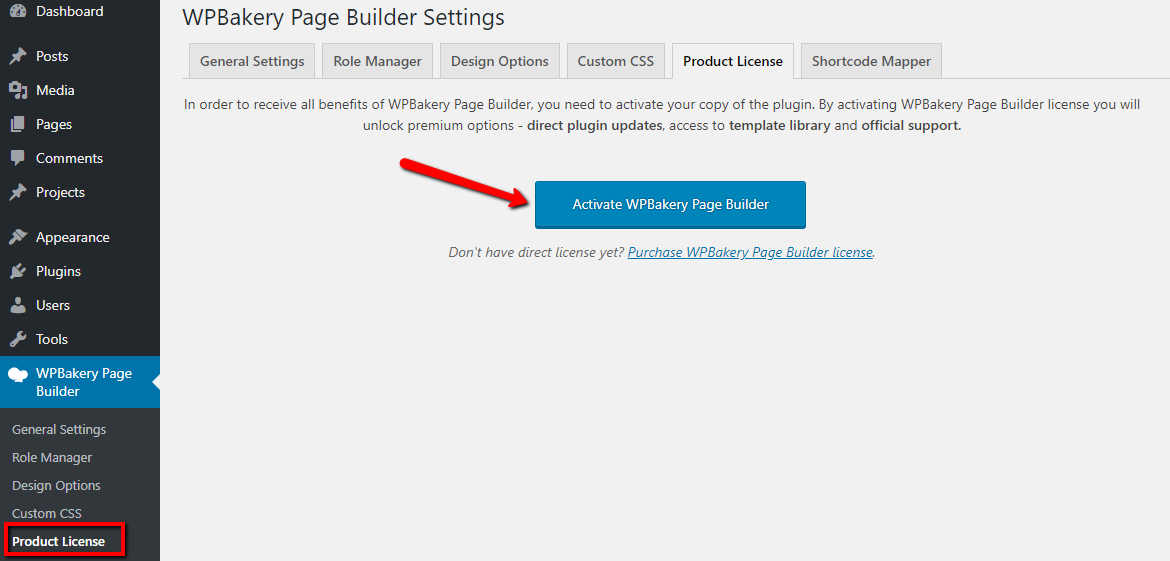
You don’t have to activate the plugin to work with it, but if you want to receive regular updates, you can make the activation by going to WP Admin -> WPBakery Page Builder -> Product License -> Activate WPBakery Page Builder.
Note: Make sure that your WP theme supports the Visual Composer. Or at least, make sure it supports the full-width layout for the page design. We at our Acadamy are working with the Divi theme from ElegantThemes because of its lightness, but you can use any modern theme you like (Recommended: a theme from ThemeForest for better implementation with Visual Composer).
Design The Perfect Landing Page In Visual Composer
Without going any further, we will jump right into the actual design.
First, you need to have some basic sketch or mockup of roughly how you want your landing page to look like. In our experience, the majority of our clients are using so-called Hybrid landing page meaning a video sales letter + the actual written sales letter.
So draw your idea on a piece of paper and we can start design it immediately. Follow our example:

Figure 3. Draw a mockup of your website
This is a very basic mockup for your landing page, but it consists of many important elements that you need to make the design in Visual Composer.
Start by creating a new page (Pages -> Add New) and name it Home. Click on the Backend editor.
Most of the themes will handle the navigation bar (logo and the menu), so you need to start creating the rest of the landing page in Visual Composer.
You can select one of the many layouts in Visual Composer (note that in Visual Composer, you don’t have landing page templates, only layouts), but we will create everything from scratch.
Visual Composer Row #1
Click on Add Element and choose Row.

Figure 4. Add new row
Rows in Visual Composer hold every other element (text, image, video…). According to the mockup, within the first row, we need to put the text on the left and the video on the right. But before doing so, we need to split the row into 2 parts. Find the button ![]() and split the row with the preferred layout. We will be using 2/3 + 1/3.
and split the row with the preferred layout. We will be using 2/3 + 1/3.

Figure 5. Splitting the row
Click on the left + button and add a Text Block. Here we will put our headline and main introduction.

Figure 6. Adding a Text Block
The Text Block in Visual Composer is the same as the standard WP editor. Here you can make all standard manipulations for the text, and in the Text part of the editor you can write CSS, or you can put shortcodes from other plugins.
When you are done with the Text Block, click on the small + sign below it. Now we will prepend the button to the Text Block.

Figure 7. Prepending new button to the Text Block
- Put the text for the button such as: Get Started
- Enter the link where this button will bring the users when clicked on it (this can be some external URL or link to an existing content of the page)
- Choose one of the styles for the button depending on your requirements: modern, classic, flat, outline, 3D, custom or outline custom. We will choose the 3D style for now.
- Select the shape of the button: rounded, square or round. We will choose Rounded.
- Select one of the predefined colors. If you want to use your own custom color in hex code, you need to select Style: Custom.
- Choose a size: mini, small, normal or large. Normal is good enough for us.
- Choose alignment for the button: inline, left, right or center.
- If you want the button to be as large as your row, check Set full-width button.
- Decide if you want to put an icon on your button (on the left or the right side). Select the icon library (usually Font Awesome) and choose your actual icon from the provided hundreds of icons.
- CSS animation is used when you want your element (button) to appear on the screen fading from the left, right, top, bottom, etc. (NOT RECOMMENDED).

Now on the right, we need to put our video. Depending on the type of video you have, you can implement the video in many different ways.
- The first method for entering your video -> If you have your video uploaded to Youtube, click on the big + button in the right column and search for Youtube. You can use the Video Player element for embedding YouTube/Vimeo Player. By using this method, you need to put only the URL of your video.

Figure 9. Putting the Video element in Visual Composer
- The second method for entering your video -> Get the embed code of your video (regardless of where it is uploaded).

- Add new Text Block element, and in the Text editor, put your embedded code.

Figure 10. Putting the embedded code of our video in Text Block
So by now you’ve entered the headline and the introduction text, you’ve added the button below, and you placed your video in the right column.
Now you may want to add a background to this whole row. Click on the Pencil button at the top of your row.

Figure 12. Editing the row
Go to Design Options tab and add a background of your choice (it can be a simple color or it can be an image).
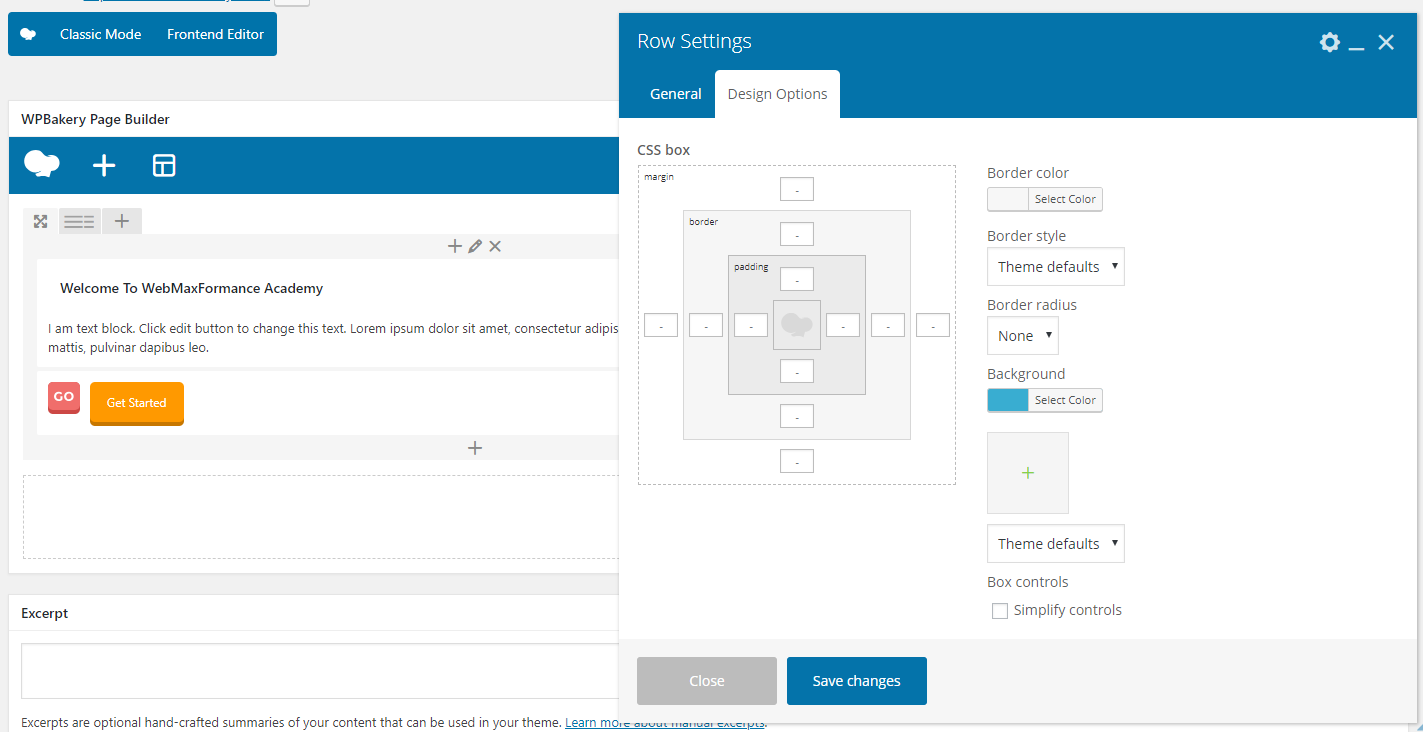
Figure 13. Adding a background to our row
If you want this row to be full-width, from General tab select Stretch row.
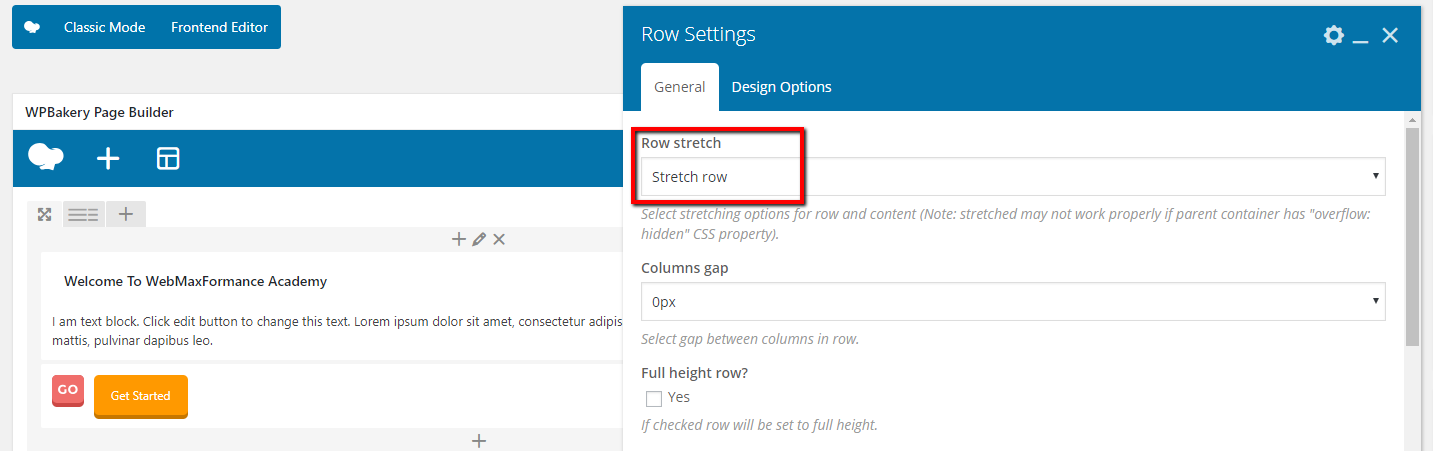
Also, you can use parallax type background for your row, by enabling the Parallax feature and specifying an image for the parallax (this can be done in the General tab).
And finally here’s our result on the frontend:

Figure 14. Our row on the frontend
Visual Composer Row #2
As you saw from the mockup, we have one divider row with the heading: Why Choosing WMF Academy.
- We will add another row on the big + button bellow, and we will insert a Text Block in it.
- Put the text in the Text Block editor and make the necessary formatting for the text (heading 2, center, color, etc.).
- Edit the row and choose a nice background color for it.

Figure 15. Adding the second row for the divider
Now you can even further enhance the row by giving borders, setting margins, paddings, etc.
- Edit your second row and go to the Design Options
- Select border color
- Border style: solid
- In the border top field put something like 10px

Figure 16. Enhancing the row with a top border
And here’s how it looks our second row on the frontend after the enhancement:

Figure 17. Visual Composer second row on the frontend
Visual Composer Row #3
Now we will add another row consisting of some main features of our site represented with icons.
- Add a new row.
- Add a Text Block and write some intro text if you want to give some explanation.
- Prepend a new row below the Text Block.
- Split it on how many columns you like (we will split it into three columns).
- In each column, place the icon image by choosing Single Image. Make sure in Image size to write full. For image alignment choose: Center. You can use the default icons in Visual Composer if you like, but we have our own predesigned image icons so we will use them as an ordinary image.
- Bellow each icon image, prepend a Text Block with an explanation about the feature.
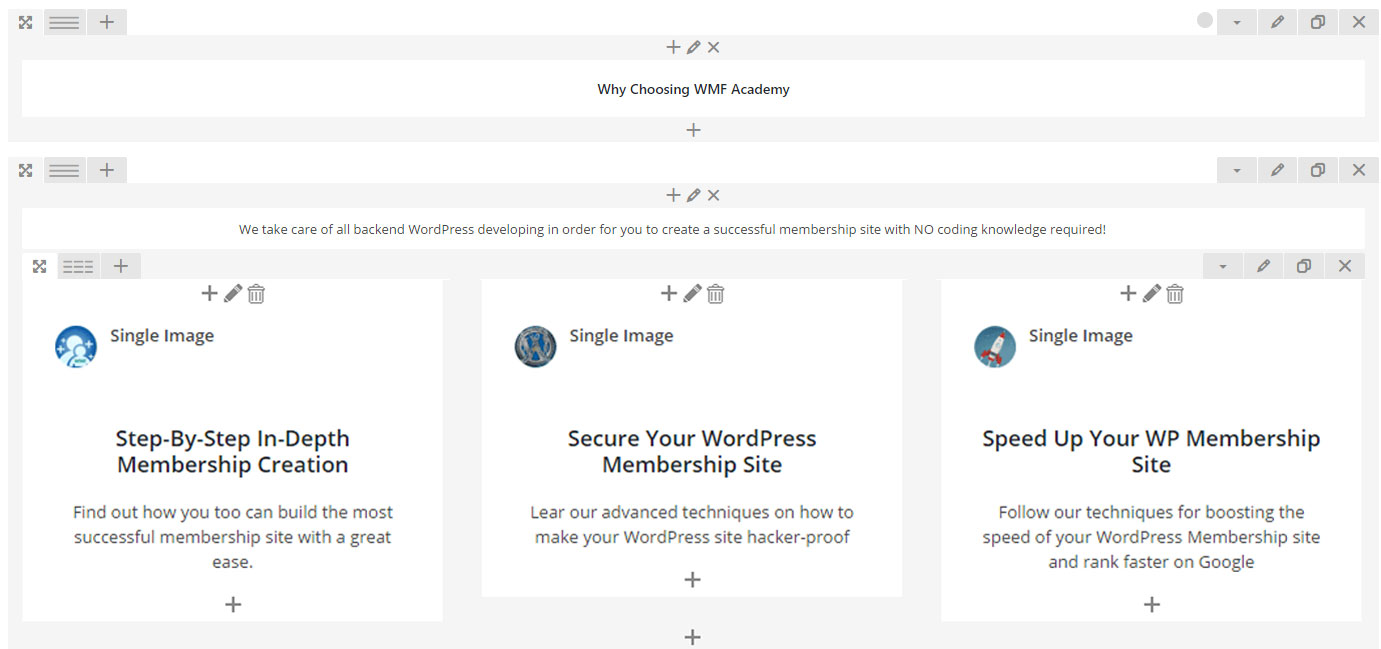
Figure 18. Creating our third row in Visual Composer
Here’s the outcome:

Figure 19. The frontend of our third row
Visual Composer Row #4
Now we will create another divider row in the same way as the previous one.
- Add a new Row.
- Put a Text Block with the heading in it such as Academy Features.
- Edit the whole row and choose some background to it.
- If you like, you can enhance the row by putting a top border just like we’ve done previously.

Figure 20. Creating our fourth row

Figure 21. Fourth-row frontend
Visual Composer Row #5 (Zig-Zag Technique Part 1)
At this point of our design stage, we will use the zig-zag technique where we will put the elements in a zig-zag manner:
- First, an Image on the left then a text on the right
- Second, a text on the left then an image on the right, etc.
Here’s what we mean…
- First, we will put one row, and we will split it in half.
- In the left column, we will put our Single Image element (Enter image size: full. You can add CSS animation to this image to appear from left to right). Instead of an image, here you can use video as well.
- On the right, we will put Text Block with the explanation for this feature
Visual Composer Row #6 (Zig-Zag Technique Part 2)
- Add another row and split it in half
- In the left column, this time, put the Text Block element.
- On the right put the Single Image element (Enter image size: full. Add CSS animation if you like, animating from right to the left)
And here’s how it looks our backend outcome:

Figure 22. Adding our 5th and 6th row using the zig-zag technique
And the frontend:
Figure 23. The frontend representation of our zig-zag technique
Continue doing this until you’ve listed all of your features. Put as many dividers and features as you like, the procedure is the same.
Also, instead of using the Single Image element, you can put Text Block and upload your image there.
Use your creativity and imagination, and in Visual Composer, you can achieve almost everything.
Adding Opt-In Box In Visual Composer
Visual Composer doesn’t have specific elements for using predefined opt-in boxes as a signup form. One way of using an opt-in box in Visual Composer is to get the generated code of your autoresponder and to put it in the Text Block.
Another way is to use third party plugin for designing the opt-ins such as Optin Forms. When you are done designing the opt-in box in this plugin, you can just get the shortcode that will be generated, and you can put it in Text Block in Visual Composer.
Install the plugin through the WP Admin -> Plugins -> Add new -> Search for Optin Forms.
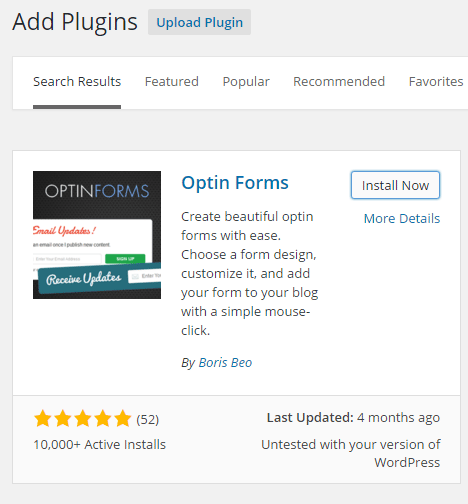
Figure 24. Using the Optin Forms plugin for designing the opt-in
When you go to your WP Admin -> Optin Forms -> Email Solution tab, you can see that this plugin supports the popular autoresponders: Aweber, iContact, MailChimp, GetResponde, MadMimi and Interspire Email Marketer. You can set the MailChimp autoresponder because it’s FREE (to 2500 subscribers). Put the credentials (you have the documentation for each autoresponder when you click on the ? button) and go to the designing part in the Form tab.
This plugin has five templates that you can customize according to your need.

Figure 25. Designing our opt-in form
In Style Your Form you can make any designing changes you want on your opt-in, starting from the headline, subheadline, fields, button, etc.
In Form Options, you can hide the specific field or label, and you can put your custom CSS here as well.
In Form Functionality, you can choose if you want to Open form submission in a new window (usually this is unchecked)
In Form Placement, you can choose where you want your form to appear (on every post/page, on a specific post/page or to use the shortcode). If you don’t like to use this opt-in box on every post/page, you can copy the [optinform] shortcode and put it in the Text Widget of Visual Composer.

Figure 26. Using the Optin Forms shortcode in Text Block in Visual Composer
And here’s how it would look like on the frontend:

Figure 28. Opt-in box frontend
Visual Composer For Advanced Users
There is a time when some element needs to be customized with some advanced settings that are beyond the standard settings from Visual Composer. For that purpose, you need to add a class (just to the particular element) or id (and class name to the whole row) to your element and use a specific CSS code for customization to that element.
Here’s what we meant…
Edit the row (or the element) and add the id or class to that row/element.

Figure 29. Adding ID to the row
Next, locate the gear button at the top of the Visual Composer editor.
Here you can put all the custom CSS code for your elements with the previously given class name or id.

Figure 30. Adding the custom CSS in Visual Composer
And that’s pretty much it, concerning designing your landing page. We’ve only shown you a portion of the design, but by now you know how to design everything else.
Why We Like Visual Composer
Mainly because of its countless features and unlimited possibilities. Some of our favorite features include:
- DRAG AND DROP: With visual composer drag and drop, it is easy to create pages of any type and also to post any content of your choice with ease.
- CONTROL OVER YOUR DESIGN: take full control over your designs and display options, see how your content displays immediately with Visual Composer on a mobile platform and a desktop.
- BACKEND/ FRONTEND EDITOR: if you wish to work with either backend or frontend editor, visual composer still allows original content with essential functions.
- EXTENDABLE: you can create a third party developer with visual composer.
- POST TYPE: with Visual Composer, you can work with many post types (including custom post types)
- SEO FRIENDLY: for people who writes or want to post articles and other contents, Visual Composer is fully loaded with SEO plugins making it easy to work with.
- GRID BUILDER: for people who don’t like predefine templates, pages and displaying post, you can create your own with visual composer grid builder.
- BACKGROUND ROWS: with Visual Composer background, you can add or create a layout with parallax style. You can also work with your columns by setting gaps between them or to merge them together. You can work on your YouTube video by inserting them or adding them to your background row to make everything looks dynamic.
- IMAGE TRANSFORMATION: you can retouch your image to any style, reposition your image style to a well professional look with image filter.
There are other features of Visual Composer like code orientation, template, control manager, free update, and so on.
Final Words
The usage of Visual Composer for designing your landing page is our TOP recommendation. We’ve tried many other page builders, but it seems the Visual Composer triumphs them all. It has a truly flexible interface and with just a little creativity and common sense and you can create almost everything.
Now you can duplicate other designs from other websites and improve them to your requirements. Also, after some time you can even offer designing services to other companies and freelancing sites (HTML to WordPress, PSD to WordPress services, etc.) With Visual Composer, you can even build a profitable designing business.
The possibilities are limitless. Buy this builder today and have fun with it.