
AddToAny Plugin Installation
Now you are ready to install the AddToAny plugin. Open your WP Dashboard and navigate to Plugins -> Add New -> Search for AddToAny. Install and activate the plugin.

Figure 1. Installing the AddToAny plugin
AddToAny Standard Configurations
Now you need to make the preferred configurations for your social sharing buttons by going to your WP Admin -> Settings -> AddToAny.

Figure 2. Standard configurations in AddToAny
Start by choosing the icon size. Usually, the Large icons are most suited. Next, there are Standalone buttons. This is how the buttons will look like under your posts. Under some buttons, you will notice a small arrow. By pressing on it, you can choose to show the number of shares if you want. Note that not every button has an option for showing the count of shares (like Twitter).

Figure 3. Show number of shares
You can change the order of the buttons with drag and drop. Now, by pressing on the Add/Remove Services, you can disable a button or add a new one from the hundreds of services. You can add/remove service by selecting/deselecting the chosen service.
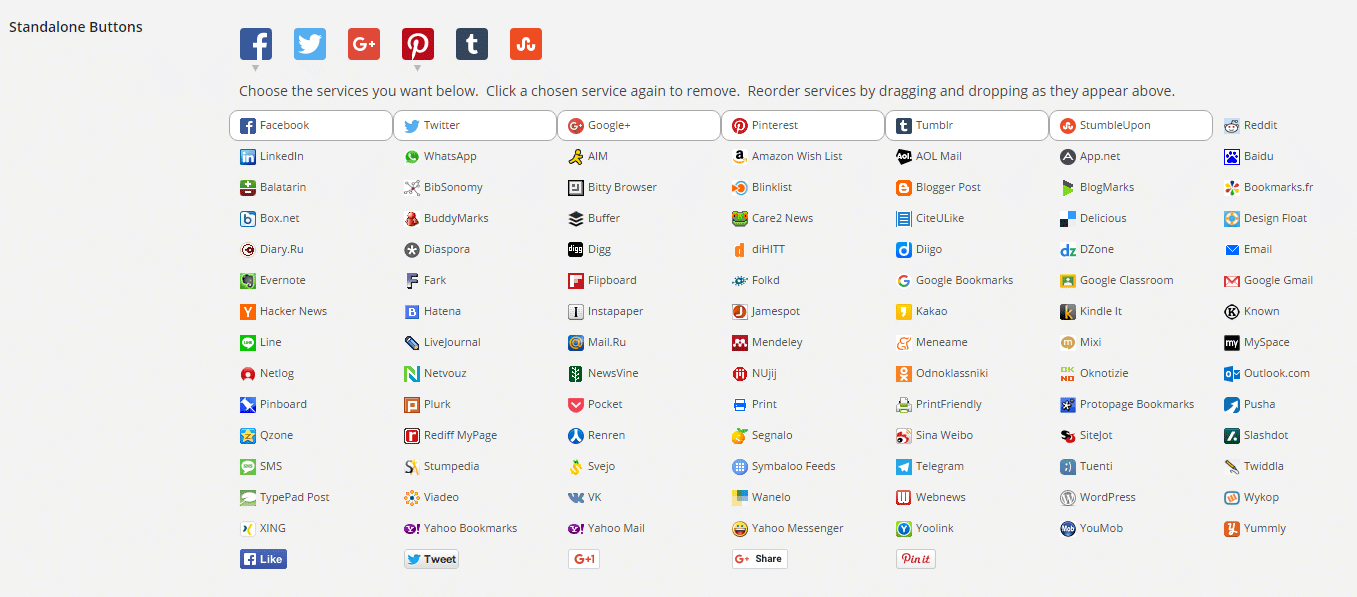
Figure 4. All sharing services in AddToAny
In the last row, you can notice the buttons for direct liking, tweeting, pinning, Instead of the buttons for classic sharing, you can use those buttons for a different kind of sharing with just one click.

Figure 5. Buttons for 1-click sharing
If you want, you can use those buttons for a more subtle way of sharing, and here’s how: For example, you can choose the Like, Tweet, and G+1 button, under Icon Size, choose Custom 20px (for perfect alignment of all buttons) and select the Universal Button with Show count selected like on Figure 9. Click on Save Changes at the bottom.
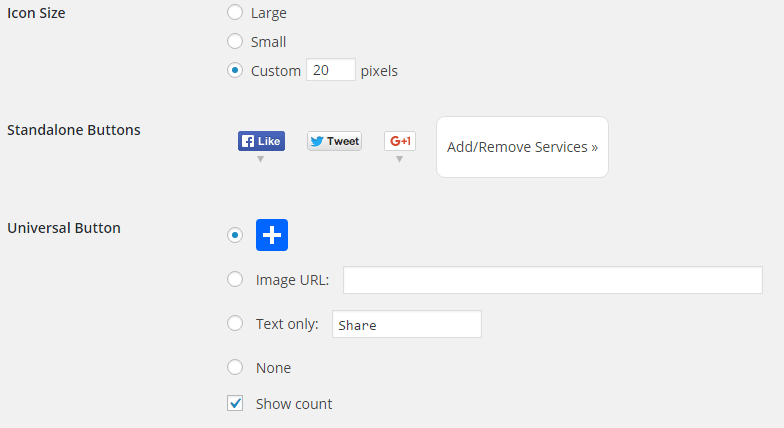
Figure 6. Customize 1-click sharing buttons
Here’s how it would look like on the frontend:
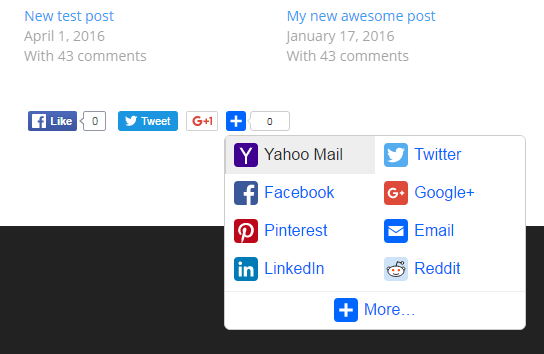
Figure 7. Buttons for 1-click sharing on the frontend with the universal button clicked
The buttons will appear under your post/page and under the related posts. Now, let’s explain the other features. The Universal Button is for allowing your users to choose additional services for sharing that are not visually present in your listed buttons. So for example, if you choose to include only buttons for Facebook, Twitter and Google Plus, your users can also choose to share your post/page on LinkedIn by finding the LinkedIn service when clicked Universal Button (Figure 10). You can use the standard Universal Button with blue icon (recommended), but you can further customize the button by:
- Using different image (put your image URL in this format -> https://mysite.com/myimage.jpg)
- Using only text (without the image)
- None (not using this button at all)
- Showing count (showing the number of shares on other social services)
Sharing Header is the text above the buttons. You can get creative here by writing some header like: Spread the love Placement is for positioning your social sharing buttons. The features here are self-explanatory. It’s up to you where you want to place your social sharing buttons (top of the article, the bottom of the article, or both). Also, from here you can choose on kind of what posts or pages you want your buttons to be displayed.
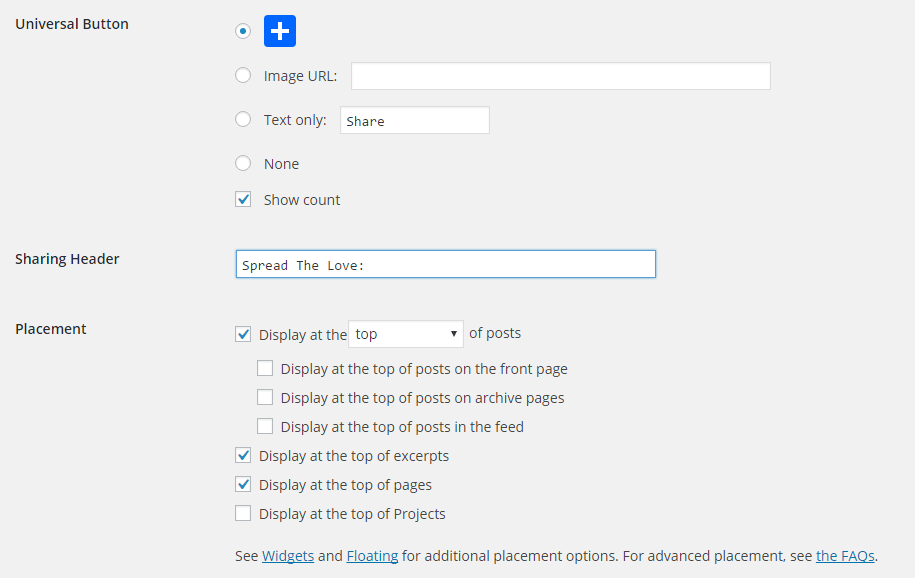
Figure 8. Universal Button, header, and placement
Next features are more advanced, and they are good by their defaults, but we will explain them as well. Under Menu Options, you can choose to show the universal button on click (the default is on hover). The other option is to show the title of the page on the universal share menu. By pressing on the Open Menu Styler, you can change the colors of the universal sharing menu. The Styler will generate code that needs to be put in the Additional JavaScript field. Additional CSS field is for putting custom CSS values to the default CSS selectors of the AddToAny sharing buttons. Example:
#a2apage_dropdown{
background-color:#0000ff;
}
Lastly, in Advanced Options, you can use custom images for your sharing buttons, you can set their width and height, you can choose to cache the AddToAny buttons, etc.
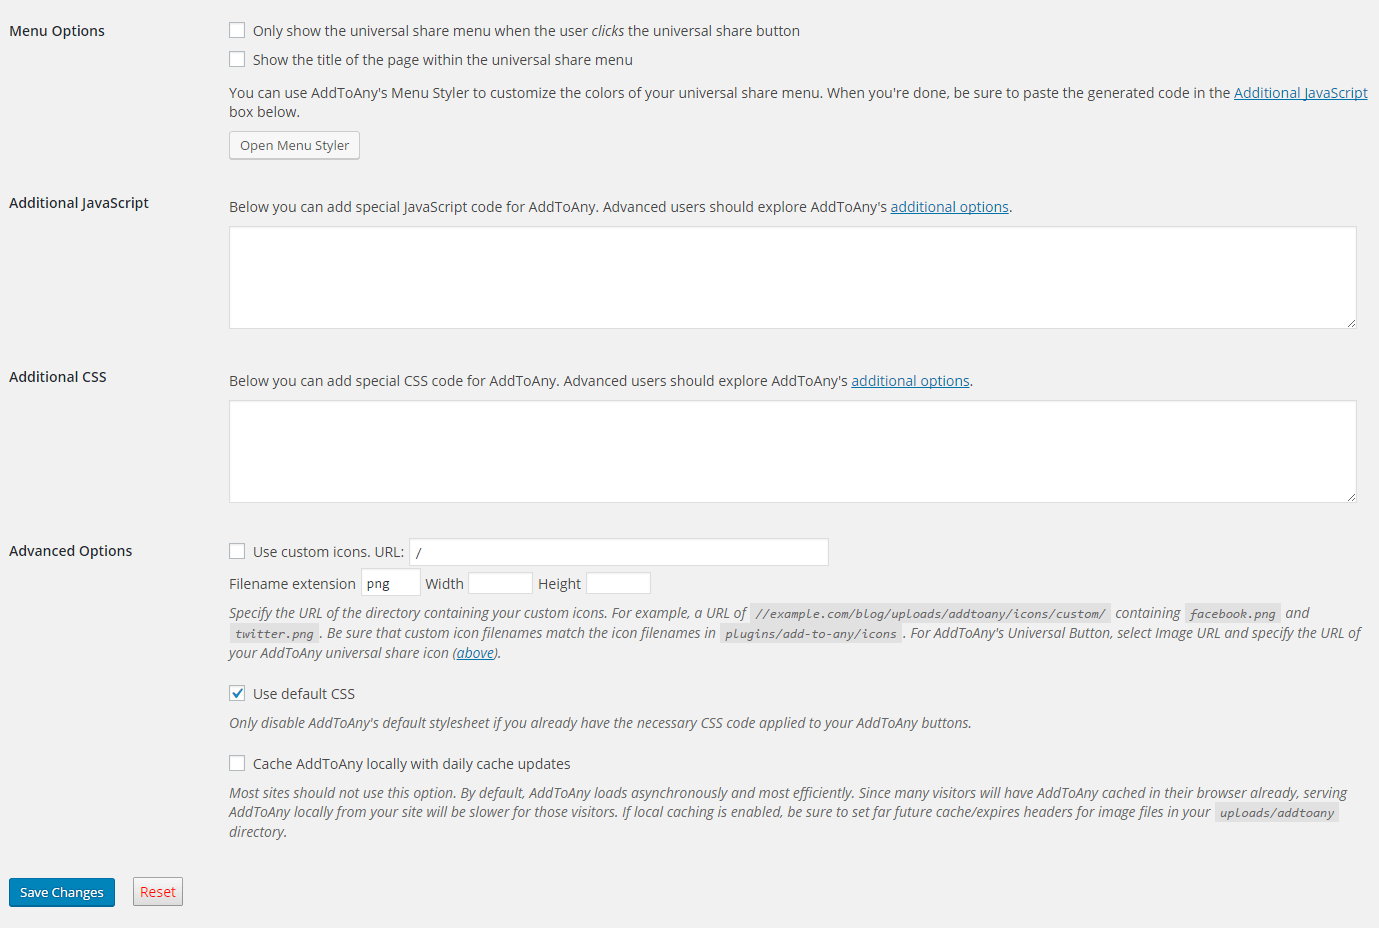
Figure 9. Advanced settings in AddToAny
When you are done configuring the buttons, you need to click on Save Changes.
AddToAny Floating Configurations
In the Floating tab, you can choose to include floating bar with the sharing buttons on the left or the right of your posts. Here’s how to configure it:
Vertical Floating Bar
From your WP Admin -> Settings -> AddToAny -> Floating tab you can select on which side you want your floating bar to appear. The bar will stay fixed on one position when users scroll down your post or page. Note: The 1-click sharing buttons (Like, Tweet, Pin.) that we’ve configured previously, WON’T work as floating bar! Now, start by choosing the Placement of the vertical buttons (left docked or right docked). For Responsiveness, it’s a good idea the floating bar to only be displayed when the screen is larger than 980px. For smaller screens (tablets and phones we will use horizontal buttons). Experiment with the Position and the Offset of the floating bar (on each theme is different). Put dimensions that look most symmetrical to you.

Figure 10. Vertical buttons configuration
And here’s the result on the frontend:

Figure 11. AddToAny floating bar – frontend
Now we will configure the Horizontal floating bar.
Horizontal Floating Bar
The whole idea of using the horizontal buttons is for appearing on smaller screens. When someone with phone or tablet visit your post or page, the floating bar can still appear (but horizontally). Now, start by choosing the Placement of the horizontal buttons (left docked or right docked). Check the Responsiveness checkbox and play with the Position and Offset until you place the horizontal bar correctly.

Figure 12. Customizing the Horizontal Buttons
Now open some post and resize the window of your browser. You will notice how the horizontal bar will appear.

Figure 13. Horizontal floating bar frontend – small screen
Congratulations, now you have floating bar on your posts and pages.
Exclude The Sharing Bar From Specific Page/Post
Not every post or page you have will need to include the sharing buttons. For example, the core pages (Contact Us, Privacy Policy, Terms and Conditions) don’t need sharing and here’s how to exclude the sharing bar on particular post or page. Navigate to your WP Admin -> Pages -> All Pages (or Posts -> All Posts). Find the particular post or page from where you want to exclude the sharing buttons and click on Edit.

Figure 17. Editing the core page
Now scroll below and uncheck the Show sharing buttons.

Figure 14. Uncheck the Show sharing buttons
Update your page.
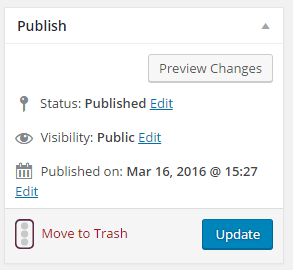
Figure 15. Update your page
Now your page won’t have any sharing buttons. With that being said, we conclude our lesson for AddToAny sharing buttons. Excellent job!

