
You can have the best site in the world, but unless you know how well it is performing on the search engines and what kind of traffic it attracts, you are missing the whole point. In today’s lesson, we will tell you how to configure the essential tool for tracking that every site needs to have – Google Analytics. Later in this lesson, we will also describe in details how to submit your website to Google Search Console (formerly Google Webmasters Tool), how to add a sitemap to your site and how to submit it to Google Search Console. In the end, we will conclude this lesson by showing how to connect your Google Analytics account with Google Search Console.
What Is Google Analytics?
Google Analytics makes an analysis of qualitative and quantitative data gathered from your website for you to improve the user experience. That data needs to be segmented (by day, device, marketing channel, geography, customer characteristics – repeat customers and first-time customers). That’s where the Google Analytics platform comes in. Now let’s see how to implement the Google Analytics tracking code to your website.
Installing A Google Analytics To Your Website
First, you need to create an account at Google Analytics with your Gmail account.
- Make sure you are logged in with your primary Gmail account (on one Gmail account you can connect up to 100 Google Analytic accounts)
- Now open the Google Analytics website.
- On the right click on SIGN IN and choose Google Analytics.

Figure 1. Sign into Google Analytics
- If this is your first time to use Google Analytics with your Gmail account, you need to Sign up (later we will show you how to set another Google Analytics if you have existing one with different website)

Figure 2. Sign up at Google Analytics
Now enter your website info following our example.
- First, enter the name for your Google Analytics.
- Put the name of your website.
- Enter the website URL (without https://)
- Choose your Industry Category from the provided categories.
- Reporting time is usually properly set by default.
- When you are done, click on Get Tracking ID
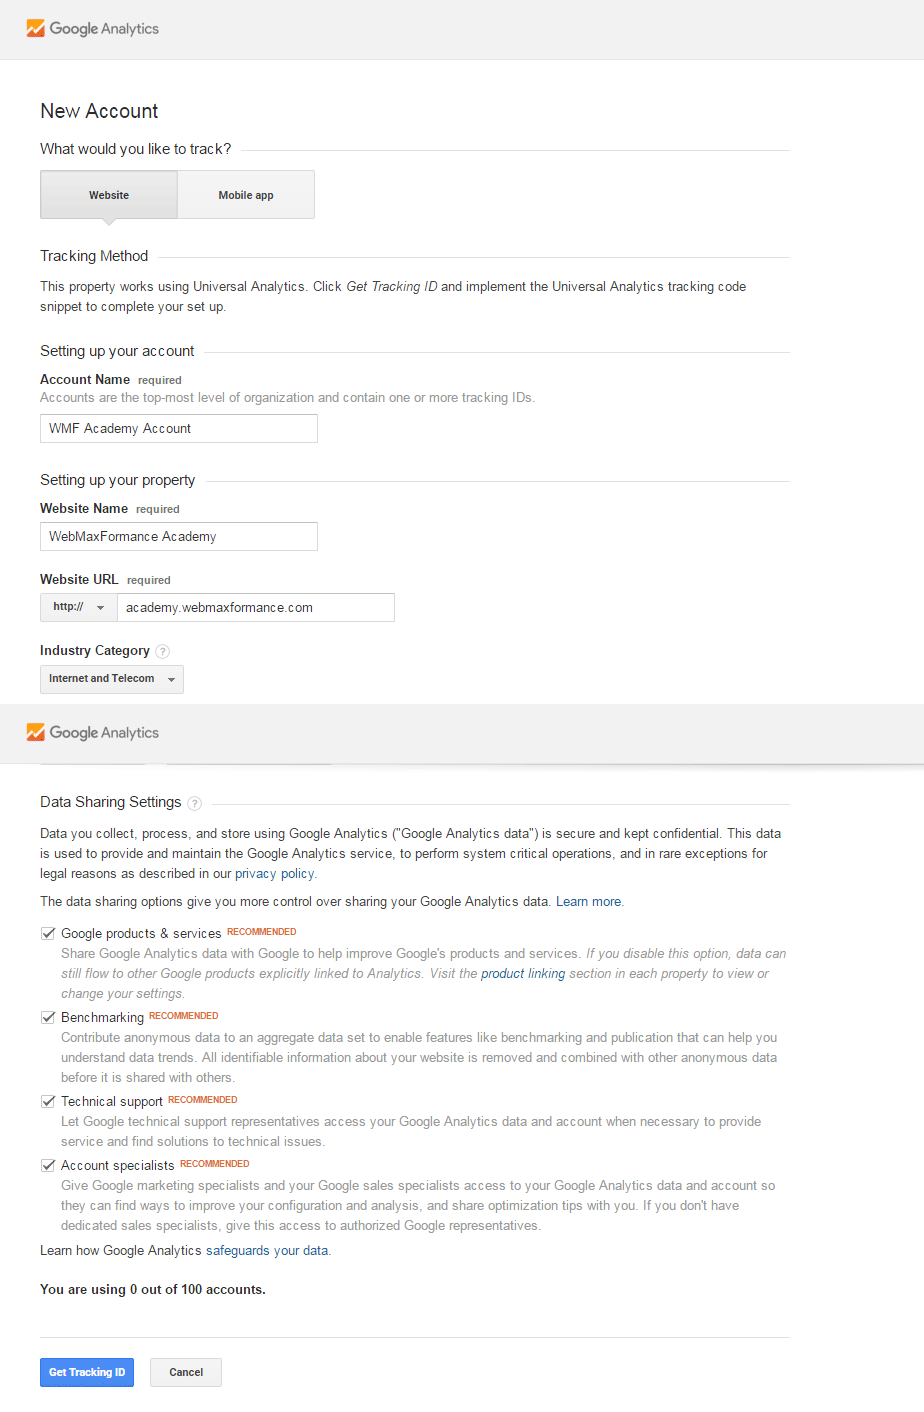
Figure 3. Put your website info
- Click on I Accept.
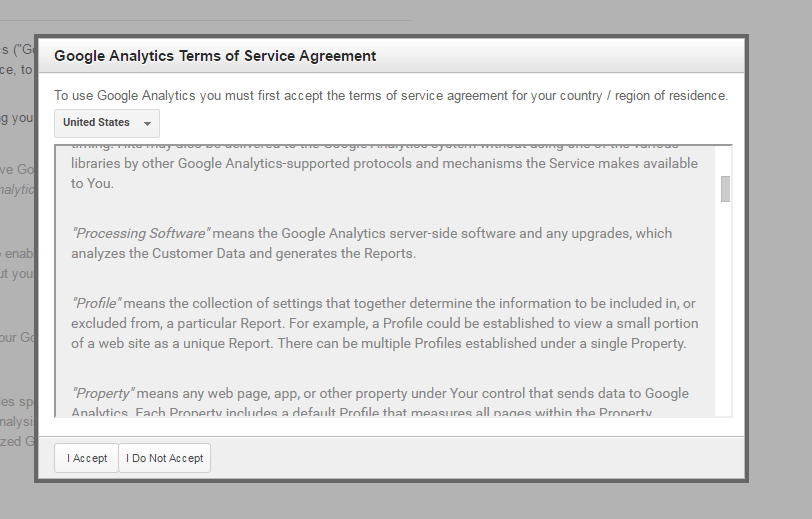
Figure 4. Accept the Google Analytics Terms
Now Google Analytics has set your account and has generated the tracking code. You don’t need to save this code because we will use a plugin for automatic integration.
Figure 5. Get Google Analytics Tracking code
Now let’s see how to add another account on existing Google Analytics account (skip this step if you’ve already created your Google Analytics account)
***************************
- Open your Google Analytics Dashboard and open the Admin.
- Under ACCOUNT column, click on the dropdown and select Create new account.
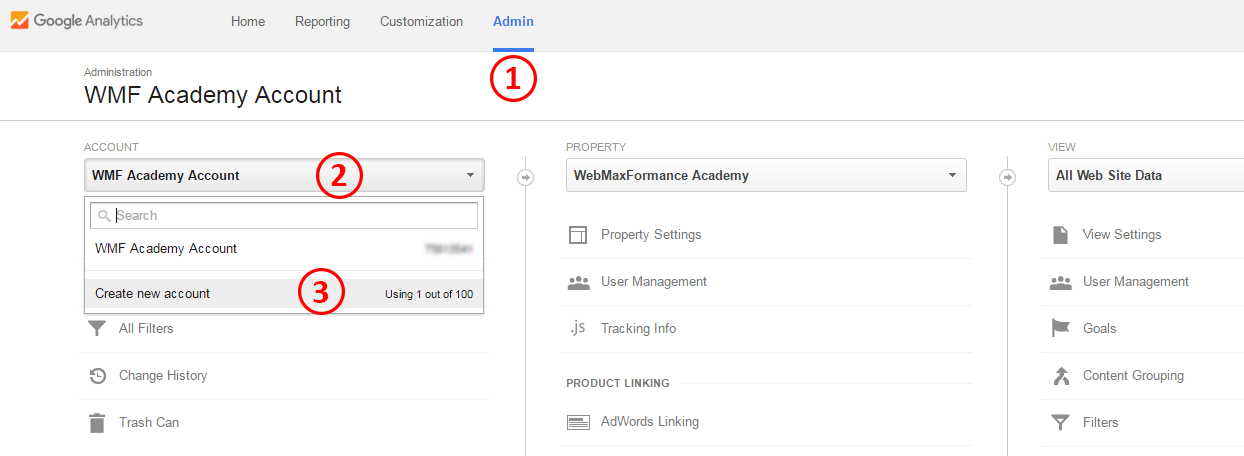
- Follow the procedure from Figure 3.
***************************
Now you need to install Google Analytics by MonsterInsights plugin (formerly Google Analytics by Yoast) for easier implementation of the tracking code. Open your WordPress dashboard and go to Plugins -> Add New -> Search for Google Analytics by MonsterInsights. Install and activate the plugin.
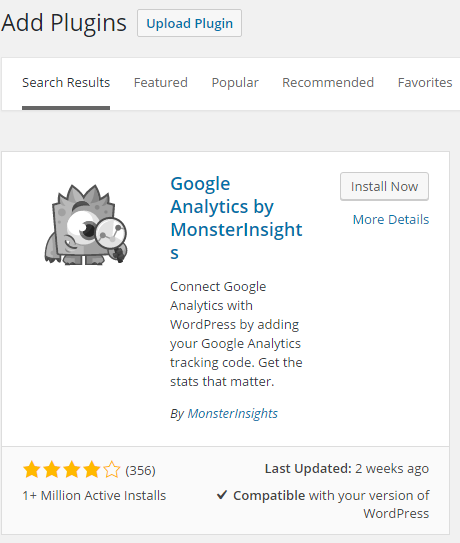
Figure 6. Connecting Google Analytics with WordPress
Now from your WP dashboard open Insights -> Settings. Click on Authenticate with your Google account.
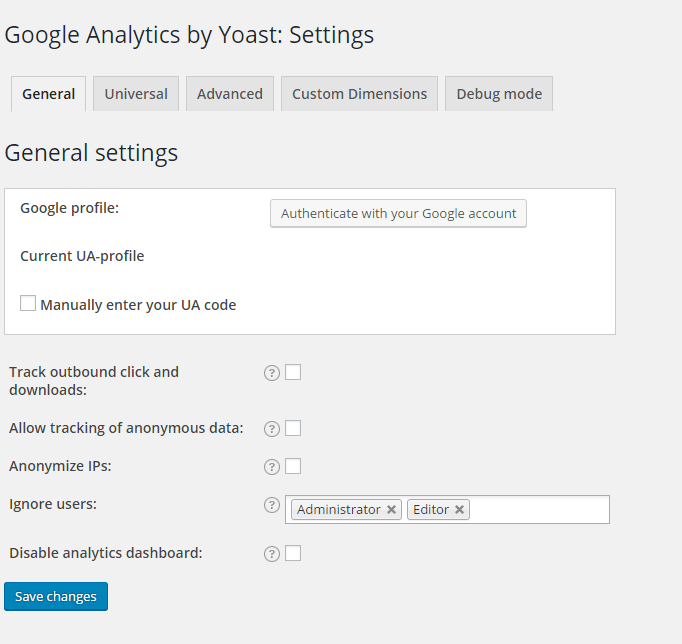
Figure 7. Authenticate your WordPress site with the Google Analytics account
Click Allow.
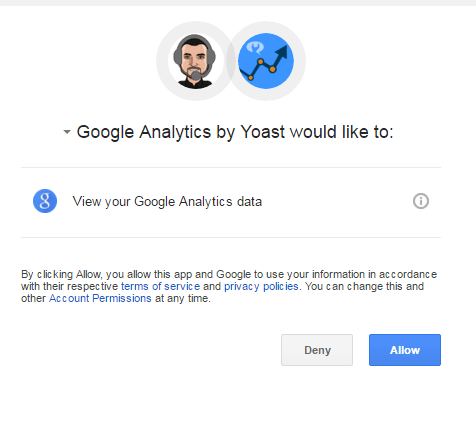
Figure 8. Allow the authentication
Get the auth code and put it in the corresponding field. Click on Save authentication code.
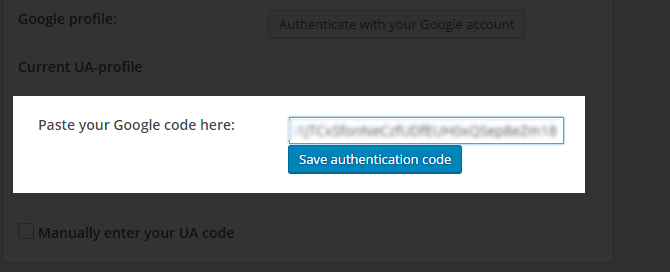
Figure 9. Use the Google Analytics auth code
Select your analytics profile. Below, you can see that the analytics will ignore the traffic from Administrators and Editors, which is a really nice feature. Click on Save Changes.
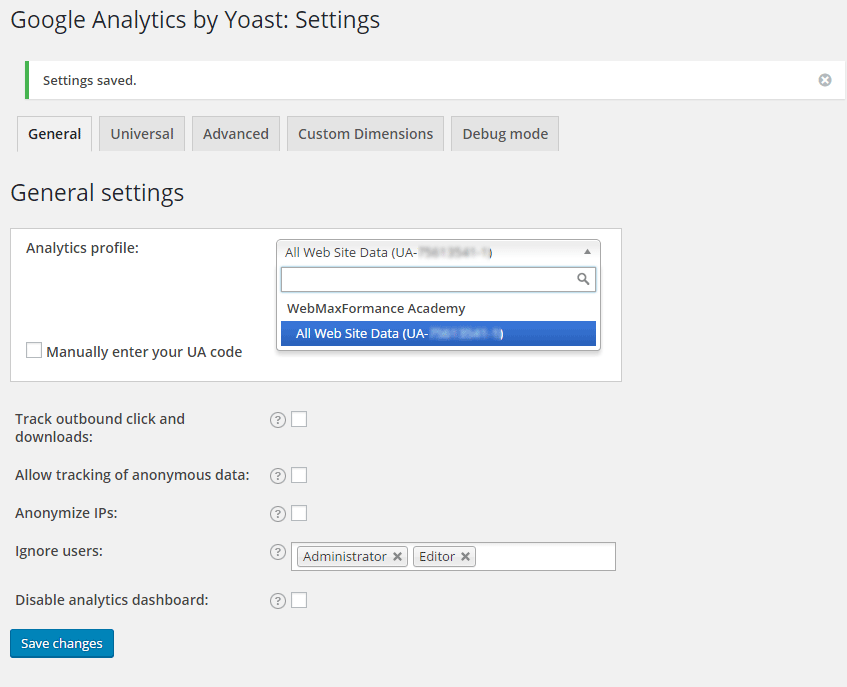
Figure 10. Select the analytics profile
Now from your WP panel -> Analytics -> Dashboard you can see how well your site is performing for the most important data segmentations (sessions, bounce rate, traffic sources, popular pages, countries). Congratulations! Your Google Analytics is properly configured on your WP site. After a while, you will start gathering data about the traffic on your website. If you don’t know what to do with that data concerning the improvement of your website, you should contact us; we will try our best to give you the best possible recommendations for improving your conversions. Now it’s time to submit your website to Google Webmasters Tools (Google Search Console)
Submitting Your WP Site To Google Search Console (Google Webmasters Tools)
You also need to ensure the indexability and crawlability of your website for possible errors. For that purpose, we will use the Google Search Console. According to Google: Google Search Console is a free service offered by Google that helps you monitor and maintain your site’s presence in Google Search results. You don’t have to sign up for Search Console for your site to be included in Google’s search results, but doing so can help you understand how Google views your site and optimize its performance in search results.
Why use Search Console?
Monitor your site’s performance in Google Search results:
- Make sure that Google can access your content
- Submit new content for crawling and remove content you don’t want to show in search results
- Create and monitor content that delivers visually engaging search results
- Maintain your site with minimal disruption to search performance
- Monitor and resolve malware or spam issues so your site stays clean
Source: https://support.google.com/webmasters/answer/4559176?hl=en
Now let’s see how to configure it:
- Open the Google Search Console
- Add new property (add your site WITHOUT the www in front)

Figure 11. Add new property in Google Search Console WITHOUT www prefix
Now you need to verify your property. We will show you the recommended method for verification that requires uploading the HTML verification file through the File Manager. Alternatively, you can use FTP client (FileZilla) to achieve the same thing.
- Download the HTML verification file and save it on your desktop (but don’t close this tab yet)
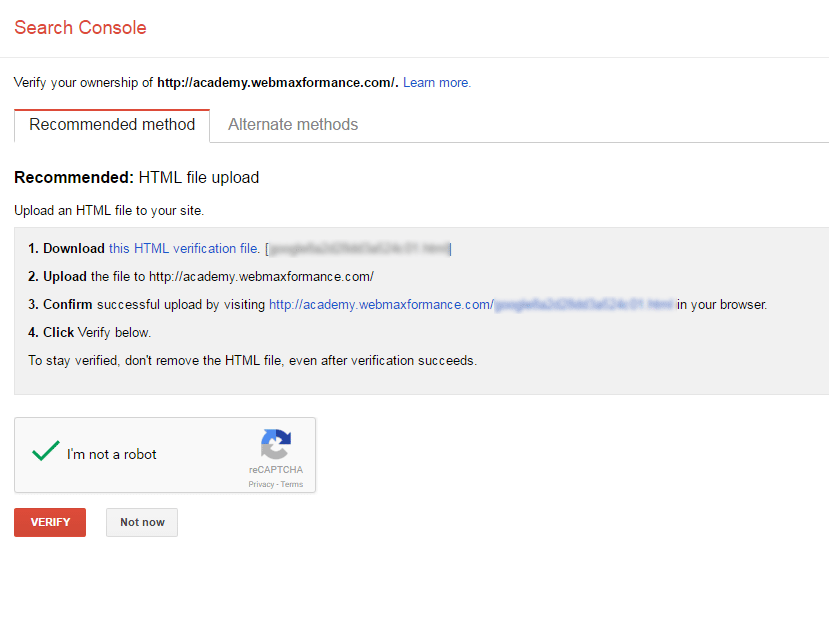
Figure 12. Verify property in Google Search Console
- Open your cPanel and find File Manager
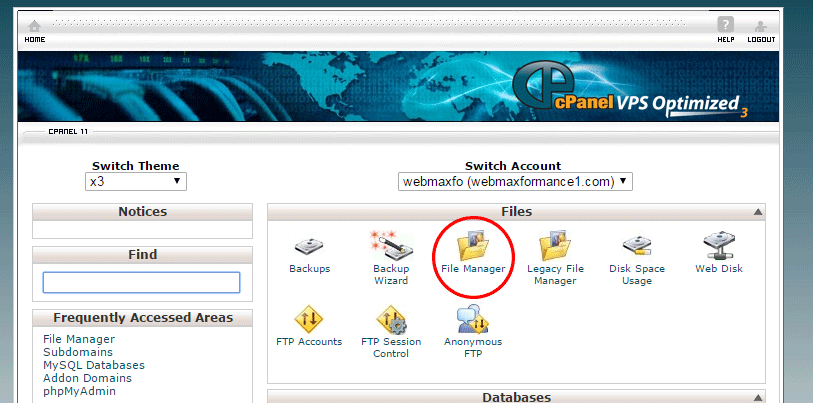
Figure 13. Open File Manager from your cPanel
- Find the root of your domain (Example: public_html -> academy) and click on Upload.
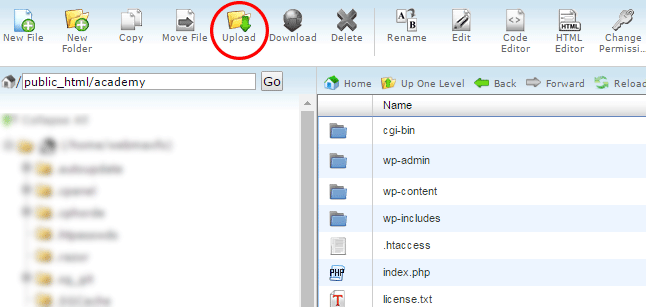
Figure 14. Upload verification file
- Click on the Choose File button and locate the verification file on your Desktop.
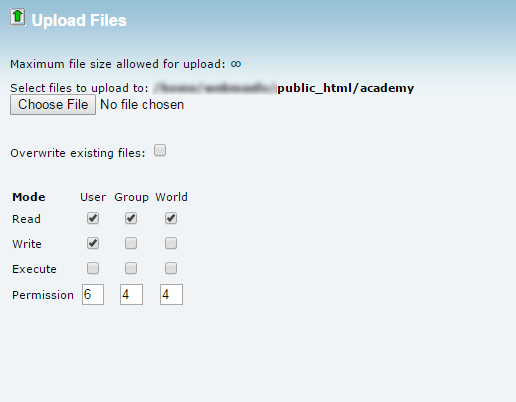
Figure 15. Browse for the verification file
Now return to the opened tab of Google Search Console and click on the link (in step 3) to confirm the successful upload.
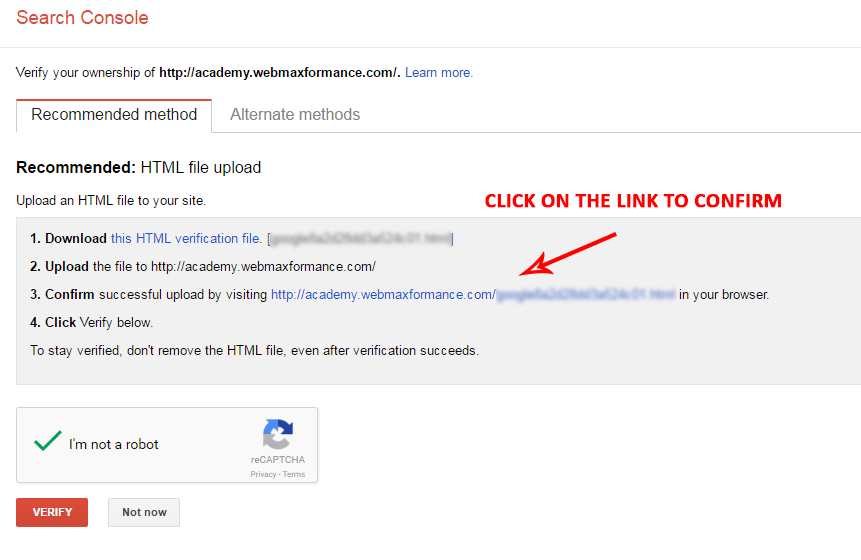
Figure 16. Click on the link to confirm the successful upload
If there appears something like on figure below, your upload is successful.

Figure 17. Successful verification
Now return to the previous tab and click on Verify.
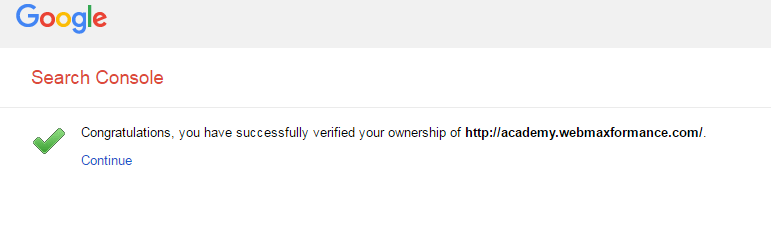
Figure 18. Congratulations for successful verification
Now we need to add a second property WITH www prefix. From the Google Search Console, click on the Search Console located at the top.
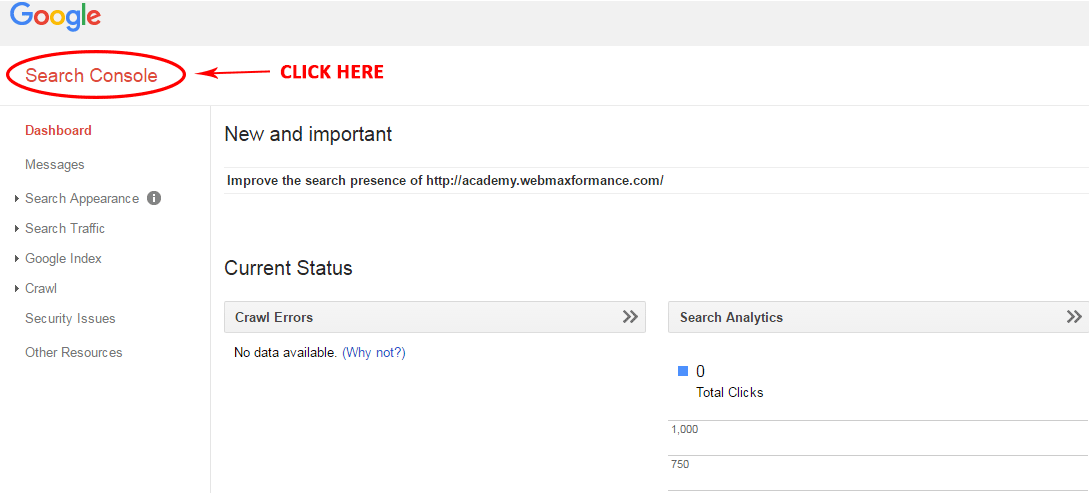
Figure 19. Google Search Dashboard
Click on ADD A PROPERTY.

Figure 20. Adding a new property
Now add a new property WITH www prefix.
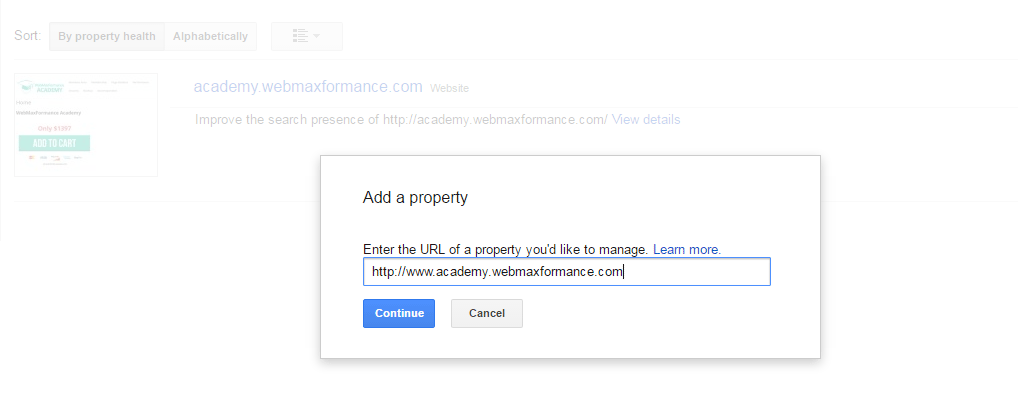
Figure 21. Add new property with www prefix
Here just click on Verify, you don’t need to download and upload the verification file.
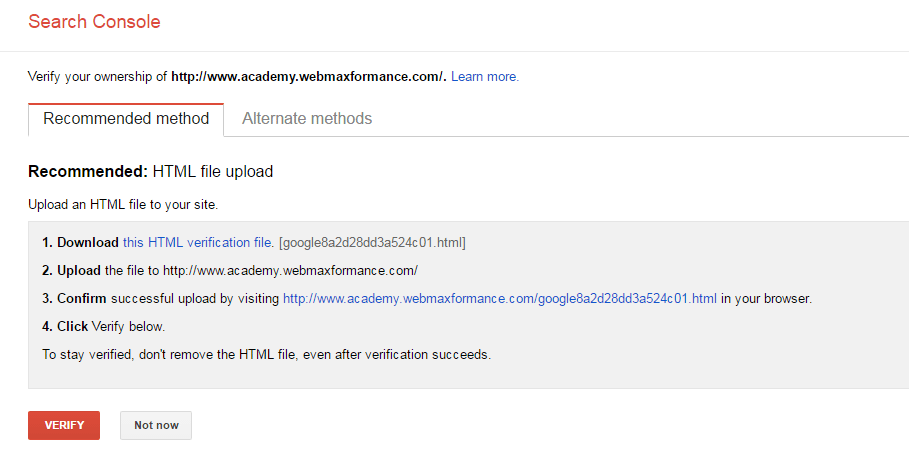
Figure 22. Verify second property
Excellent job! Now you need to connect the non-www property with your WordPress site.
Connect non-www property with your WP site
Log in to your WordPress Dashboard and navigate to SEO -> Search Console (Assuming you already have your YOAST SEO plugin installed). Click on Get Google Authorization Code.
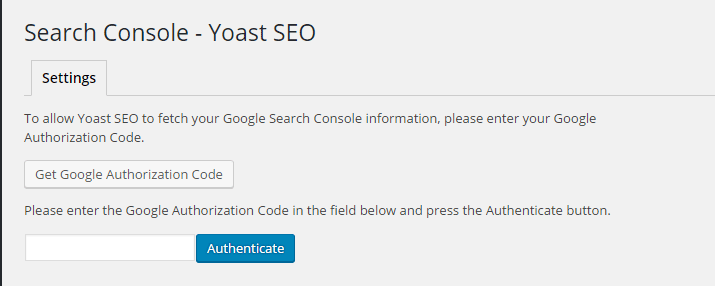
Figure 23. Connect your Google Search Console with Yoast SEO plugin
Click on Allow and get the code that will be generated. Put that code in the corresponding field and click on Authenticate.
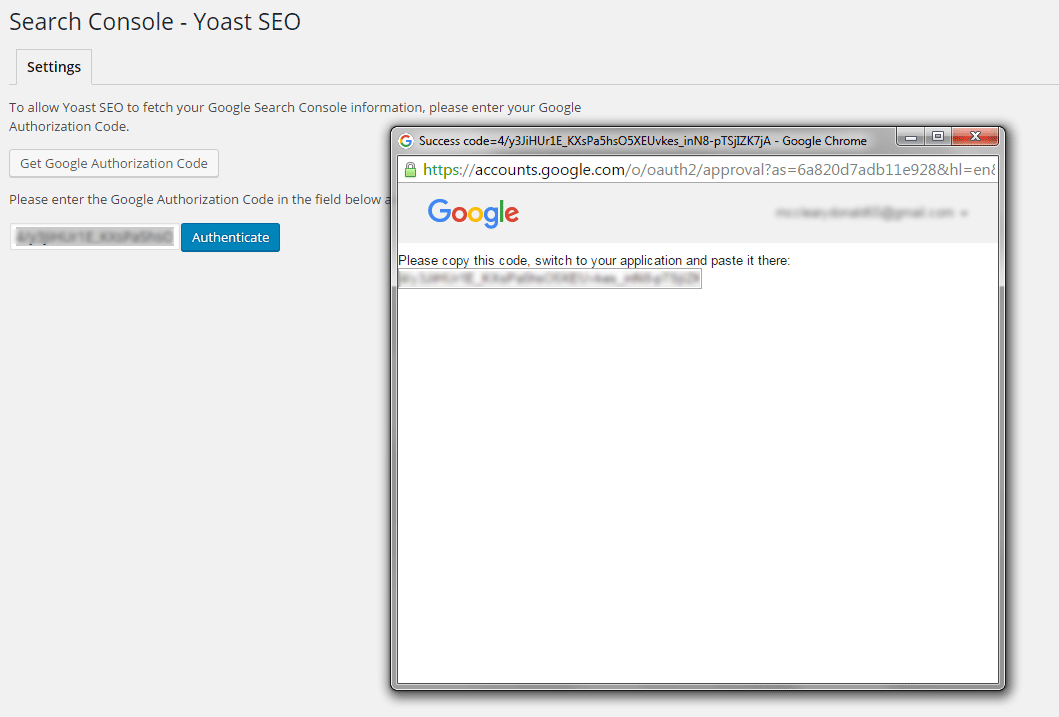
Figure 24. Copy – paste the generated code
Now, what is REALLY important is to choose the non-www property here. Once again, select the domain WITHOUT the www prefix. Click on Save Profile.
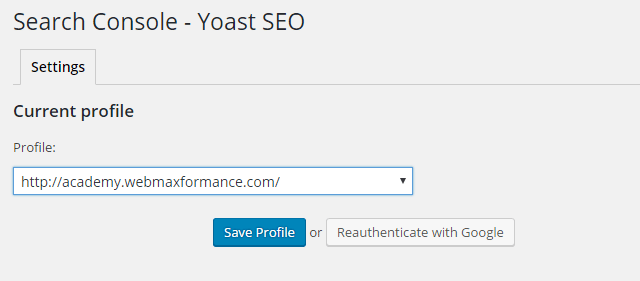
Figure 25. Choose NON-WWW property (domain WITHOUT www)
You are done for connecting your WP site with the Google Search Console. Now remains one more step for faster indexing your site and ensuring complete functionality of the Google Search Console.
Creating Sitemap And Submitting To Google Search Engines
According to Wikipedia: The Sitemaps protocol allows a webmaster to inform search engines about URLs on a website that are available for crawling. A Sitemap is an XML file that lists the URLs for a site. It allows webmasters to include additional information about each URL: when it was last updated, how often it changes, and how important it is in relation to other URLs on the site. This allows search engines to crawl the site more intelligently. Source:https://en.wikipedia.org/wiki/Sitemaps
So in other words, having a sitemap is crucial for ensuring smooth crawlability of your website. Next, we will show you how to create the sitemap of your website easily and submit to Google Search Console. Open your WP Dashboard and navigate to SEO -> XML Sitemaps. Click on Enabled and Save Changes.
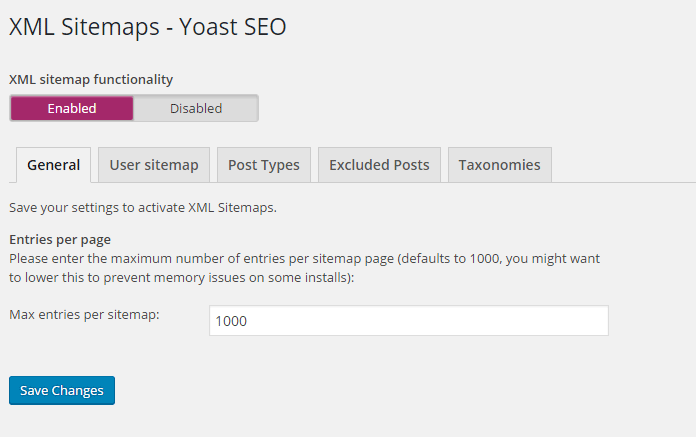
Figure 26. Generate the XML sitemap for your website
- In the General tab, you can limit the number of entries for your website. If you have a smaller website (with a couple of posts/pages), you can put a smaller number here.
- In User sitemap, you can choose to include the authors URLs of your website in the sitemap.
- In Post Types, you can select what type of posts you want to include in your sitemap (post, pages, projects, media attachments, etc.)
- Excluded Posts tab is for excluding the IDs of the posts/pages that you don’t want to be submitted in the sitemap.
- Taxonomies tab contain all the taxonomies (tags, categories) on your website that will be included in the sitemap.
The default settings are good enough for us at this point. Once the sitemap.xml is created, now you need to submit it to the Google Search Console.
- Open the Google Search Console.
- Click on the non-www property.
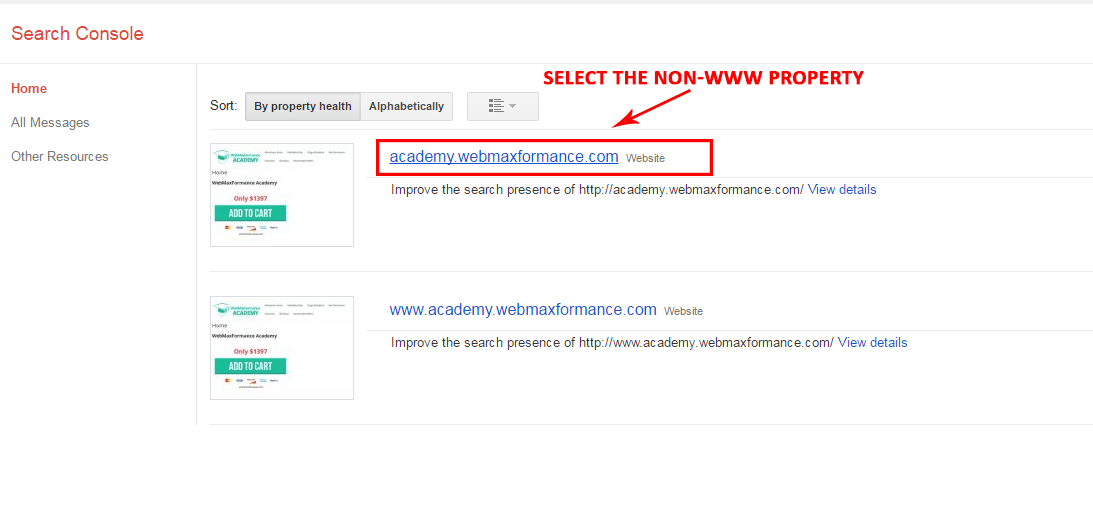
Figure 27. Choose non-www property
- Navigate to Crawl -> Sitemaps.
- Click on ADD/TEST SITEMAP.
- Write at the end: sitemap.xml
- Click on Test
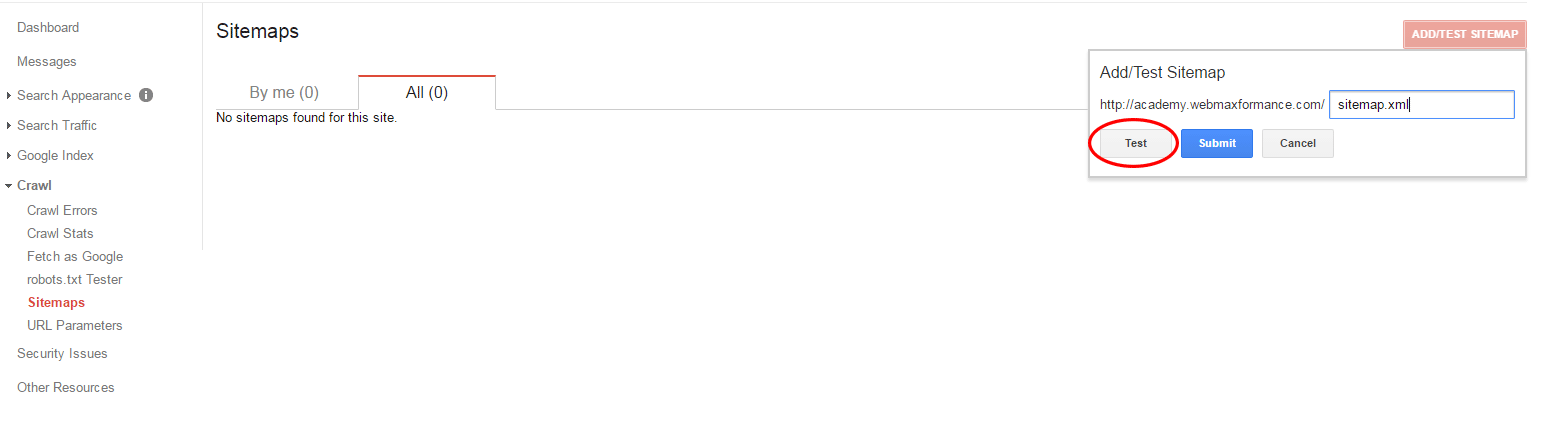
Figure 28. Test the sitemap first
If the test result is successful (without errors), you need to navigate once again to Crawl -> Sitemaps. Repeat the procedure (ADD TEST SITEMAP -> Write sitemap.xml) and now click on Submit.
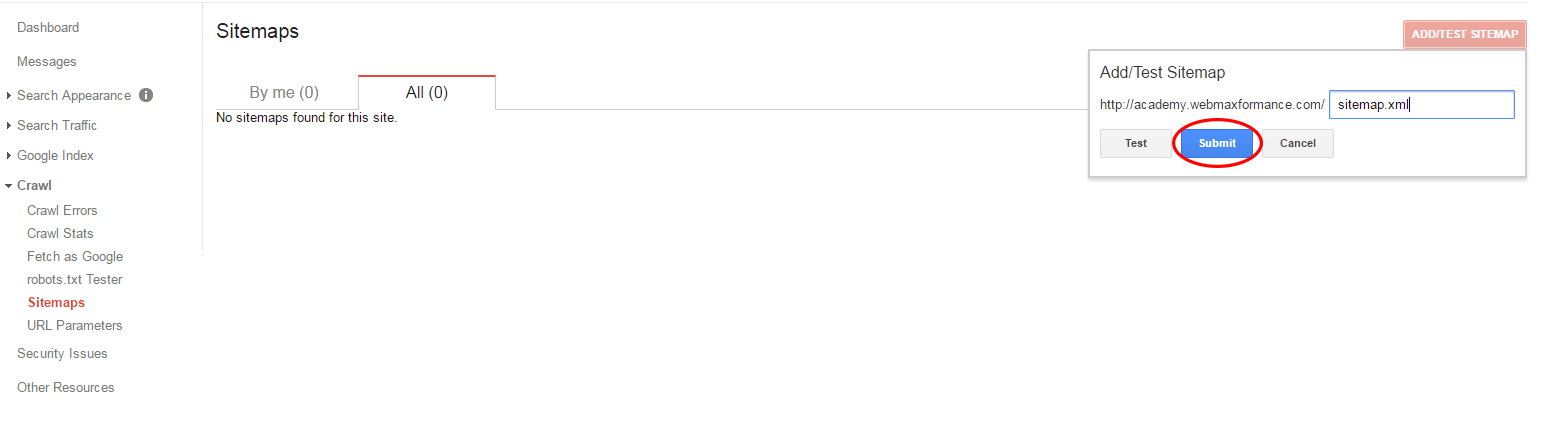
Figure 29. Submit the sitemap
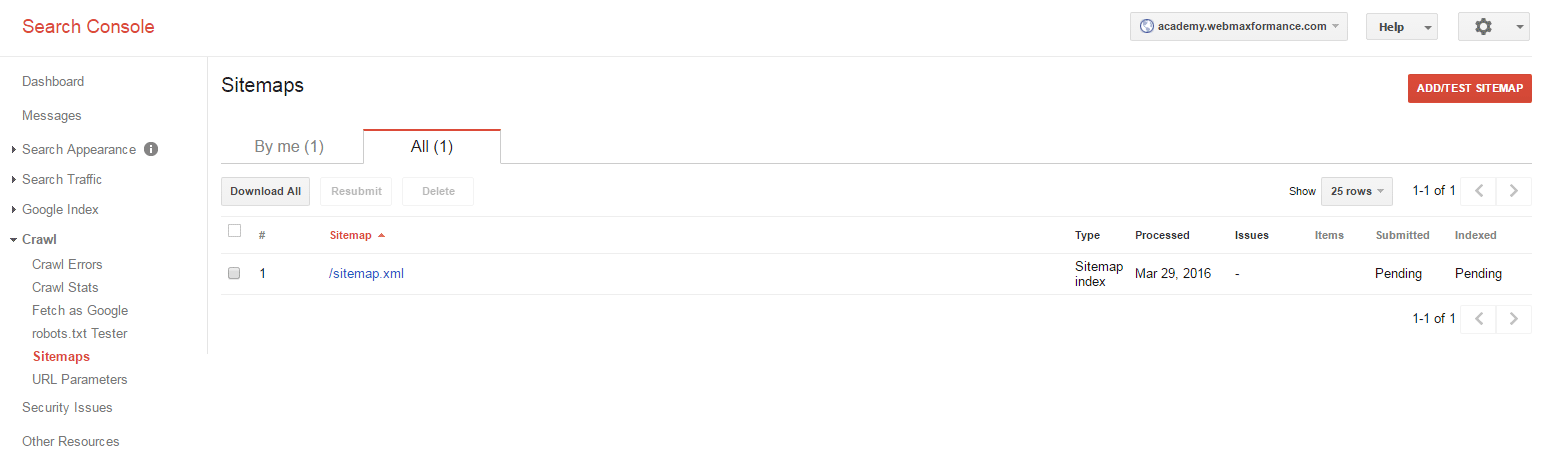
Figure 30. Submitted sitemap
Now your sitemap is submitted, and you can see it by going to https://yoursite.com/sitemap.xml and choose one of the children sitemaps.
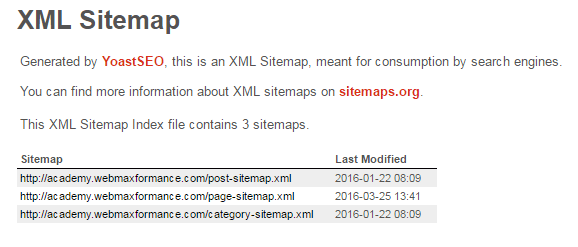
Figure 31. Generated index of your sitemap (with children sitemaps)
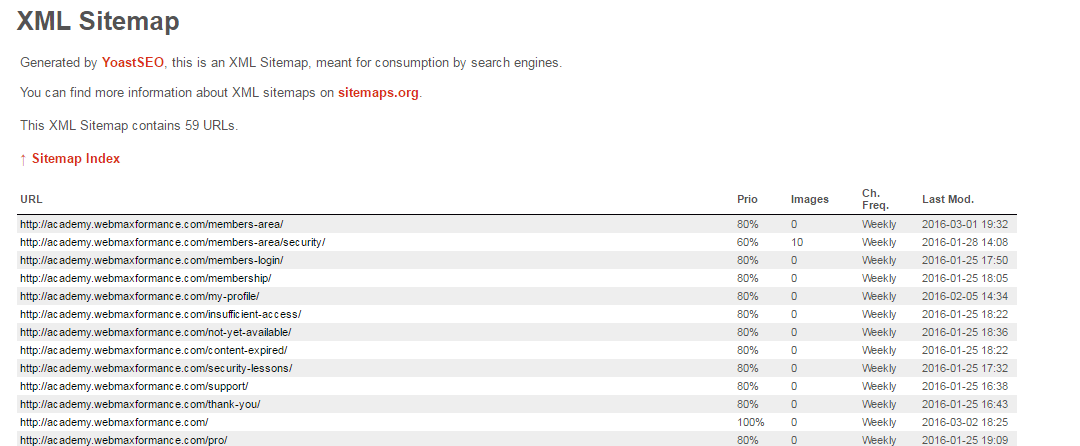
Figure 32. Children sitemap of pages
Now you need to wait for a few days (2-3) in order the Google search engines to index your site and give you report about the crawlability of your site. You will find all the possible errors in your Google Search Console. If you don’t know how to fix those errors, we are here to assist you in any matter.
Connect Google Analytics With Google Search Console (Google Webmaster Tools)
There is one additional step for connecting your Google Analytics with Google Search Console.
- Open your Google Analytics dashboard and click on Admin.
- Under PROPERTY, click on Property Settings
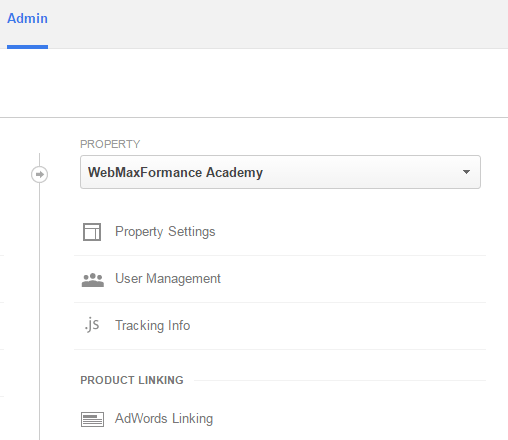
Figure 33. Choose Property Settings from the Admin of Google Analytics
Now scroll all the way to the bottom and click on the Adjust Search Console.
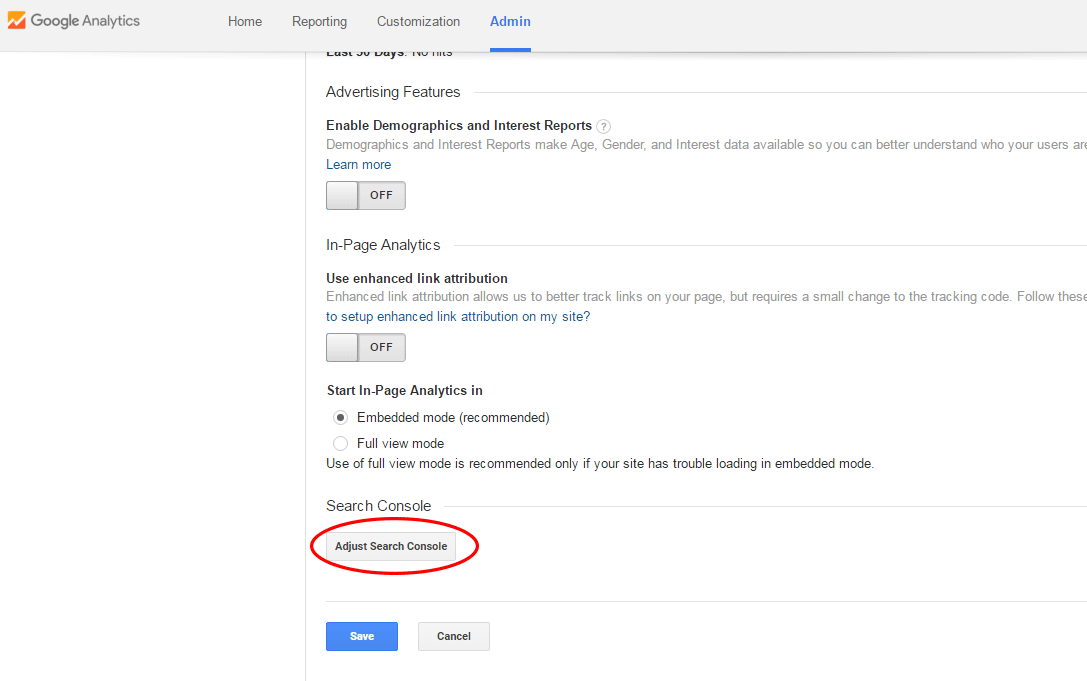
Figure 34. Adjust Search Console in Google Analytics
Click on Edit.
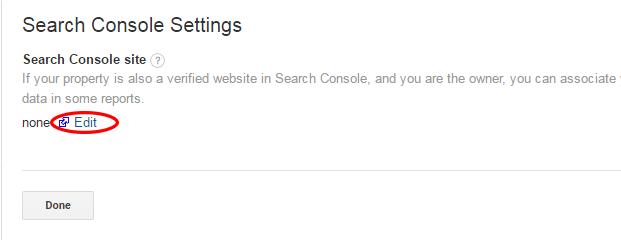
Figure 35. Editing the Google Search Console settings
On the next screen choose the non-www property (choose the domain WITHOUT the www prefix) and click on Save.
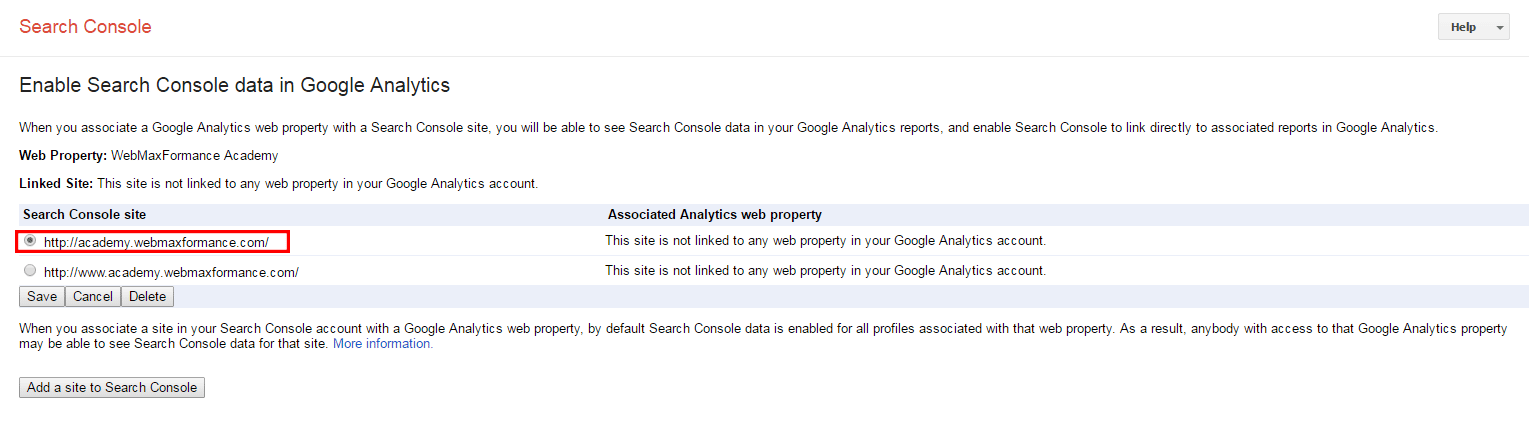
Figure 36. Select the non-www property
On the pop-up screen click on OK.
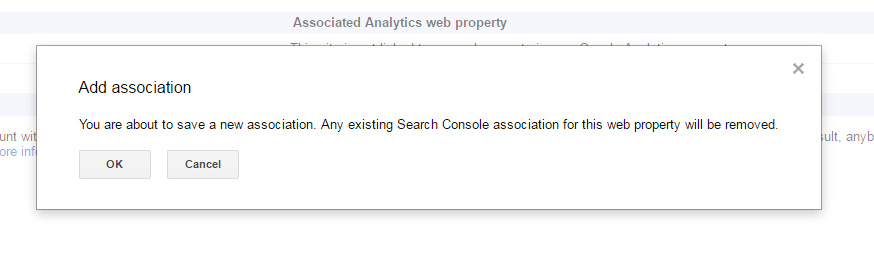
Figure 37. Add association
Congratulations, now your Google Search Console is associated with your Google Analytics. Refresh your Google Analytics dashboard you can see that under Acquisition there is new reporting tool enabled: Search Console. From here you can track even more metrics (after 2-3 days) that both tools Google Analytics and Google Search Console provide combined.
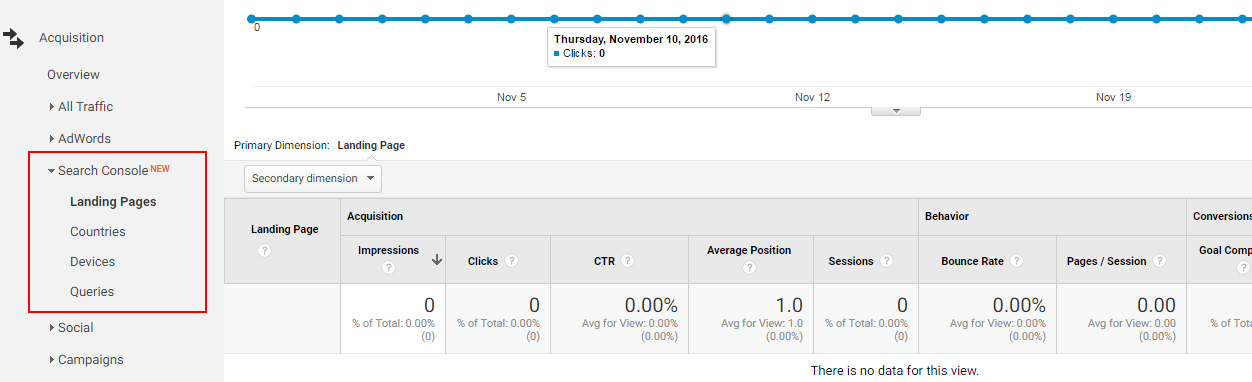
Figure 38. Search Console in Google Analytics
Once again, if you don’t know what to do with this data and how to use it to improve your site, contact us and we will gladly assist you. You’ve done a fantastic job for today, now reward yourself with a cup of coffee, take a rest or go for a walk outdoors and move to the next lesson.